Got it

How to Remove Hiss from Audio Completely (3 ways)

Even if you have picked a quiet room to start your recording project, fizzle roots in the voice background like a shadow by the side. No need to be frustrated, truly. It's not the problem of microphone settings, let alone your chosen space. The background hiss is some kind that you cannot completely eliminate if you use electronic devices to record or play audio. But you can remove hiss from audio by using audio editing tools to make it barely audible.

Here're three and with guides to use them. Besides, if you wish to get rid of unwanted hiss sound, may be a perfectionist or something, don't miss the guide given below.

What Is a Hissing Sound?

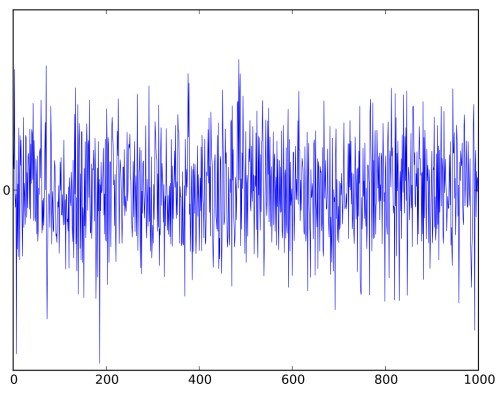
Hiss in audio refers to a high-frequency noise that continuously occurs in recordings or playback. It is about 30 dB to 60 dB but varies depending on the recording environment.

What does a hissing sound like? Some use static or white noise to describe it. It typically resembles a prolonged "s" or "sh" noise. Speaking of examples in daily life, here is one. When you try listening to the radio in a car, you'll hear a hissing sound before successfully tuning to an FM channel.

(source: en.wikipedia.org)

What Causes Audio Hiss?

You should note that the hiss noise is unable to eliminate completely. Once you understand how it’s generated, you'll grasp why to say that.

So, what causes hiss noise in your recordings? Mainly the device that is used to record or to play, more specifically, the microphone, the audio interfaces, the amplifier or speaker. Sound wave needs devices to convert them to electrical signals so that people can hear them via the tool. During the transduction process, mechanical vibrations will be converted to electrical signals and reversed. Every electronic component in this process will produce noise due to vibration. When recording, hiss is the noise floor and is generated by random electron movement (motion caused by electric current passing).

Technique to Remove Hiss from Audio

Noise reduction is the technique to minimize or remove hissing sound from audio. Its algorithms will help lower the degree of electrical signals.

hiss removal

A hissing sound hurts audio quality. It might cause annoyance or discomfort when hearing it, whether in a song, a podcast, or an interview. For hiss removal, you can make an effort before or after sound recording. Explore now!

How to Remove Hiss from Audio with Audacity?

Audacity is a free audio editor and recorder to help with hiss reduction. Since it is a comprehensive tool with a recording feature, many use Audacity to remove microphone hiss. The hassle-free feature is called "Noise Removal."

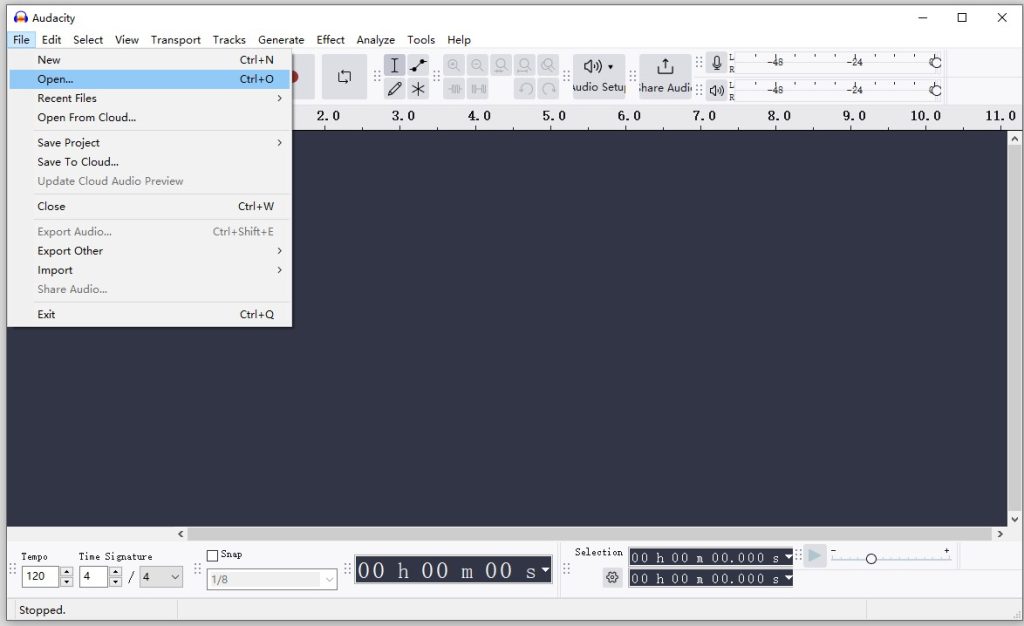
Step 1. Open the audio file in Audacity's File > Open.

remove hiss from audio

Step 2. Click the waveform and drag to select the range.

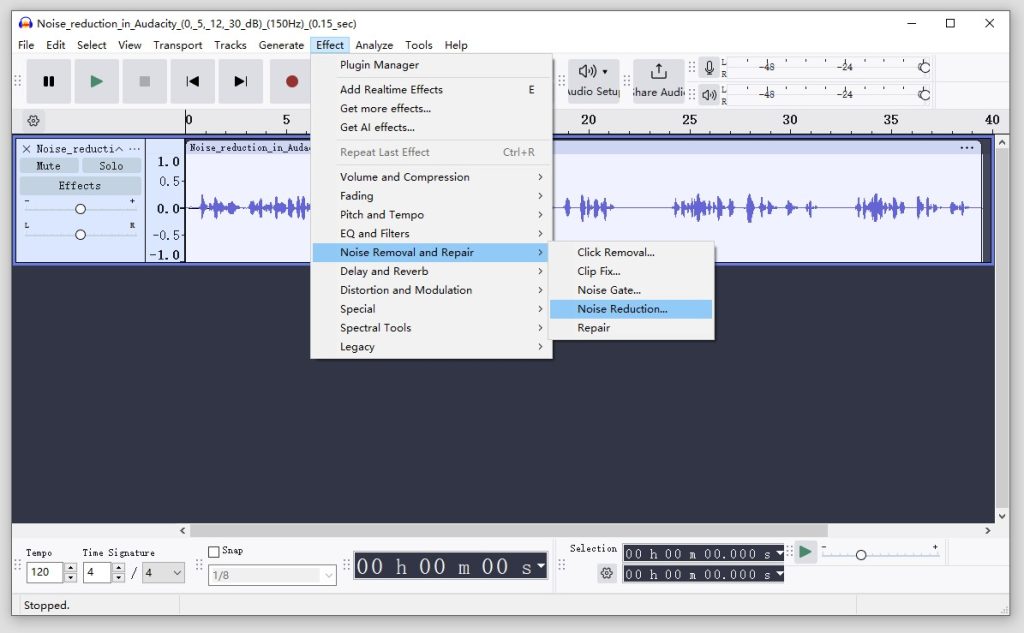
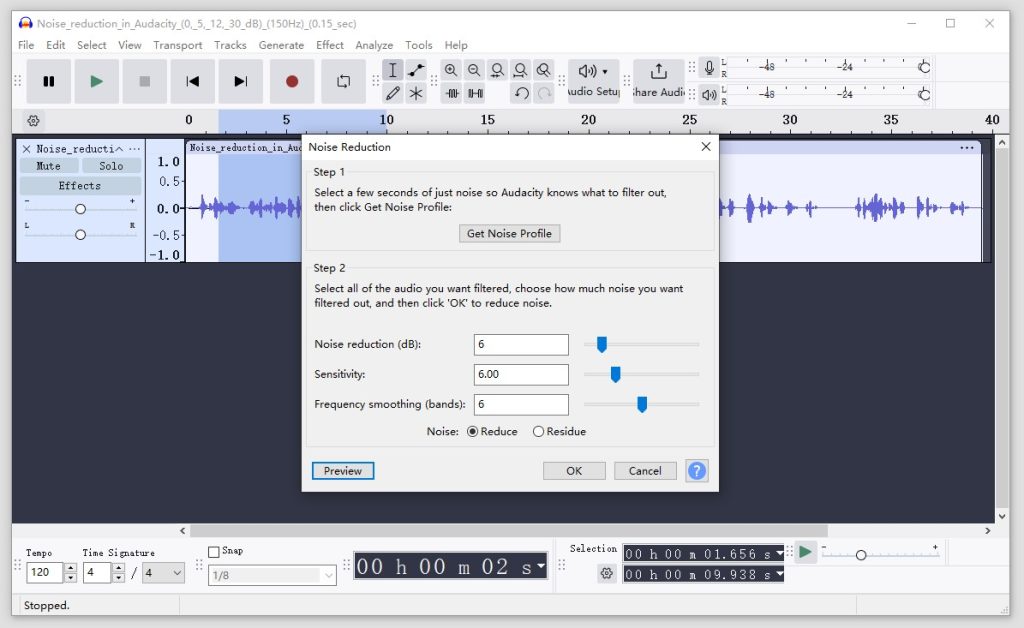
Step 3. Click Effect in the toolbar. Then, Noise Removal and Repair > Noise Reduction.

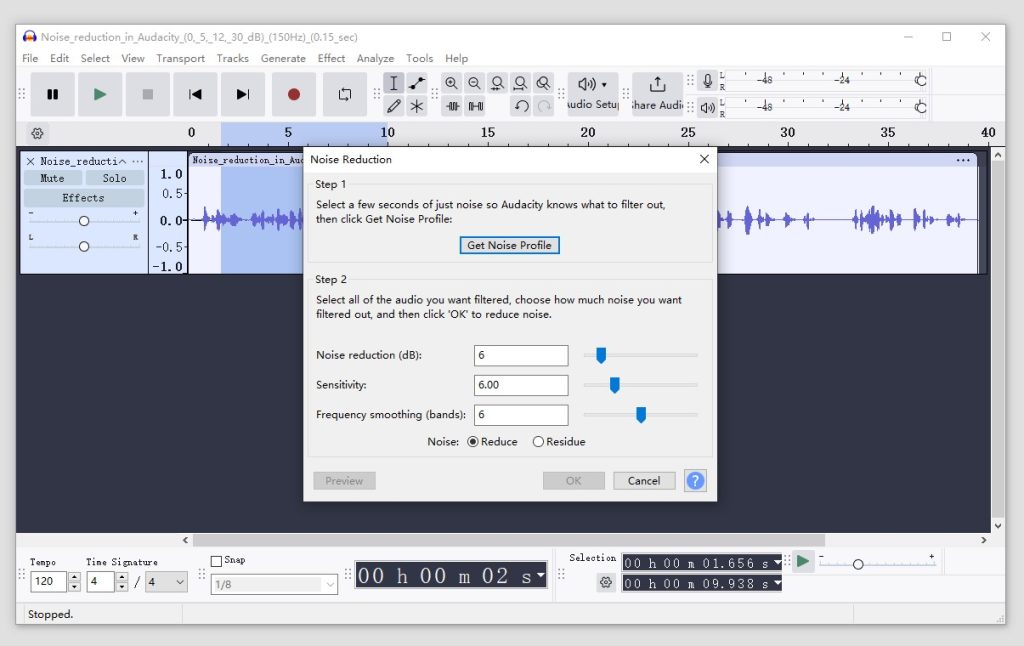
Step 4. Click Get Noise Profile.

hiss removal

This is a helpful feature to identify hiss noise in the audio track. Audacity will recognize the noise floor so you can remove hiss in seconds.

Step 5. Set up dB for Noise Reduction; Sensitivity; and Frequency smoothing.

remove background hiss from audio

Noise Reduction - this is used to control how much the noise volume is lowered.

Sensitivity - this is to control how much audio is treated as noise.

Frequency smoothing - it spreads the noise removal across nearby sound areas.

Step 6. Click Preview or OK to implement.

How to Remove Hiss from Audio with Kingshiper Audio Editor?

This is another free-to-use tool for audio hiss removal. The feature for it is calle “Denoise.” With one click, you can remove background hiss from audio.

Kingshiper Audio Editor

Official

Download

Step 1. Drag your recording file to Kingshiper.

Step 2. Select the scope in the waveform.

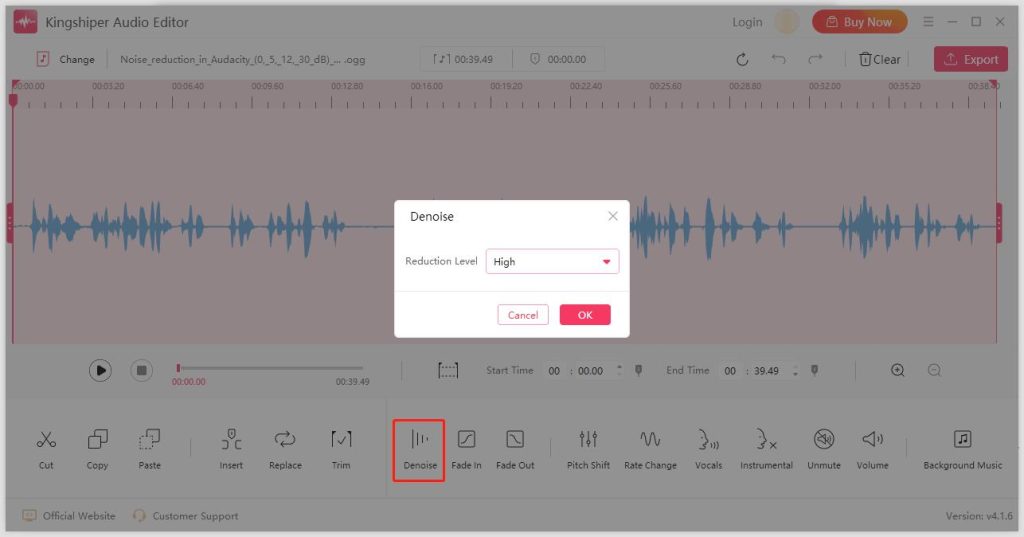
Step 3. Click Denoise.

audio hiss removal

Step 4. Choose a level to reduce noise.

Step 5. Save the file and export.

How to Remove Hissing Sound from Audio Completely and Without Losing Quality?

Some people may want to get rid of the annoying background hissing. But, when dealing with a recording, keeping audio quality while removing background hiss from audio seems challenging. There is a way out. You should try this method and start from recording.

Step 1.Minimize hiss noise by using a well-set microphone.

Hiss noise can be very noticeable if you use an unset microphone. You can equip it with good sound reception, like a shock mount and pop filter.

Moreover, you can adjust the settings for the microphone to remove the microphone hiss in advance. For example, you can set the gain levels, input sensitivity, and polar patterns in cardioid or supercardioid micorphones.

Step 2.Reduce interference and noise pickup by using a high-quality audio interface and cables.

See if your audio interface has a built-in preamps or not. It can provide better sound quality and allow for finer control over gain levels.

You should also use a high-quality cable to reduce possible hiss noise caused by the current.

Step 3.Adjust the noise gate threshold in your recording software.

This step can effectively reduces hiss noise by cutting off sound that falls below a certain volume level.

Step 4.Use spectrum analyzer and audio equalizer (EQ) to identify hiss in audio file and reduce.

As you finshing recording and make an audio file, likely there is still hiss noise in the background. To remove hiss from audio completely and without affecting human voice, you can first find out the hiss frequency.

Generally, hiss appears in the higher frequency range of around 3 kHz to 10 kHz.

You can load a spectrum analyzer plugin in your DAW. Then play the audio and look for peaks in the 3 kHz to 10 kHz range in the waveform. Mark it down.

Now, insert an equalizer plug-in. Choose a band to boost frequencies. This will make the hiss more noticeable and more easy to isolate. Then use a narrow bandwidth (high Q factor) to isolate the hiss. You should adjust the Q factor and cut depth as needed to ensure that the vocals remain clear.

Step 5.Listen again and export.

To remove hiss from audio completely, you need to repeat step 4 several times so that you can get perfect work.

Latest Articles