Get Started
Please follow these steps to download, install, purchase and activate the software.
1.1 Download & Install
Step 1. Download the Software to Your PC.
You can download Kingshiper JPG to PDF Converter conveniently with the button below. Or, visit this page to get the installation package.

Step 2. Install Kingshiper JPG to PDF Converter.
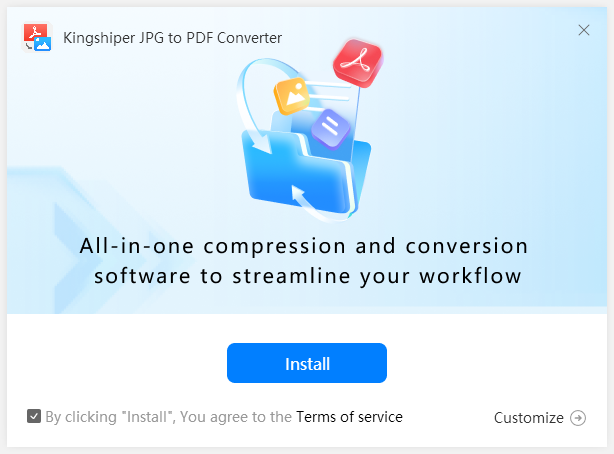
Double-click the EXE file to start the installation. As you see the window show up, choose the location you would like to keep the software by clicking "Customize" or you can just have its defaults by changing nothing. Next, tick the "term of service" and then click "Install."
Step 3. Start the Program.
Wait a few seconds. The "Start Now" button will pop up after the installation is completed. Now, you can click it to use the software.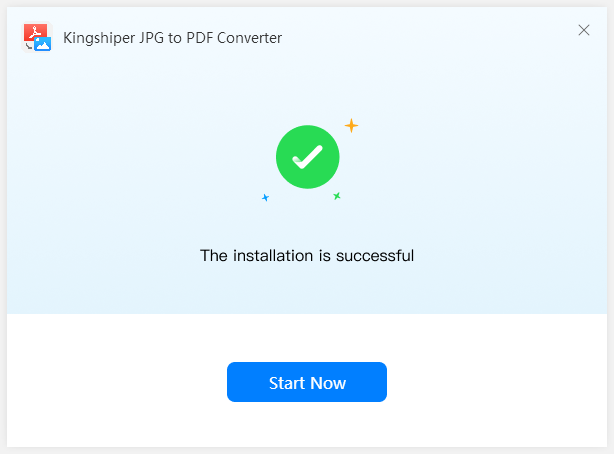
1.2 Login with Kingshiper Account(Register) & Update & Uninstall
1.2.1 Login Kingshiper JPG to PDF Converter with Your Kingshiper Account.
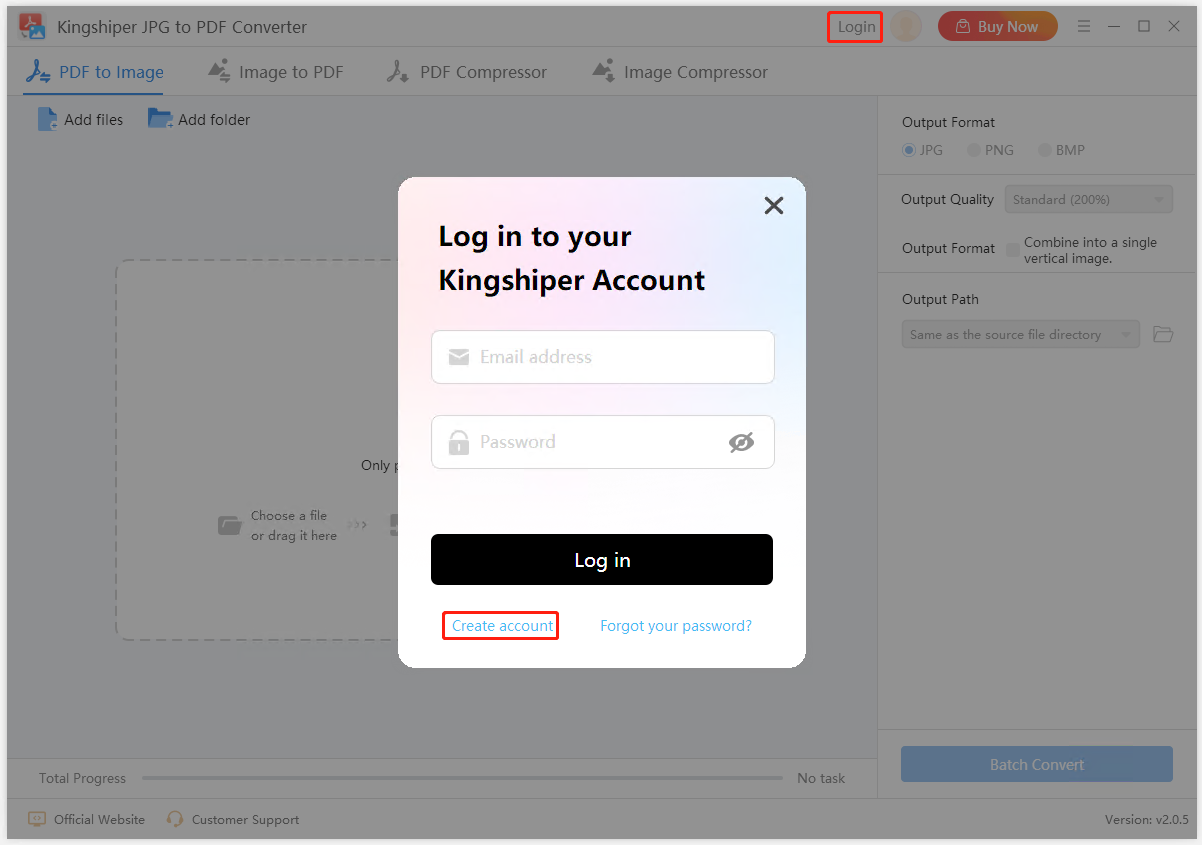
Login to your account via the "Login" button in the top right-hand corner then you can enjoy more Kingshiper services.
Do not have an account yet, you can click "Create Account" to signup.
1.2.2 Features of Trial Version.
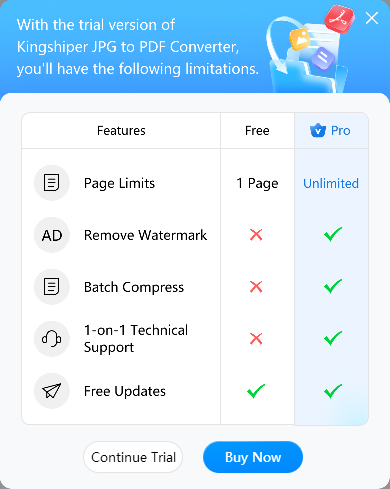
Kingshiper JPG to PDF Converter is free to use. And you can enjoy all features with the trial version but with these limitations: 1 page limit, cannot remove watermark, and cannot use batch compress.
1.2.3 Features of Premium Version.
Advanced features of Kingshiper JPG to PDF Converter are as follows:
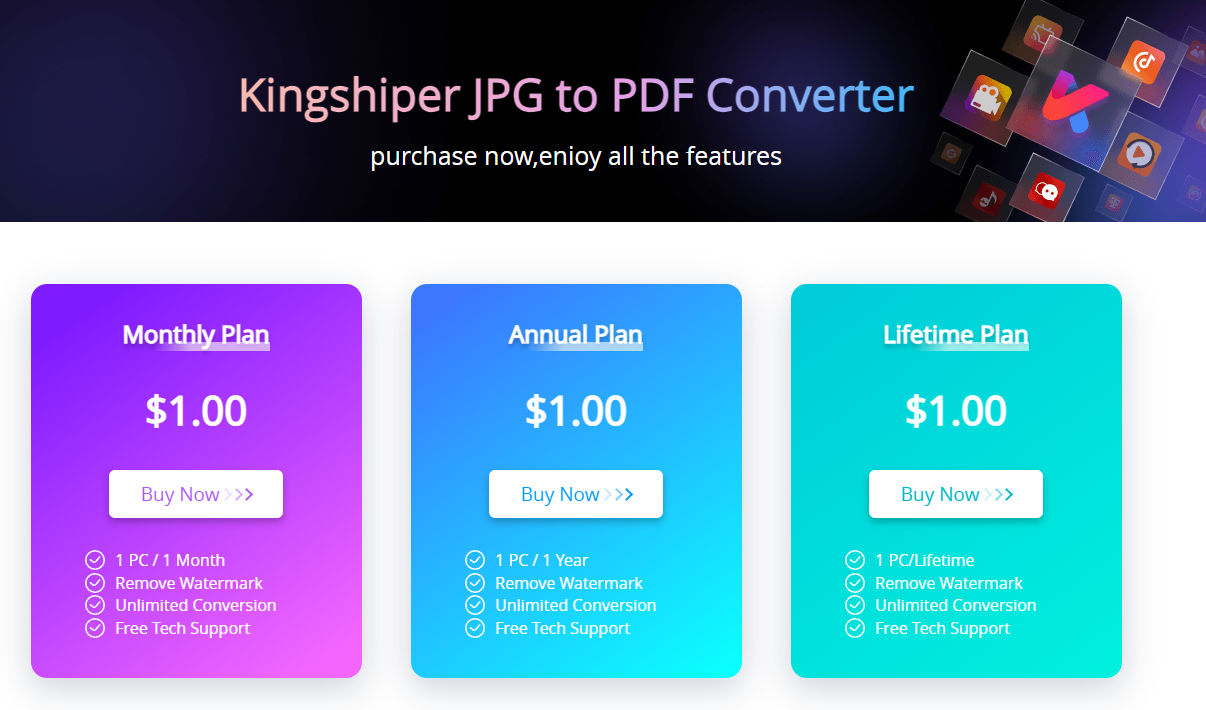
1.2.4 How to Unlock Premium Version of Kingshiper JPG to PDF Converter?
The process is simple. Click "Buy Now" and you will jump to the page of pricing plans. Then, choose a plan based on your needs. Continue clicking "Buy Now" on the page to proceed with the payment.
1.2.5 What can you do with Kingshiper Account?
Click the Person icon once you log into Kingshiper, you're able to enter the Account Center. Here you can:
- Check Order Info in My Order
You can find your purchased items, prices, expired data, and status here.
- Edit Personal Information in Profile
- Change Password in Security

1.2.6 Update
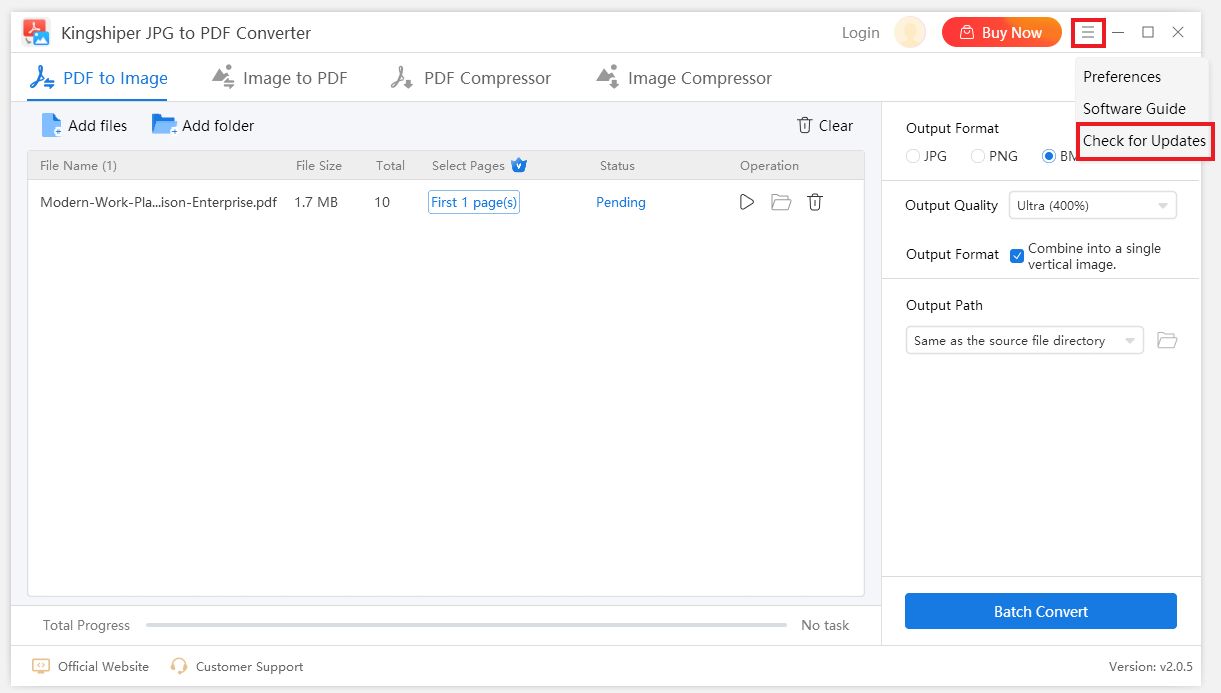
To use the latest version of Kingshiper JPG to PDF Converter, you can update the software by clicking the "Menu" icon in the top right corner.
Step 1. Check for Updates.
Click "Check for Updates" to see whether there is a new release.
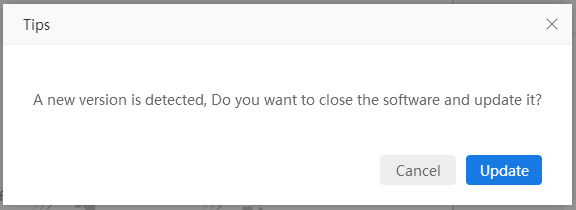
Step 2. Update Software.
If it is not the latest version, download the new one and press "OK" to terminate the program.
1.2.7 Uninstall
If Kingshiper JPG to PDF Converter does not meet your expectations or you don't want to use it anymore, uninstalling the software is quite easy. There are two methods to go with.
Method 1: Use JxUninst.exe to uninstall.
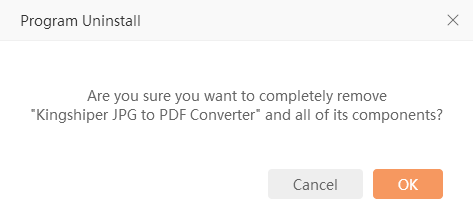
Find the installation folder on your PC. Then, find JxUninst.exe, which is marked as a trash icon. Double-click it and then proceed with "OK."
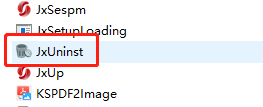
The files will be deleted right away.
Method 2: Use the system Control Panel to uninstall.
Open the Control Panel and go to Programs > Programs and Features > Uninstall.
Then right-click Kingshiper JPG to PDF Converter and choose "Uninstall" among the options.
1.3 Brief Introduction
Kingshiper JPG to PDF Converter is an all-in-one tool for conversion and compression that supports the Windows system. You can use it to convert JPG to PDF, PDF to JPG, compress PDFs/images with different modes, etc. More, batch processing of multiple files is available.
1.3.1 Four Main Functions
PDF to Image: This feature allows you to turn a PDF into an image. There are five options for output quality which suitable for different intended uses.
Image to PDF: This feature helps convert an image to PDF format.
PDF Compressor: This is able to compress PDF files with various modes and levels, for example, speed priority or picture quality priority.
Image Compressor: This allows compression of images with customizable quality, such as compress by ratio.
1.3.2 Supported Import Image Formats
JPG, JPGE, PNG, BMP, TIF.
1.3.3 Supported Output Image Formats
JPG, PNG, and BMP. Kingshiper is available to output the file the same as the source.
How to Use
2.1 How to Convert a PDF to Image?
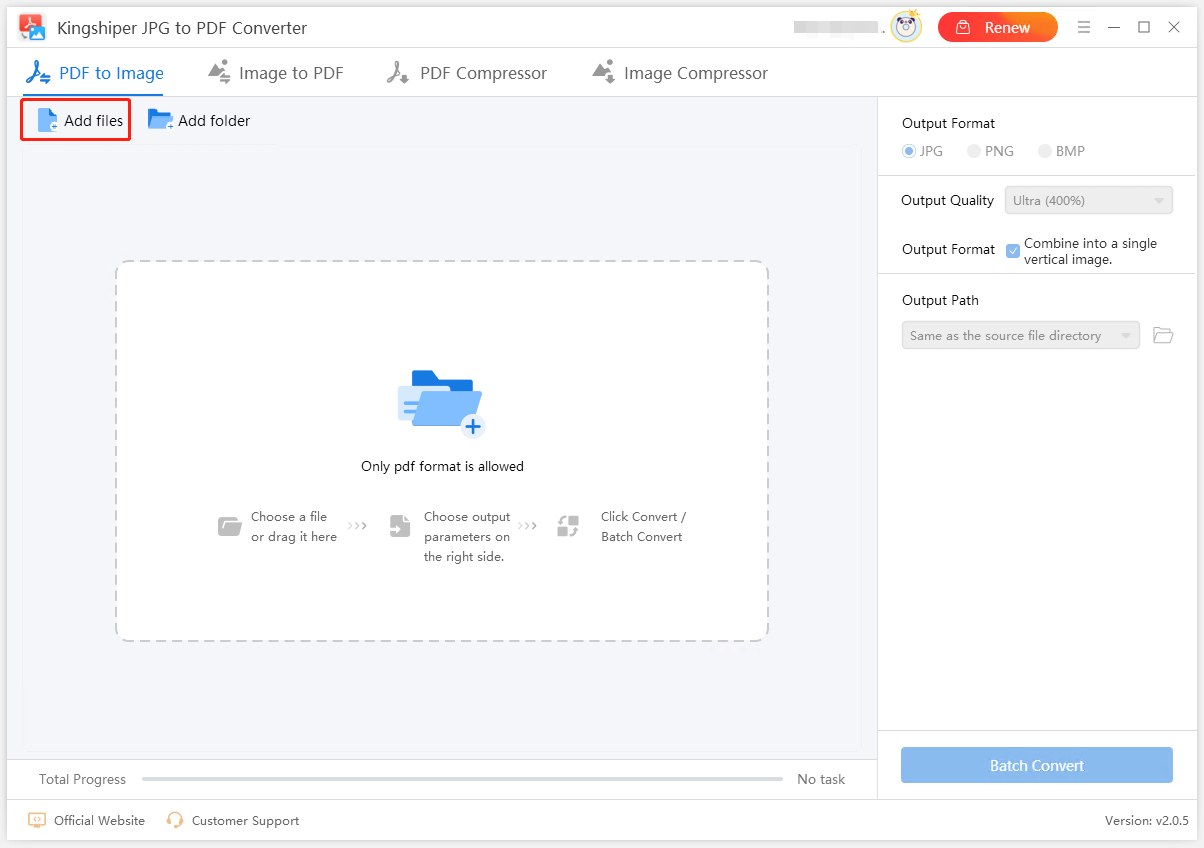
Step 1. Add a PDF file in "PDF to Image".
Click "Add Files" to choose a PDF file from your PC. Or, you can drag the document to the dashed box.
When the file is added, you can see info like file name, file size, total pages, etc.
Step 2. Select the page(s) you want to convert.
You can choose "Select all", "First ? pages", "Last ? pages", "Selected only odd/even pages", or "Custom."
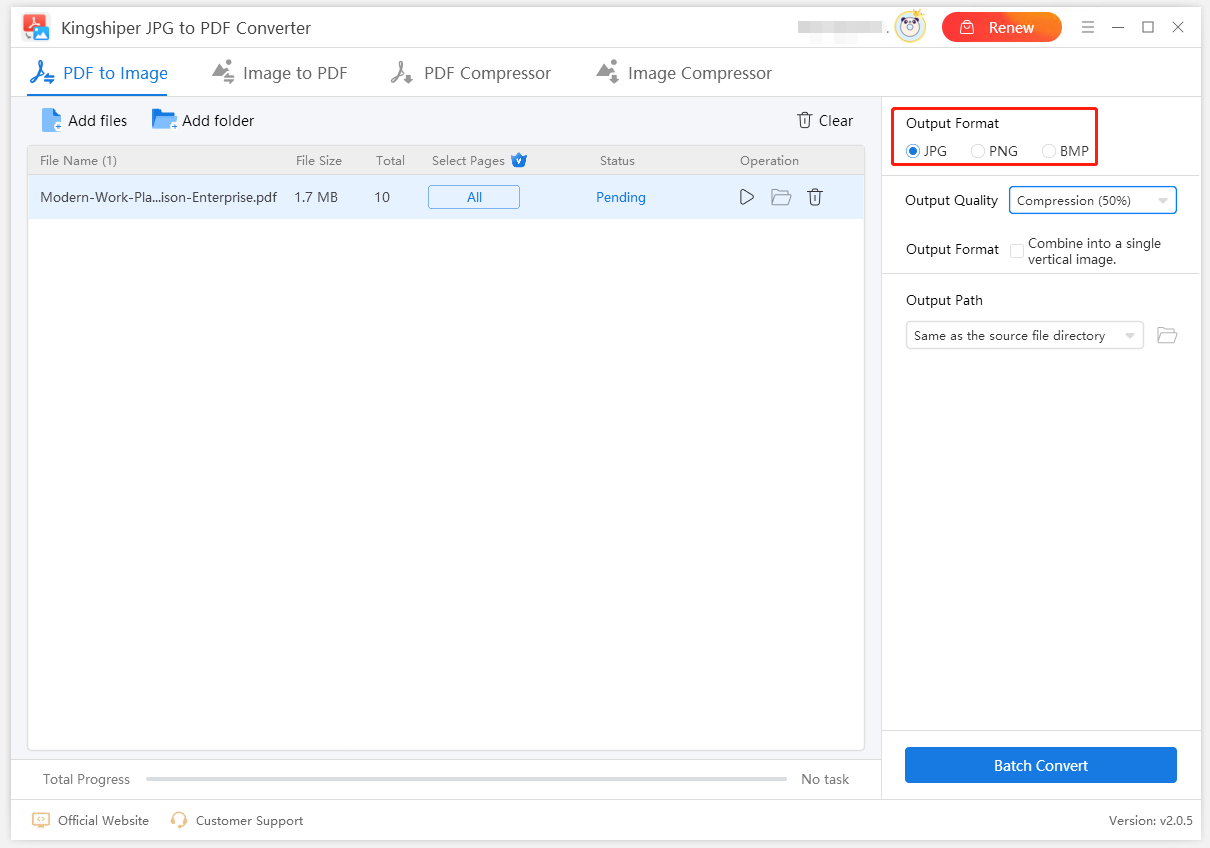
Step 3. Choose output format.
JPG, PNG, and BMP are supported.
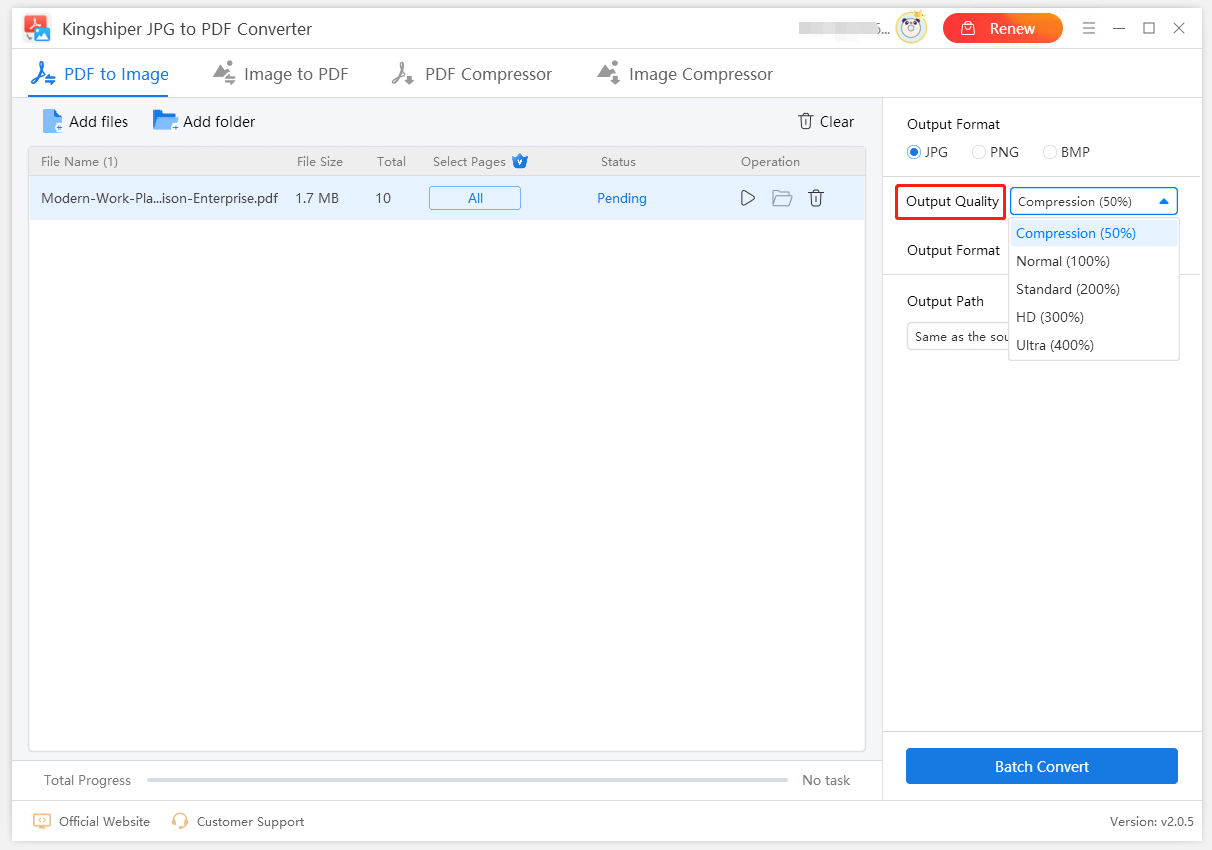
Step 4. Choose output quality.
You have five options - Compression (50%), Normal (100%), Standard (200%), HD (300%), and Ultra (400%). The higher the percentage, the better the image quality.
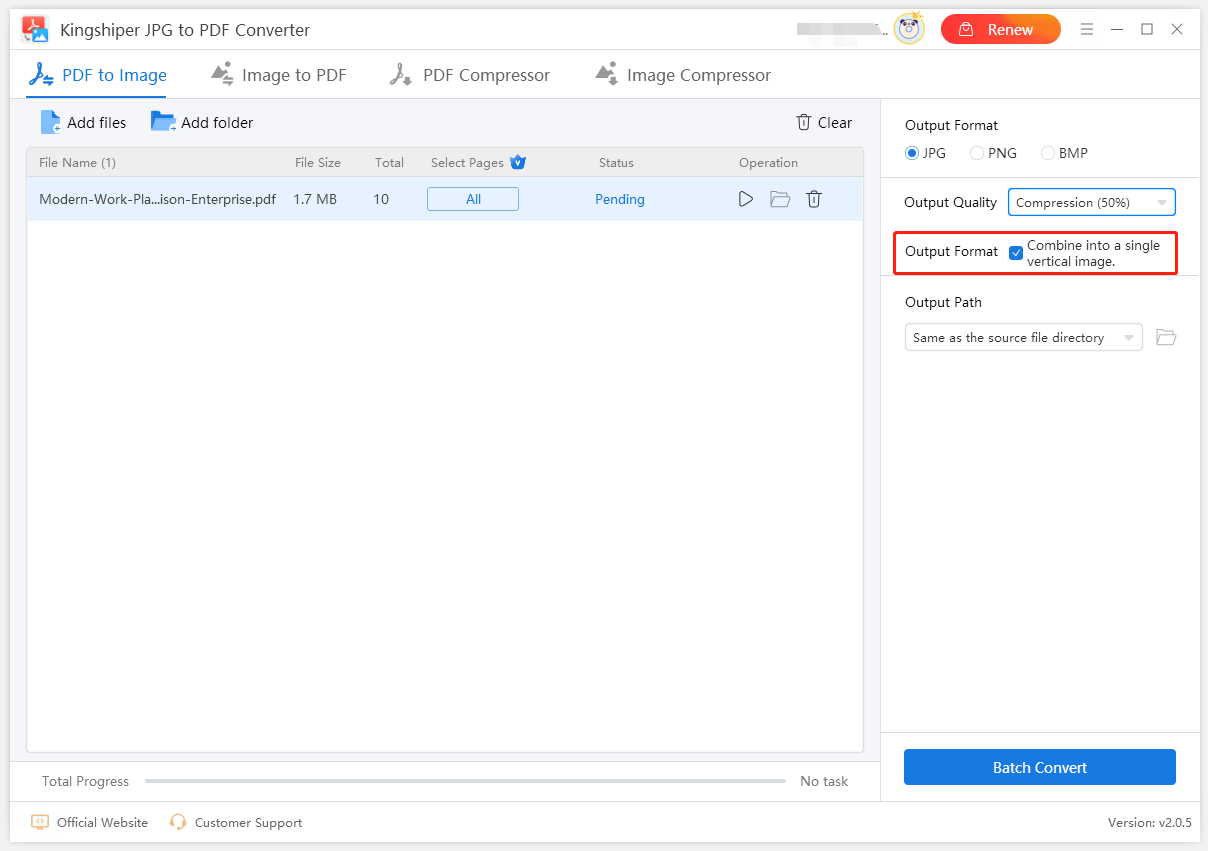
Step 5. (Optional) Combine into a single vertical image.
Suppose you have converted several pages; they can be merged into one picture. In this way, you can archive the document with ease.
Just tick the option before converting.
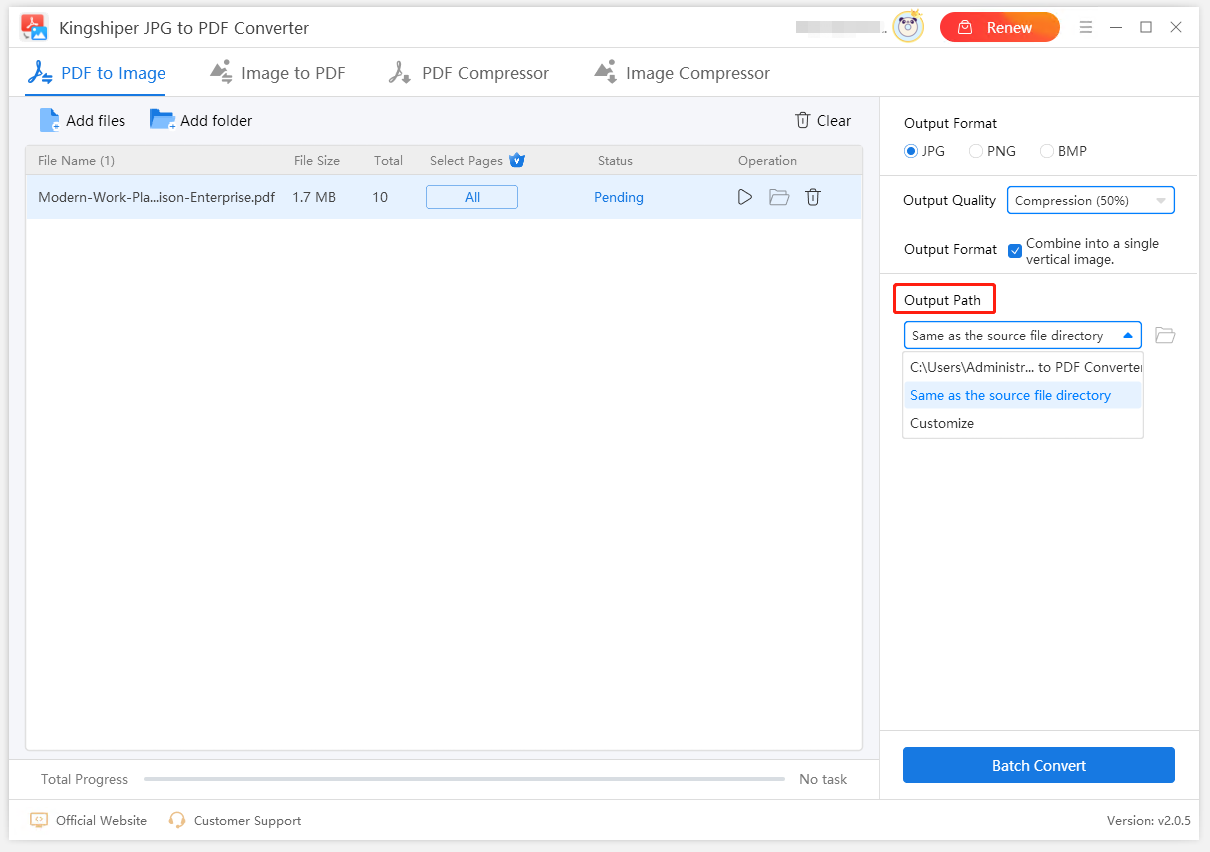
Step 6. Select output path.
By default, the converted file will be saved in the same file folder. But, you can also save it in the C drive or customize the location.
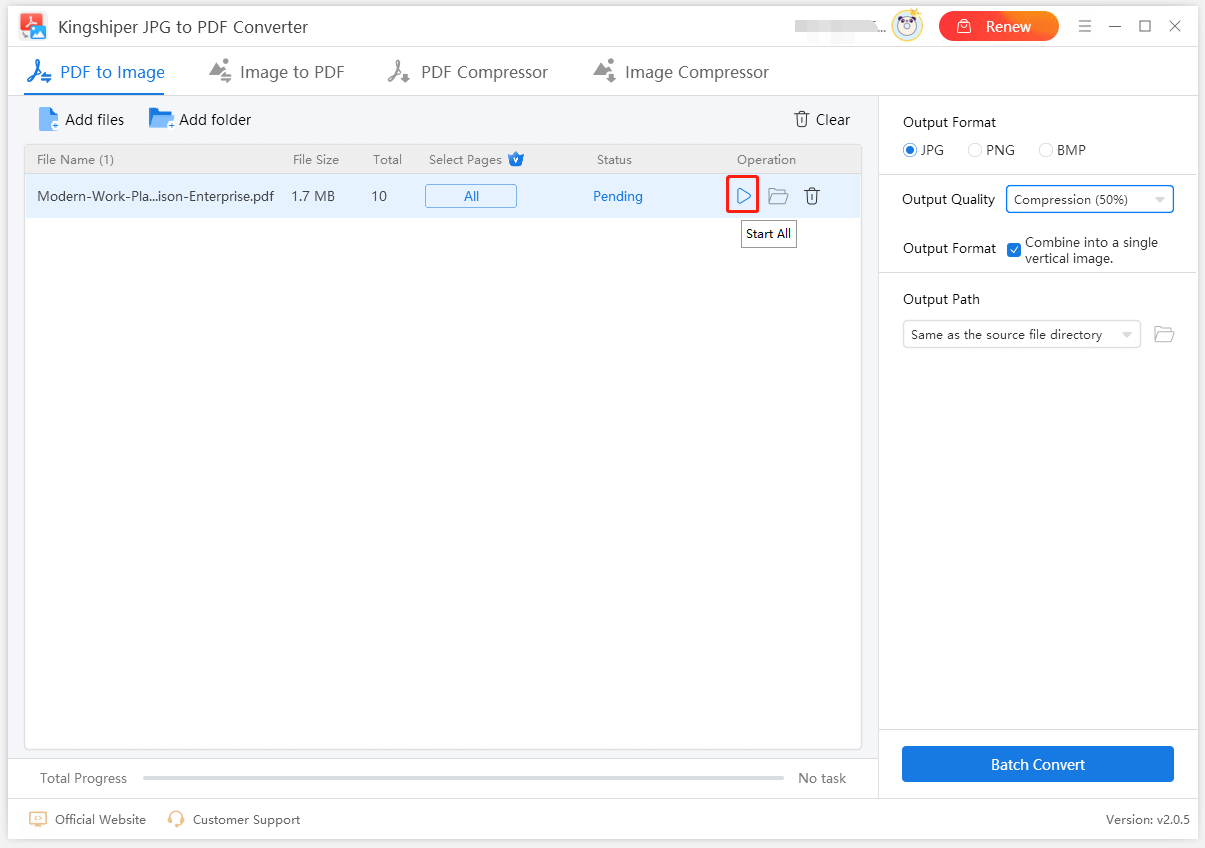
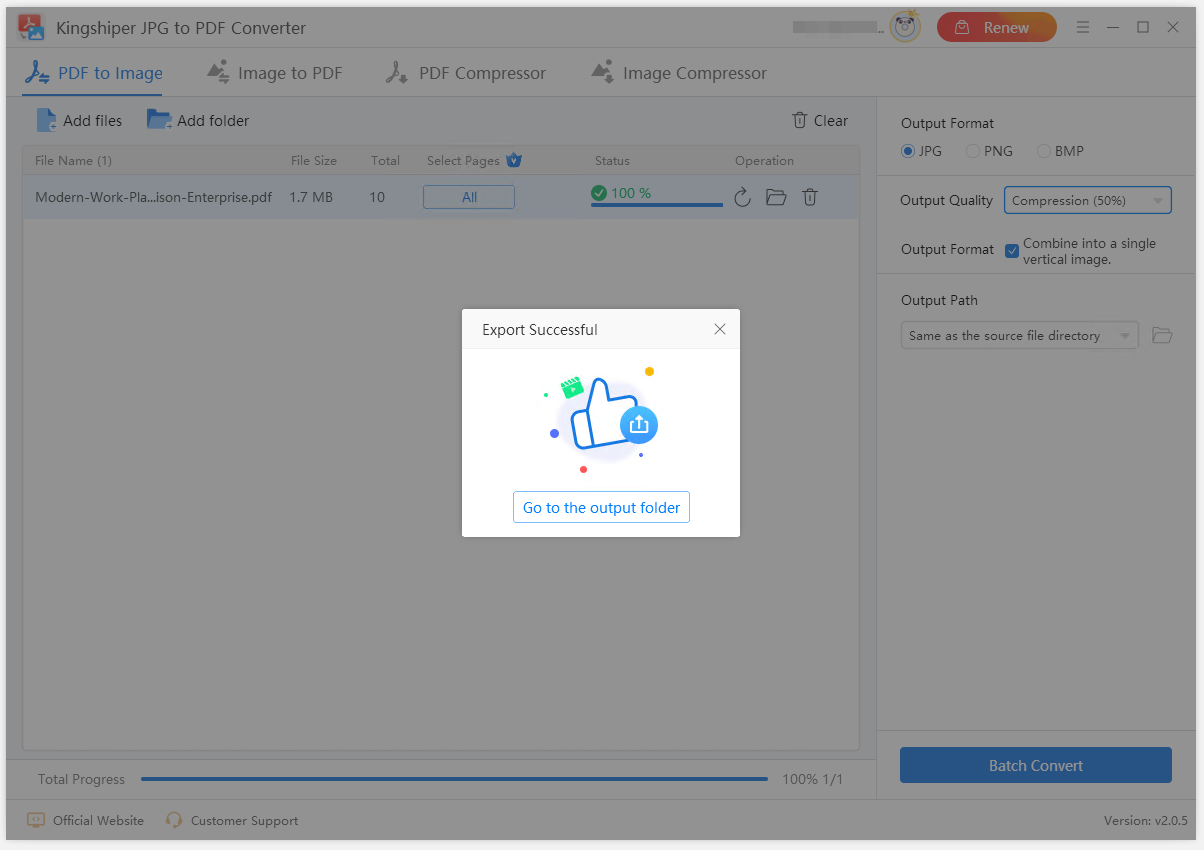
Step 7. Click "Start All" to start converting.
Find the button in "Operation" which is marked as a triangle button.
Step 8. Delete the file.
The delete button is in "Operation" as well. Use it when you want to stop the conversion for the current PDF.
2.2 How to Convert PDFs to Images in Bulk?
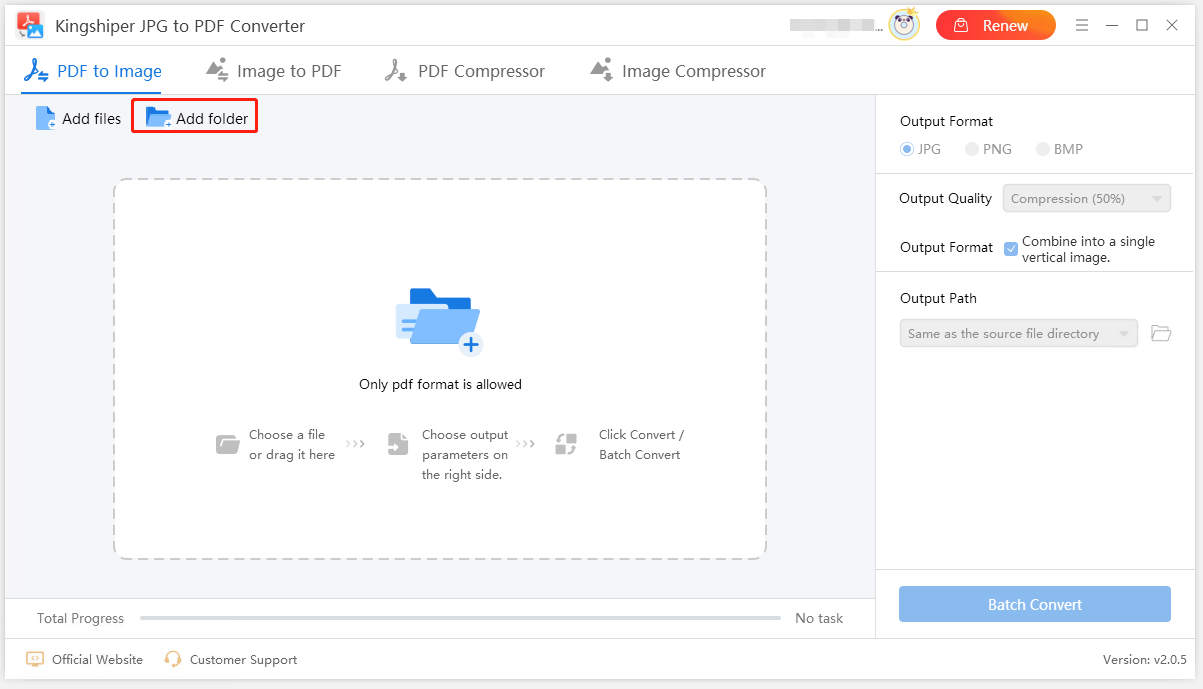
Step 1. Add multiple PDFs via "Add folder."
As you choose a folder, the tool will automatically process all the documents inside and identify available PDF-formatted files. Those files that can not be imported will be listed in the window.
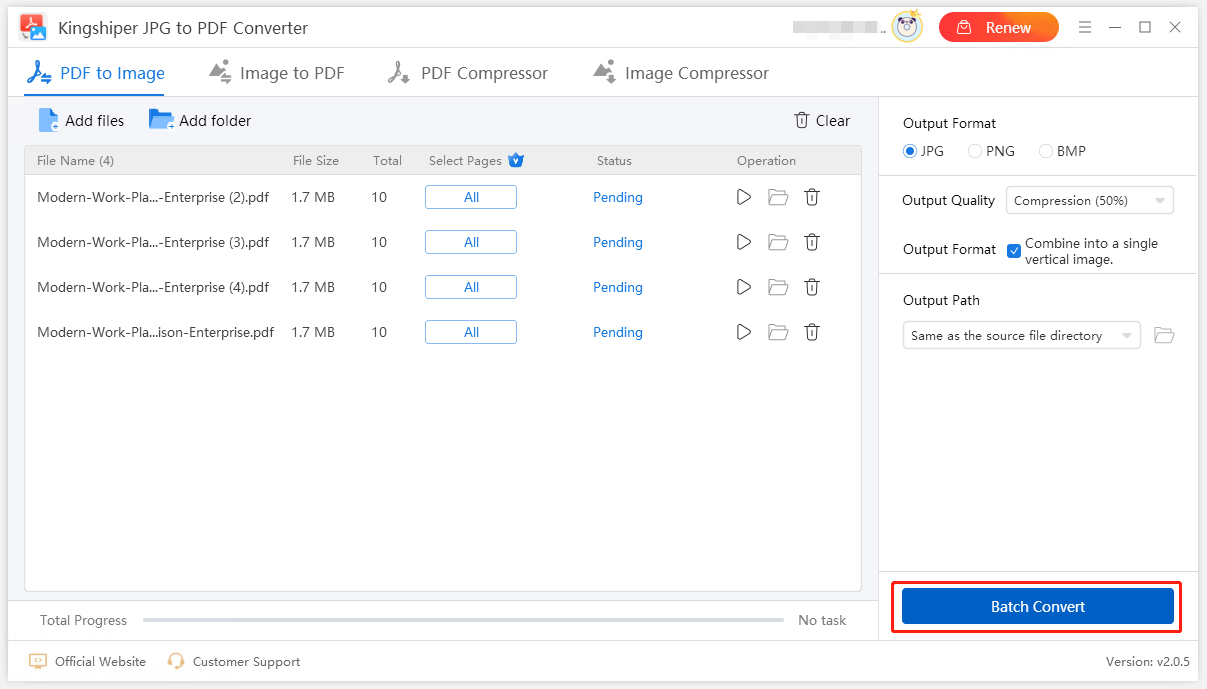
Step 2. Set up output configurations.
As per the above-mentioned steps, you need to select pages, format, quality, and path.
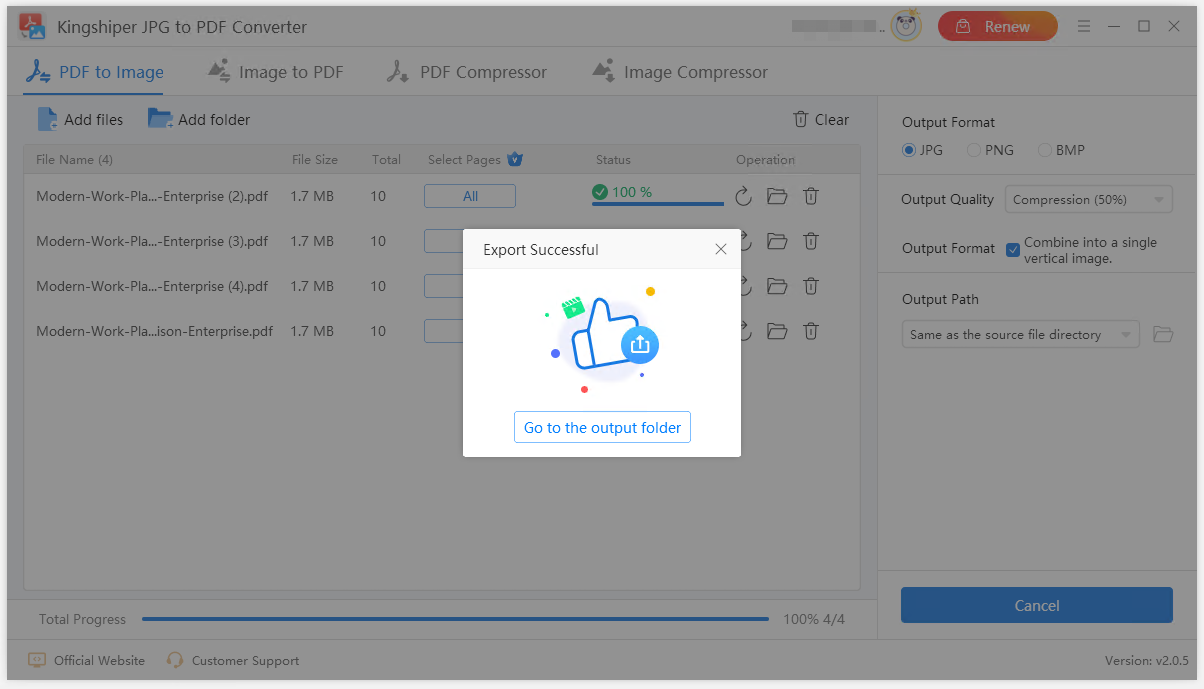
Step 3. Click "Batch Convert".
When all are set, click the "Batch Convert" button to convert PDFs to images at once.
2.3 How to Convert an Image to PDF?
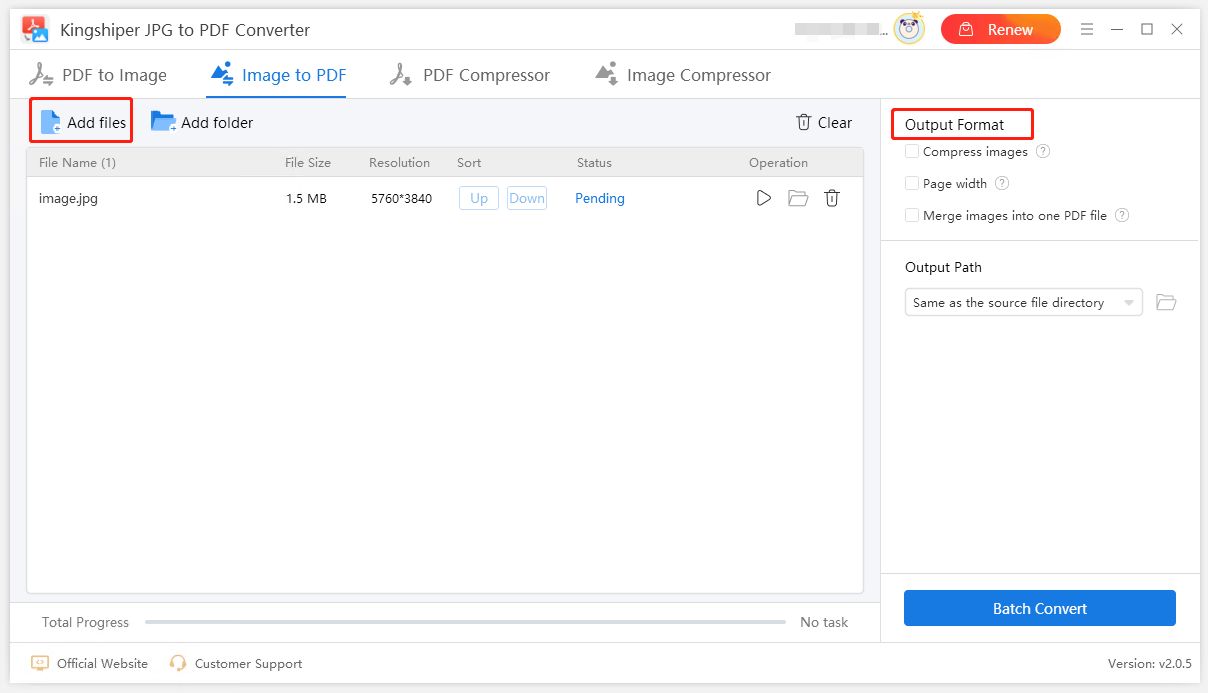
Step 1. Add a picture in "Image to PDF."
Use the Add Files" button or drag the image. And in the interface, you can check the name, the size, and the resolution of the added image.
Step 2. (Optional) Select output format.
You can tick these three options freely.
Compress image - use this feature to compress large images before converting.
Page width - use this feature if you want to standardize the page width and export same-style files.
Merge images into one PDF file - if you have imported multiple images and want to put them in one, use this feature.
Step 3. Adjust the order of images.
The "Up" and "Down" buttons help to move the sequence. In this way, you can make the PDF look like what you want.
Step 4. Choose output path.
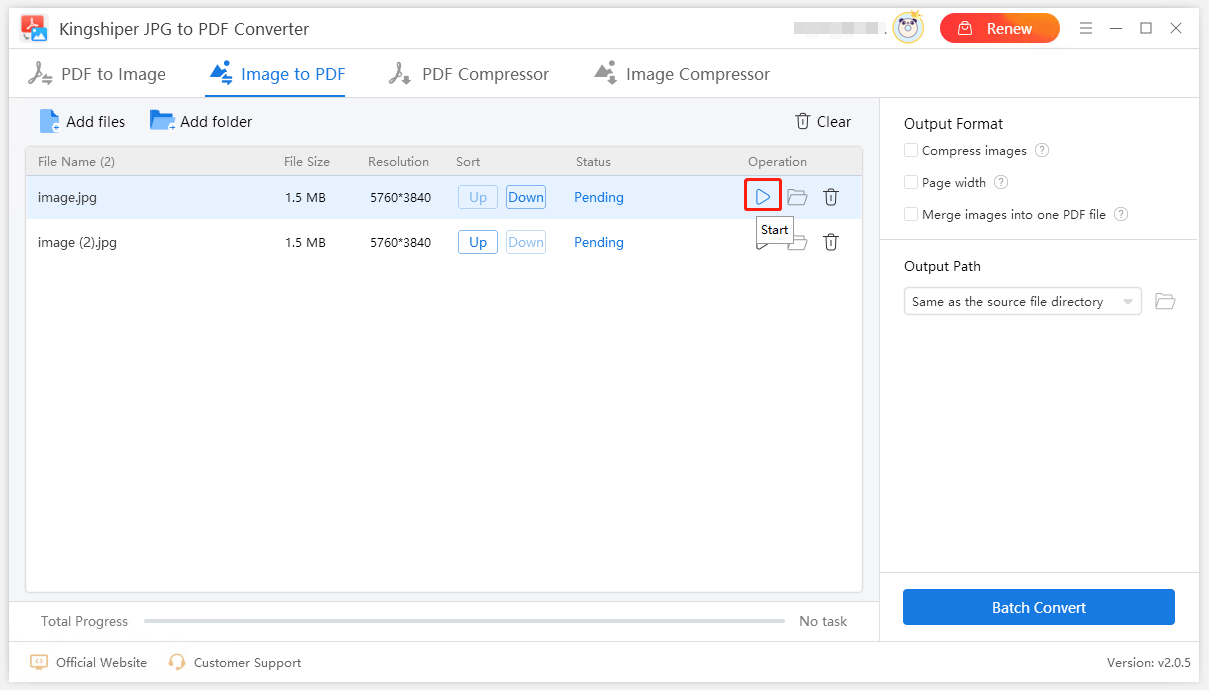
Step 5. Click "Start" to convert.
Click the triangle icon in "Operation" to start.
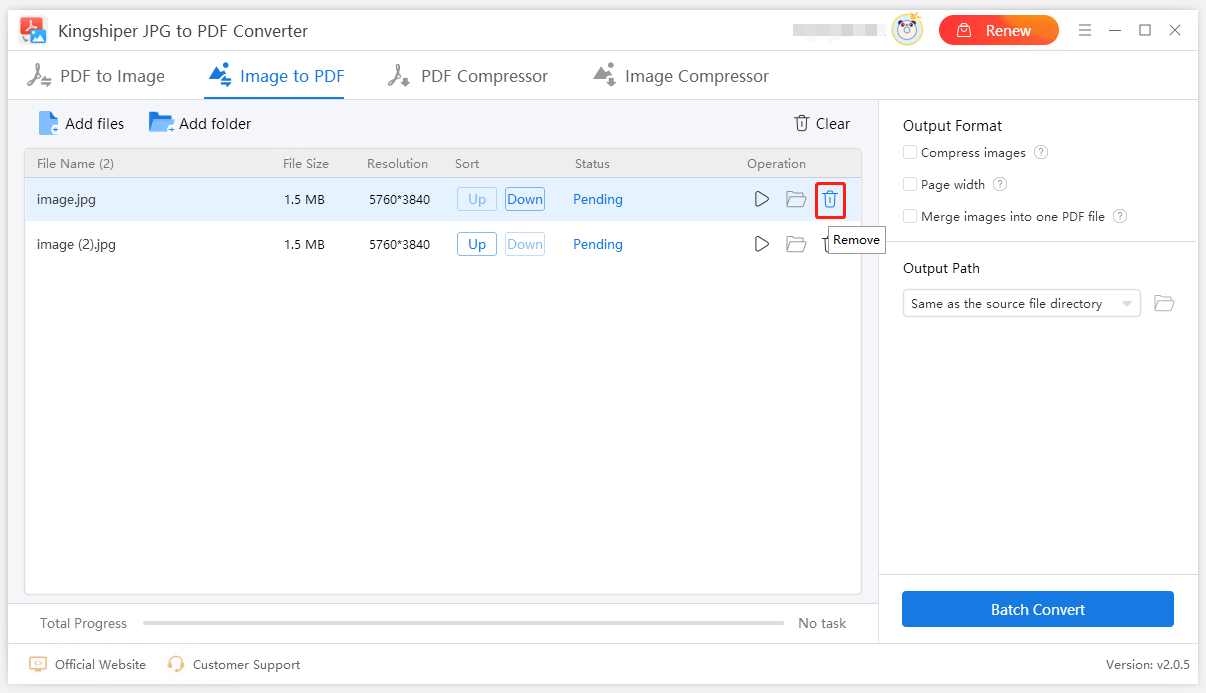
Step 6. Remove images.
If you want to change another image, click the trash icon to remove files.
2.4 How to Convert Images to PDFs in Bulk?
Step 1. Add multiple images with "Add Folder."
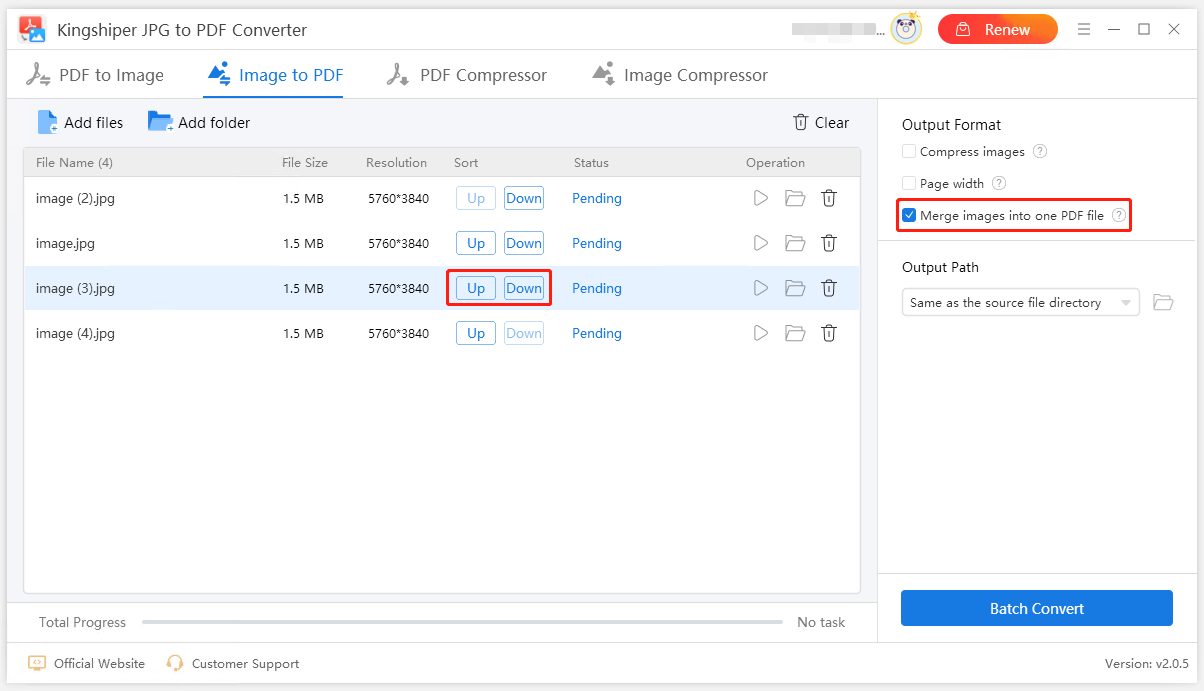
Step 2. Set output format based on needs.
In the menu, you can tick one or all.
Please note that the "Up" and "Down" buttons in Sort are used with "Merge images into one PDF file." You can change the order of display.
Step 3. Choose the location in the output path to export.
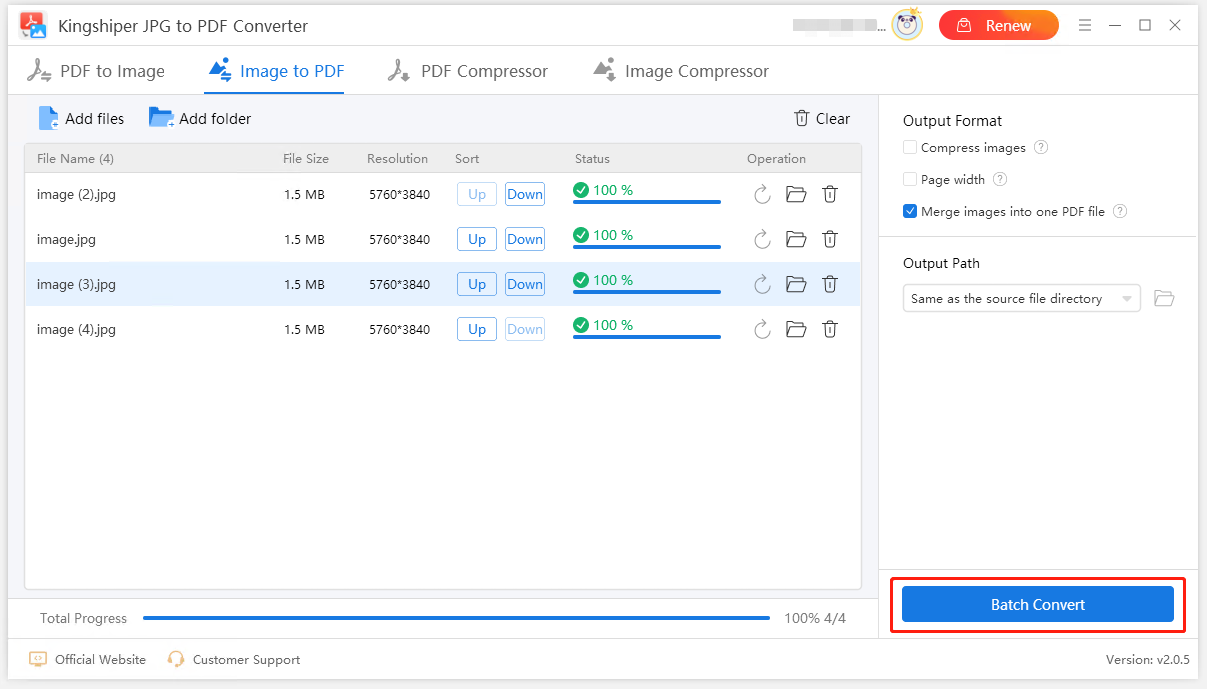
Step 4. Click "Batch Convert."
Use the "Batch Convert" button to turn multiple images into PDFs at once.
Step 5. Remove images.
Want to one-click delete the added images? Click "Clear" to remove all items.
2.5 How to Compress a PDF?
Reducing a PDF size is quite simple with the PDF Compressor feature.
Step 1. Add the target PDF to the software.
Click "Add files" or drag the file from the folder to Kingshiper JPG to PDF Converter.
Note: To process more than one PDF, you can use "Add folder" to import files in bulk.
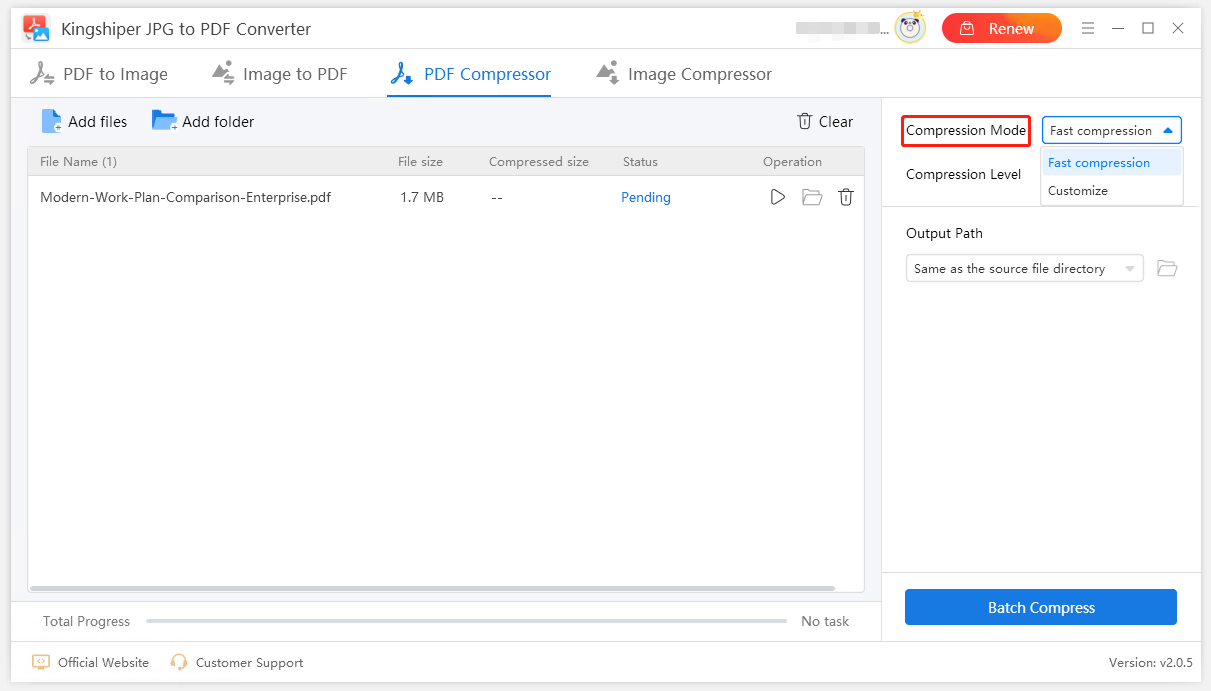
Step 2. Choose a compress mode and level.
Drop down the blank of "Compress Mode" and you can see:
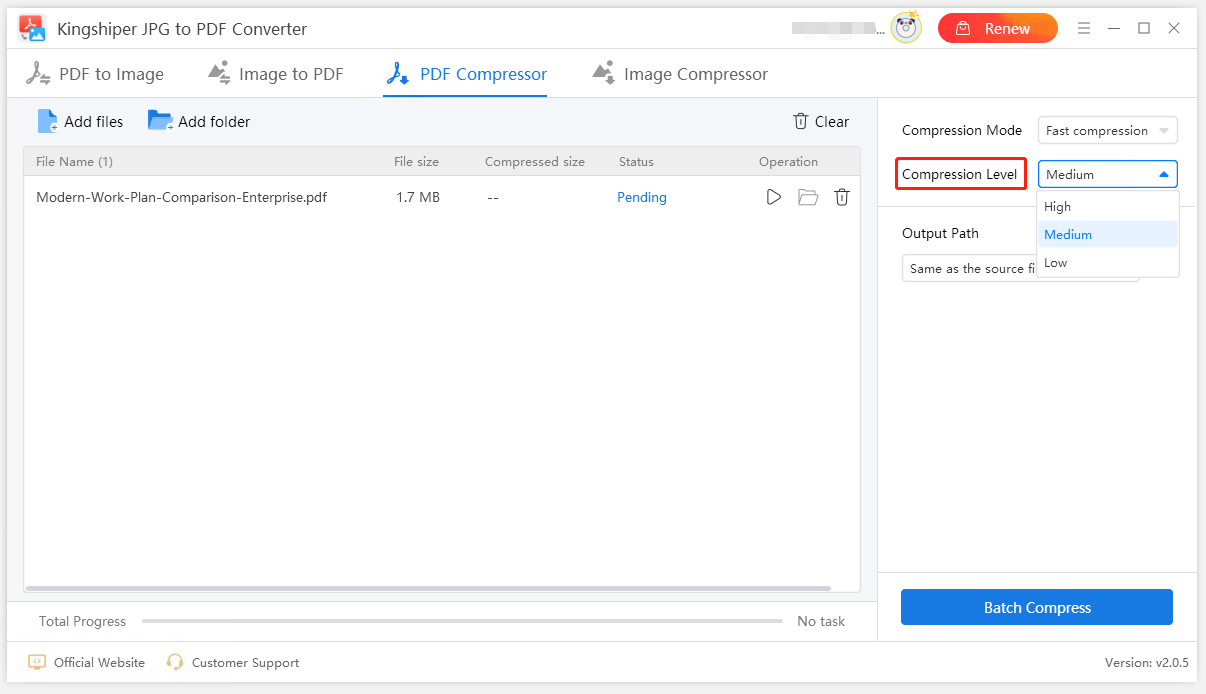
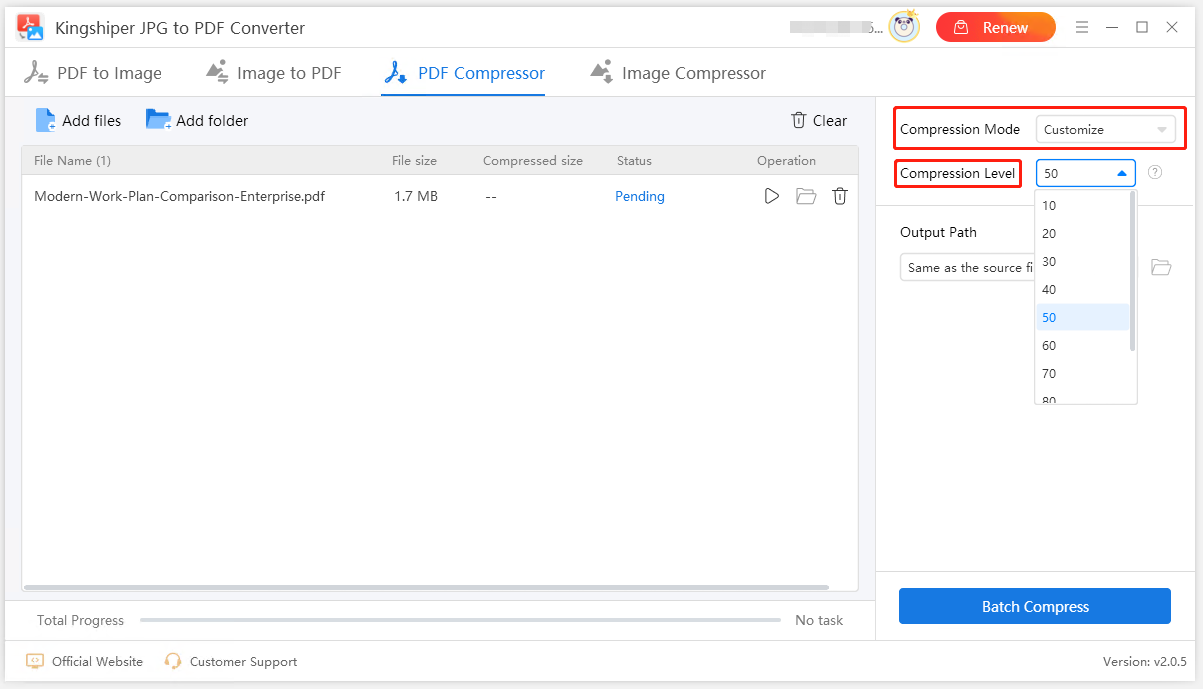
The bigger the number, the greater the compression strength. That is to say, if you select 100 as the compress level, you will get the minimum file size and the lowest image quality.
Step 4. Select an output path to locate the exported file.
Step 5. Click "Start" in Operation.
Below the Operation column, click the first button to start compressing the PDF.
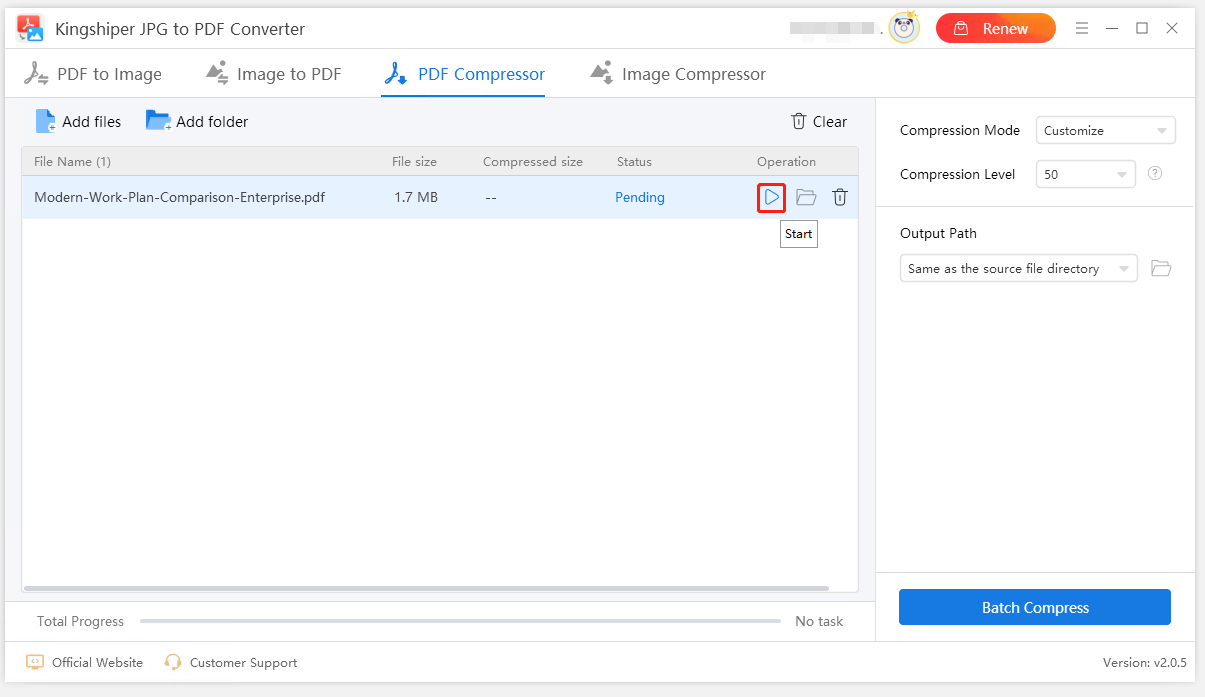
Note: If you have imported multiple PDFs, click "Batch Compress" instead. In this way, you can compress all PDFs within one click.
2.6 How to Compress an Image?
Step 1. Add an image in "Add files."
Click the button or directly drag the image from your device. Then, the image will be imported and wait for processing.
Note: When there are a large number of images that need to be compressed, you can add them to a folder. Click "Add folder" on the right.
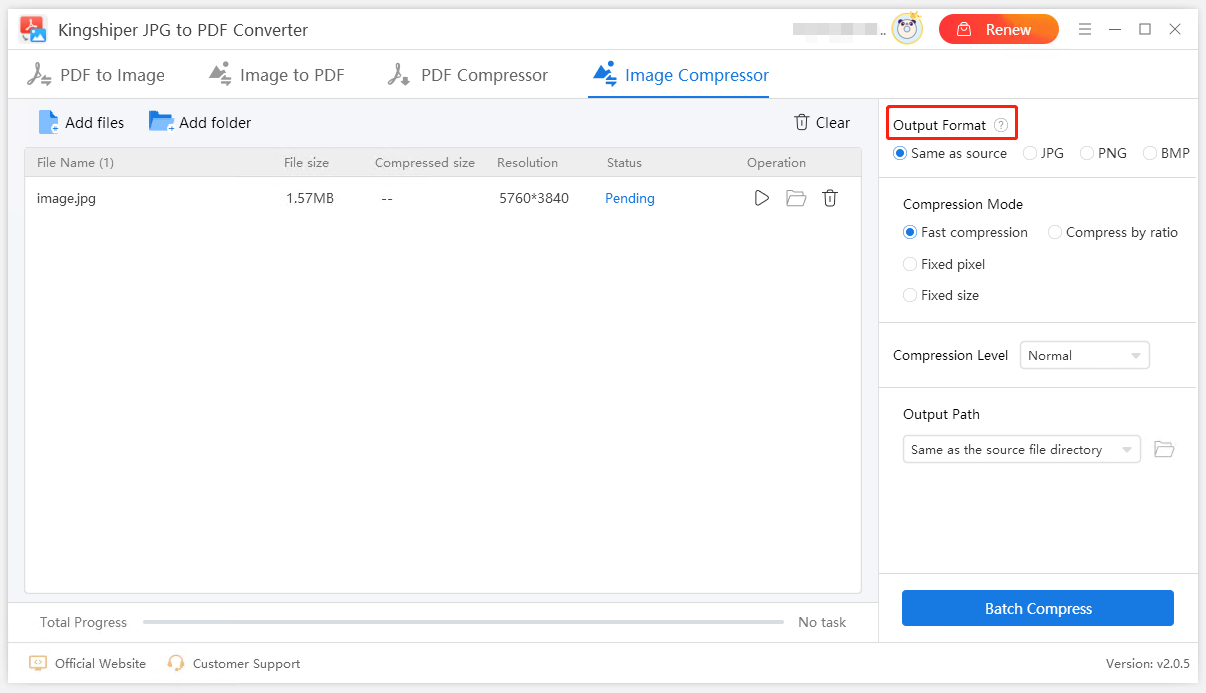
Step 2. Choose a format.
Kingshiper is available to output the image as:
- Same as source: export it using the same format type as the imported file
- JPG
- PNG
- BMP
Step 3. Choose a compress mode.
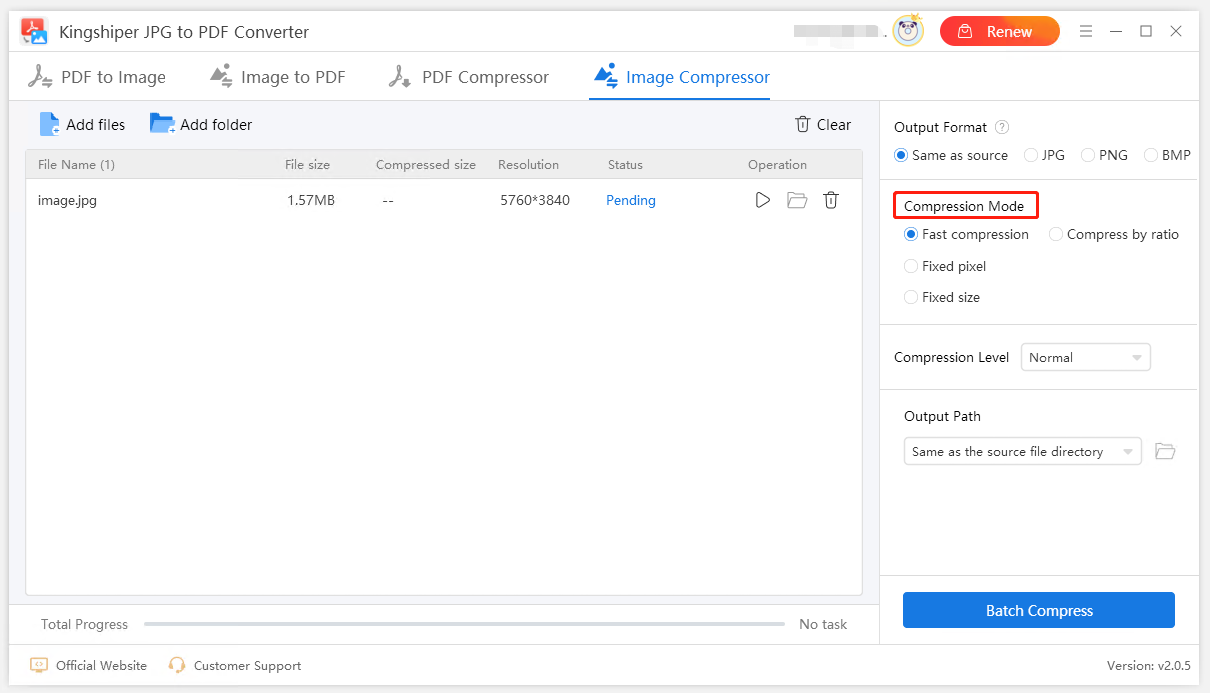
Whether you want to go with speed-first or quality-first, we meet your needs.
Fast compression - best for handling massive images and allow to compress in seconds.
Compress by ratio - best for reducing file size and cutting height and width at once.
Fixed pixel - allows to set up of prescribed height and width for the compressed image.
Fixed size - allows to compression of the image to a specified size and avoids insufficient storage space.
Step 4. Select the output path.
Step 5. Start compression by clicking "Start."
Find the button in "Operation" and then click it. The compression will be completed in seconds.
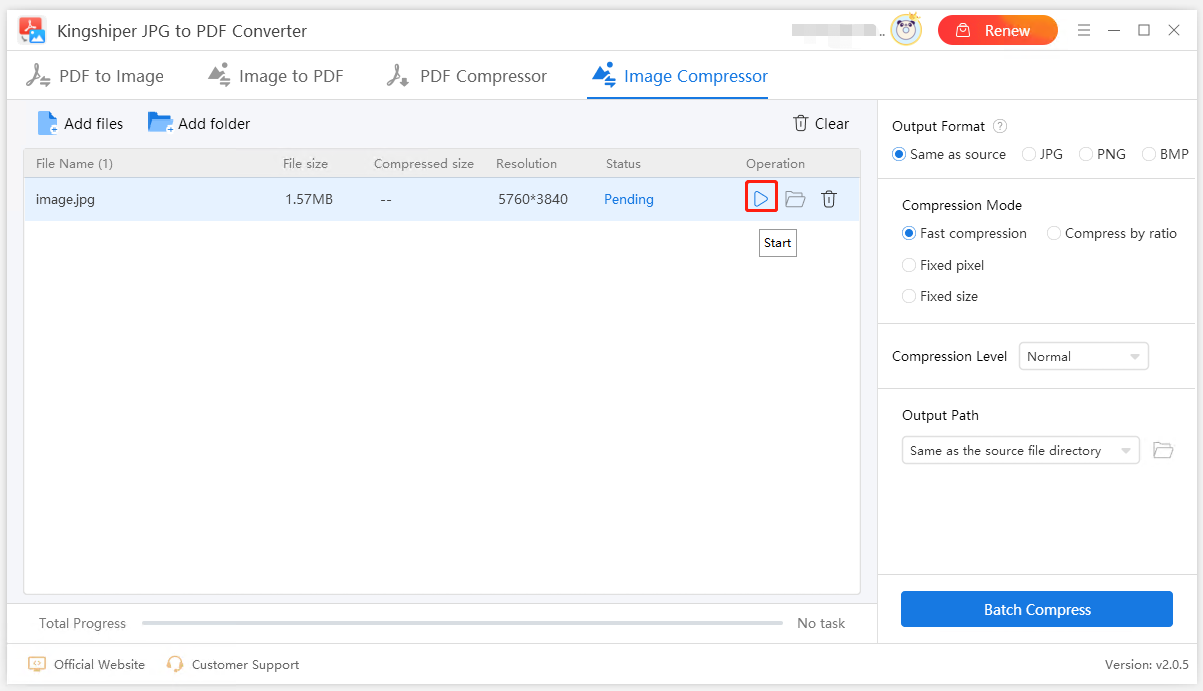
Note: For compressing images in bulk, you need to click "Batch Compress," which is in the bottom right corner.
Support and Help
We're happy to hear from you. If you have any feedback or suggestions on Kingshiper JPG to PDF Converter, please feel free to let us know. And we will reply to all your questions about using it ASAP.
Please contact us at:
Submit Tickets: https://www.kingshiper.com/contact
Email: [email protected]


 All
All


 All
All


 Hot Products


