Multimedia Tools
Video Tools
Audio Tools
Image tools
Record and Edit Porfessional Videos on Mac
Windows Desktop Screen Recording Software
Easy and Fast Way to Compress Video and GIF
Screen Mirroring App for iPhone/Android/PC/Pad
All-in-one video toolkit that supports converting over 1000+ formats
Portable audio format converter, which supports common audio format conversion, multiple audio merging, audio compression, audio segmentation, and one click batch conversion of audio formats
Karaoke Maker and Vocal Extractor on Mac
Cut, copy, paste, insert audio, add effects and other editing functions, which can easily re edit the recorded audio files and make ringtones, adding a unique personality to your life.
Extract vocals and instrumentals from any audio and video track with the latest AI technology.
Best Voice Recording Software for All Windows Users
Convert Audio/Video to MP3/WAV/FLAC/OGG
Utilities
Office Utilities
Simple and powerful office solution for file compression, extraction, transferring, and sharing. Easily to process multiple files in seconds!
A powerful, simple and easy to operate PDF to word converter, which supports the conversion between PDF documents and multiple formats such as doc, ppt, pictures and txt documents; The software has the functions of fast conversion, batch conversion, high-quality identification, etc
Fast Way to Reduce Your File Size
The best and perfect tool to convert various ebook files with ease.
Convert Videos, Audios, Images, PDFs, and Word with Ease
Seamless Conversion for PDF to JPG & JPG to PDF
Shrink size of PDFs, images, and videos without losing quality
Extract & Manage & Compress Files in Seconds
System & Recovery
NTFS is perfect for ultra-large files and has a great performance on Windows PCs. This makes it an ideal choice for an external hard drive to store and transfer documents.
However, this is not the case on Mac. Many complain that they have trouble using NTFS on Mac. Due to the incompatibility between Windows and MacOS, NTFS, the popular file system made by Microsoft, commonly causes reading and writing issues on Mac devices.
Today, we will go through the topic of whether Mac can read and write NTFS and provide useful tips to enable essential functions on Mac.
Yes. You can read the NTFS drive on a Mac and view all documents inside.
Apple Mac operating system has built-in read-only support for NTFS drives. And the supported versions are as follows:
It is worth knowing that Apple brought read-only support of NTFS since Mac OS X 10.3 Panther.
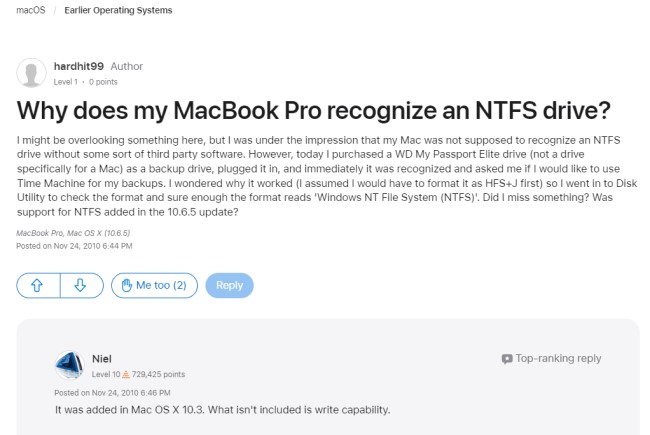
A discussion of Apple Community mentioned the NTFS reading access in 2010. A user suddenly found that his MacBook Pro was able to recognize an NTFS drive and then got a reply explaining the compatibility of Mac with NTFS.
Writing access for NTFS is a hot topic among many Mac users.
Mac can not write NTFS by default. In Disk Utility (the application to manage internal disks and external storage devices on Mac), you can see no option related to NTFS. According to Apple’s official document, the available file system formats are APFS, Mac OS Extended, MS-DOS (FAT), and ExFAT in macOS.
However, it does not mean that you can not write NTFS volumes on Mac. Native NTFS write support is implemented in 10.6 and later. It’s just you need to activate it by some methods.
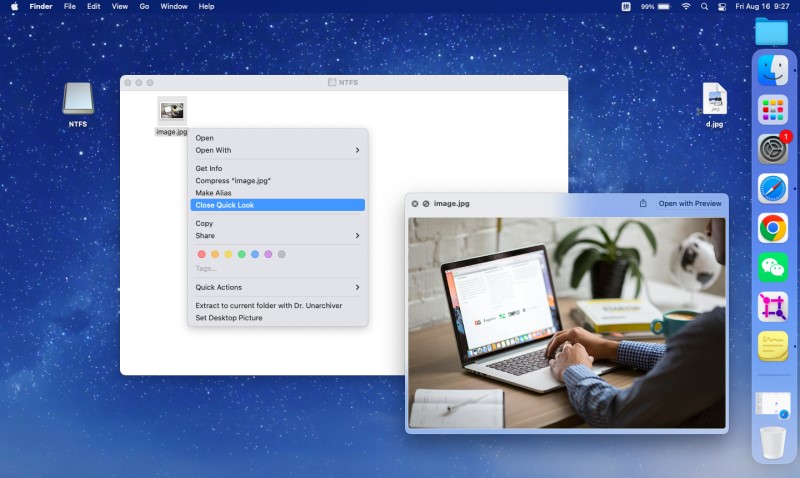
As you connect an NTFS drive to a Mac device, a hard-drive-like icon shows up automatically on the desktop. Double-click the icon to open it. Now you can see the supported operations.
You can browse files in the NTFS-formatted drive.
Click ‘Get Info,’ and you can see the information on the NTFS drive as well as the file info.
What you can see:
Kind (Volume), Format, Capacity, Available Capacity, Used Capacity, Creation Date, Modification Date, Name & Extension, Comments, Sharing & Permissions, etc.
When you duplicate the drive, a folder will be created automatically on the Desktop.
Similar functionality to duplicating, but the entity is named differently.
Both the drive and files inside can use the quick look feature and see basic info. Same as the preview.
You can copy the drive or the files inside and paste them to any location on the Mac.
Files in the NTFS drive are able to be shared via AirDrop, Mail and other approaches.
You can safely eject the NTFS device before unplugging it from your Mac.
By default, you’re not allowed to write files in NTFS drives when using a Mac.
People who often need to transfer files between Windows and Mac will find that it’s very inconvenient to use an NTFS partition, especially at work. Is there a way to use NTFS on Mac as smoothly as on Windows PCs? Tips listed.
This is the easiest way to use NTFS on Mac. You only need to install NTFS for Mac software on your Mac device so to use it without limitation.
As you installed, the NTFS drive will be mounted once it is connected. Then, you can proceed with read and write abilities, such as create, copy, paste, delete, view, and so on. See how to use the software.
Step 1: Download NTFS for Mac software and drag it to ‘Applications.’
Step 2: Connect the NTFS drive and open the software.
Step 3: Open the drive and modify it in the interface.
If you want to write NTFS on a Mac without third-party software, try Terminal, the built-in app.
This method requires shell command knowledge; you can read the details here.
Please note that using Terminal can possibly lead to failure and data corruption. Therefore, when entering commands, ensure that you have input the correct text.
It may be due to NTFS damage, physical connection issues, outdated NTFS version, mounting problems, system security settings, etc.
Tip: See if your device can use other storage devices normally via Disk Utility. Then, check if the NTFS drive can be used on Windows devices and its info.
NTFS files invisible on a Mac is possible because of file attributes or permissions. They may be hidden and not appear in Finder.
Tip: Use Terminal to to list all files (including hidden). Type this command ‘$ ls -a’.
This is a common issue after the security update. It can affect System Integrity Protection (SIP) settings, which might interfere with third-party software. You can re-install software for NTFS.
For another reason, if the NTFS drive uses an unsupported NTFS variant or partition scheme, it may not mount correctly on macOS.
When reformatting a drive, you need to take data loss and system compatibility into consideration. If there is no data stored in the NTFS drive and you want to use it on the Mac and Windows systems, you can format NTFS to ExFAT.