1 Get Started
It is simple to download, install, purchase, and activate the software. Follow the below steps.
1.1 Download & Install
Step 1. Download it on Your PC
If you don't have Kingshiper Screen Recorder yet, click the button below to download it. Or visit here to download it.

Step 2. Install Kingshiper Screen Recorder
From the pop-up window, you can click the Install button to install our product as the default or you can choose the “Customize” option. After that, you can click the Install to go ahead.

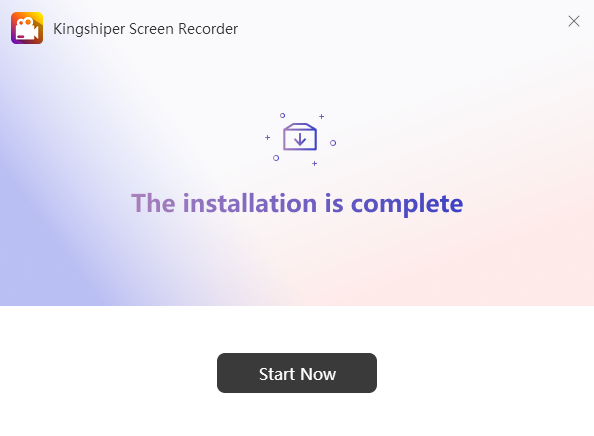
Step 3. Launch Kingshiper Screen Recorder
It will take seconds to install Kingshiper Screen Recorder successfully. A window like the one below will prompt you that you can click the Start Now button to open Kingshiper Screen Recorder at once.
1.2 Login with Kingshiper Account(Register) & Update & Uninstall
1.2.1 Login Kingshiper Screen Recorder with Kingshiper Account
With the premium version of Kingshiper Screen Recorder, you'll have the following permissions.

If you want to enjoy the full features without any limitations, please simply click the “Buy now” option in the upper-right corner to purchase Kingshiper Screen Recorder from the official store.
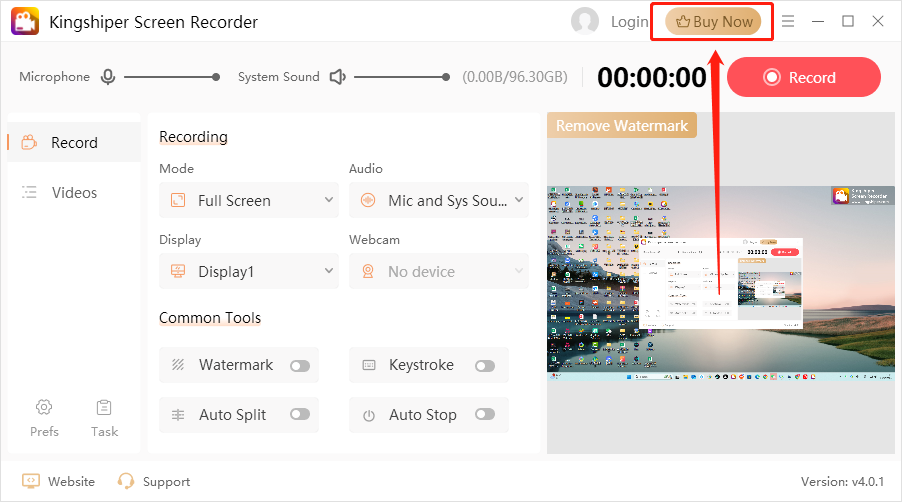
If you have already purchased the Kingshiper Screen Recorder, please log in with the Kingshiper Account by clicking the Login button.

1.2.2 What is Kingshiper Account?
Kingshiper Account refers to the account you created from one of the Kingshiper products. It helps you manage your order details and log in to Kingshiper products that support the Kingshiper Account.
1.2.3 How to log in to Kingshiper Screen Recorder?
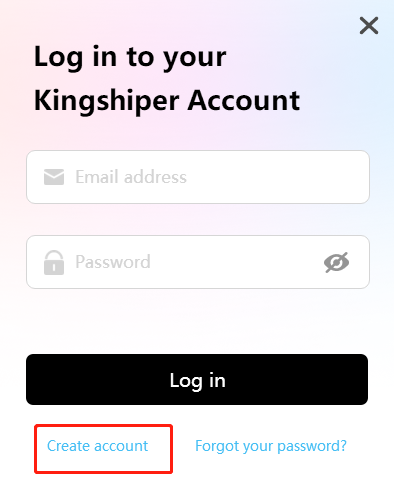
Launch Kingshiper Screen Recorder after installation, and click the Login button in the upper right corner to get a new window as below.

1.2.4 How to sign up for a new Kingshiper Account.
If you don't have a Kingshiper Account, then you need to click the Create account here option on the initial interface and create a new account.
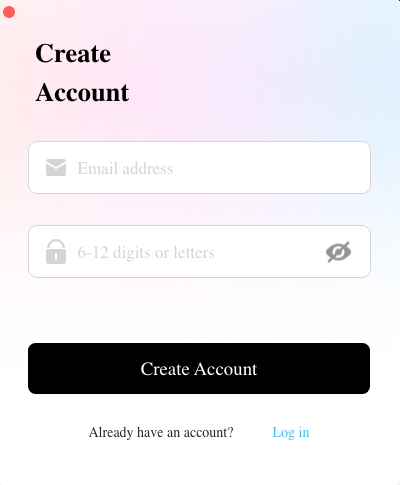
You'll get a new interface to enter your email address and set a password, and then click the “Create Account” button to create the account.
1.2.5 What can you do with Kingshiper Account?
You can click on the “Member Center” button to open the Kingshiper official website and click on the Person icon, then choose “Account Center”. You can edit your profile, change your password, and check your order on this page.
My order: You can find the Order, Profile, and Security information here.
Profile: You can edit your personal information from this tab.
Security: You can change your password here.
1.2.6 Update
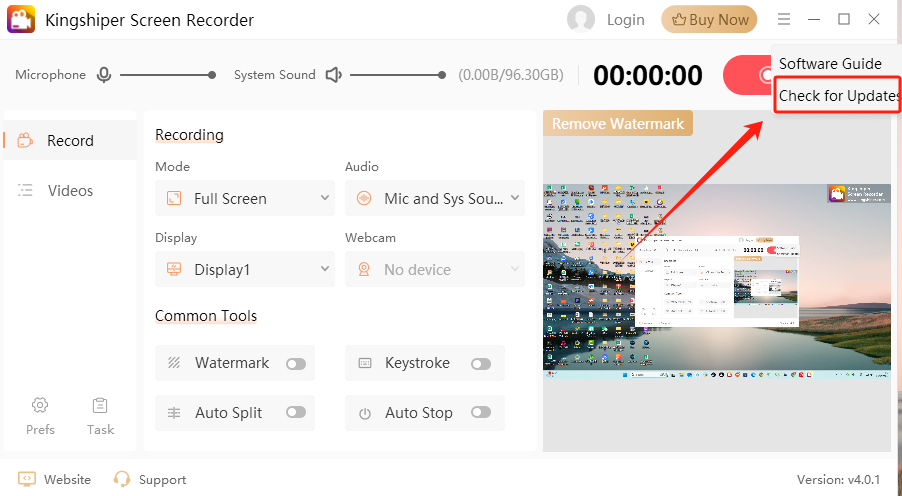
If you want to check if your Kingshiper Screen Recorder is the latest version and update it, you can follow the steps below to update automatically.
Step 1. Check for Updates.
Go to the “Menu” icon, and click the “Check for Updates”. It will pop up a Live Update window, please press “Go to Update” to download the package.
Step 2. Update the package.
After downloading the latest version, please press “OK” to terminate the program and install the new version from the pop-up window. You can also click "Cancel” to install it next time.
1.2.7 Uninstall
If you think Kingshiper Screen Recorder hasn't met your expectations or you don't want to use it now, you can uninstall it as below:
Go to “Control Panel” > “Programs” > “Programs and Features” > “Uninstall” and then right-click the icon of Kingshiper Screen Recorder and select Uninstall. Click “OK” when asked "Are you sure you want to completely remove Kingshiper Screen Recorder and all of its components?"
1.3 Brief Introduction
Thank you for your interest in Kingshiper Screen Recorder. Kingshiper Screen Recorder is a powerful and easy-to-use tool for capturing high-quality screen recordings. It offers various features, including customizable recording modes, sound recording, webcam overlay, and multi-screen recording. With options like automatic splitting, scheduled recordings, and hotkey support, you can automate and streamline your recording process. You can also adjust output settings, add watermarks, and manage your recordings easily. Perfect for tutorials, meetings, or gaming content, Kingshiper Screen Recorder provides all the tools you need to record efficiently and effectively.
Supported video formats: MP4, AVI, MKV, WMV, FLV, GIF, MOV, WTV
Supported audio formats: MP3, WAV, OGG, FLAC, M4A
2 How to Use Kingshiper Screen Recorder
2.1 Interfaces & Buttons
Please launch Kingshiper Screen Recorder on your computer; the main interface will display. Some basic functions are as below.
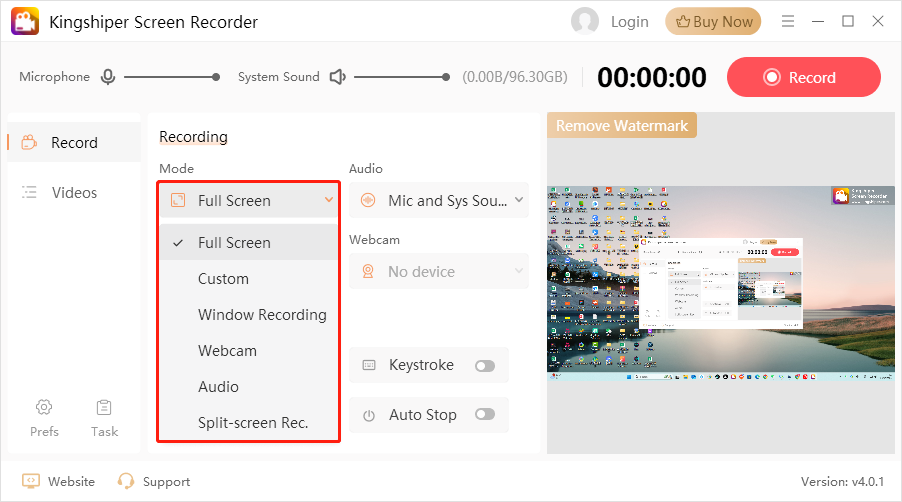
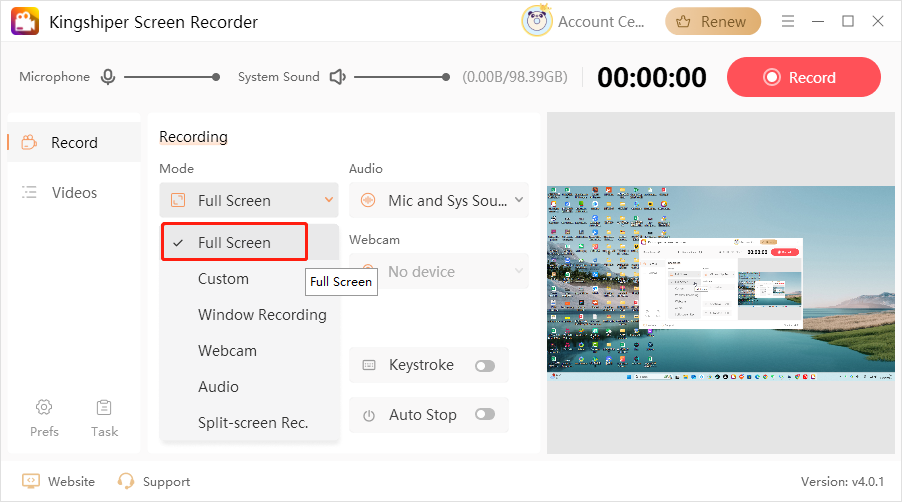
2.1.1 Recording Modes
Kingshiper Screen Recording offers multiple recording modes to meet various needs. You can choose to record the full screen, a specific area, a window, or a particular application. It is good to record presentations, gameplay, or online meetings.
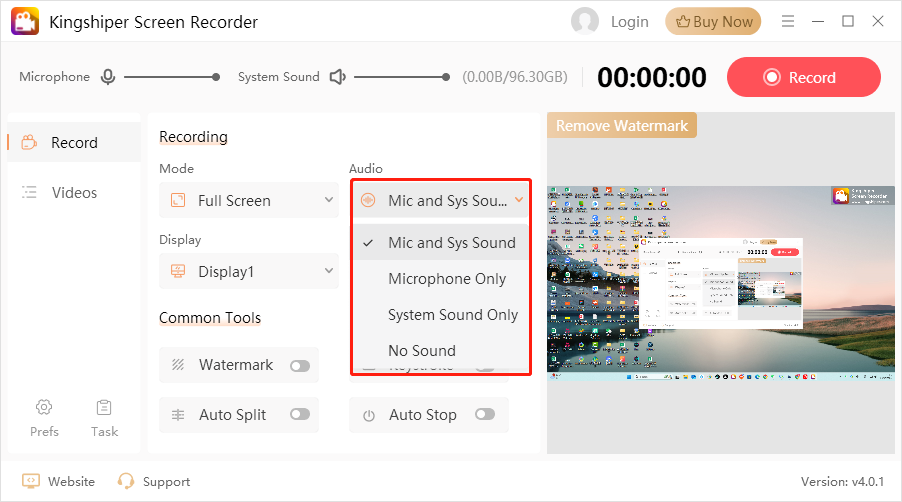
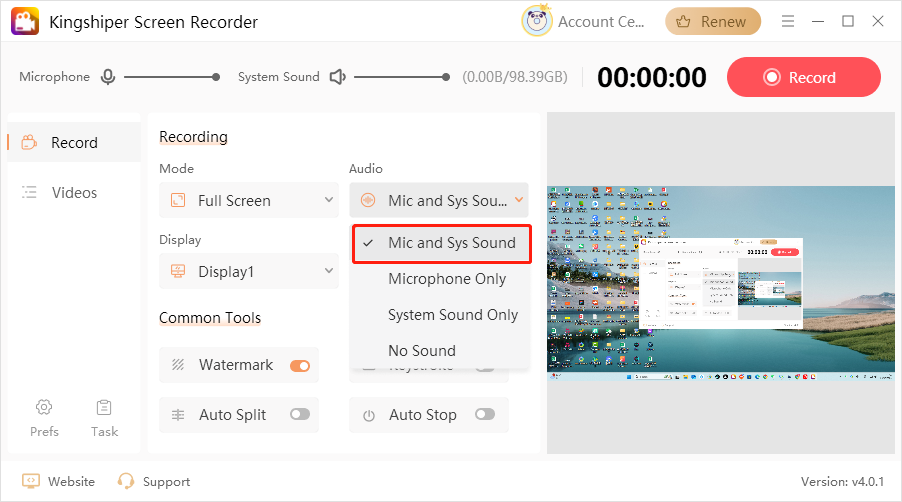
2.1.2 Audio
This feature allows high-quality sound recording. You can capture system sound, microphone input, or both simultaneously, ensuring clear audio for tutorials, commentary, and live recordings.
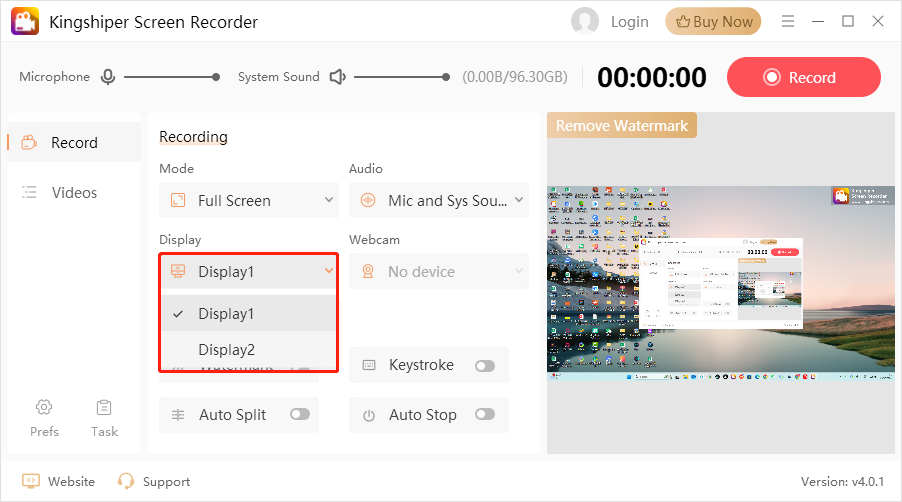
2.1.3 Display
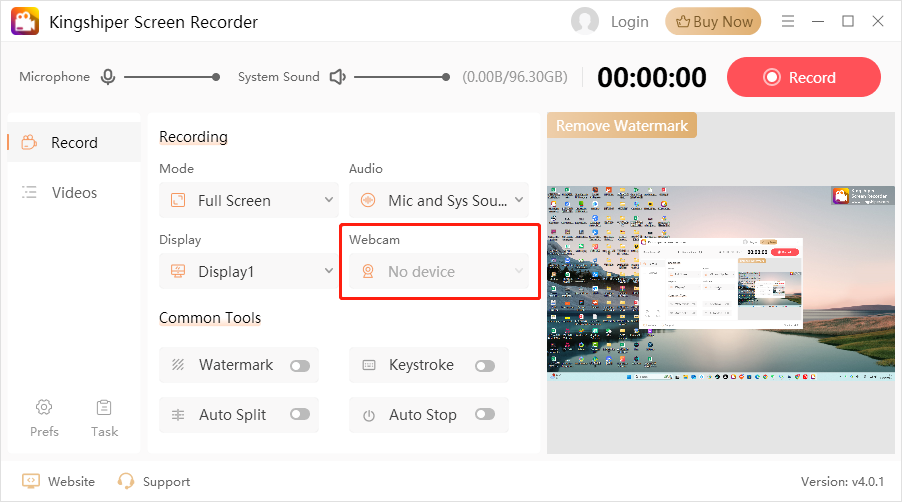
The Display feature allows you to select which monitor to record when using multi-screen recording. Simply click the drop-down menu to choose the display you wish to capture, ensuring that the correct screen is recorded during your session.
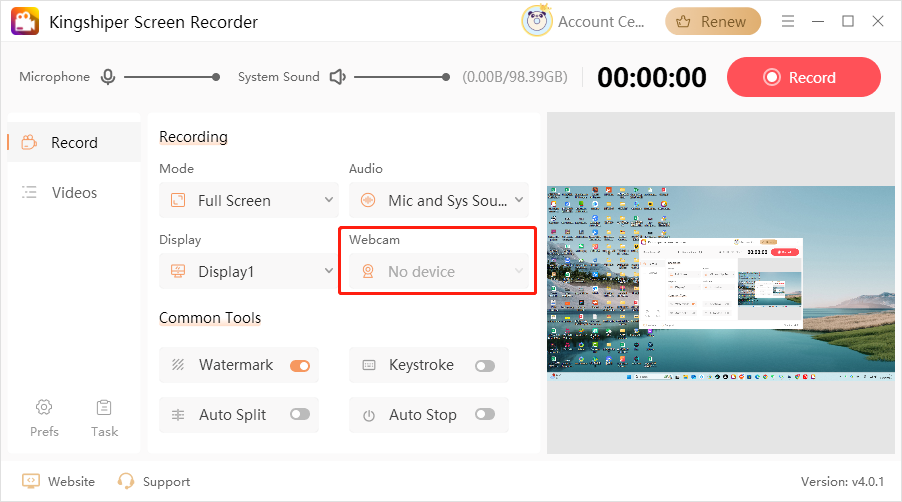
2.1.4 Webcam
Choose your Webcam device on this if you want to record tutorials, video conferences, and live streams. It supports picture-in-picture mode for enhanced presentation.
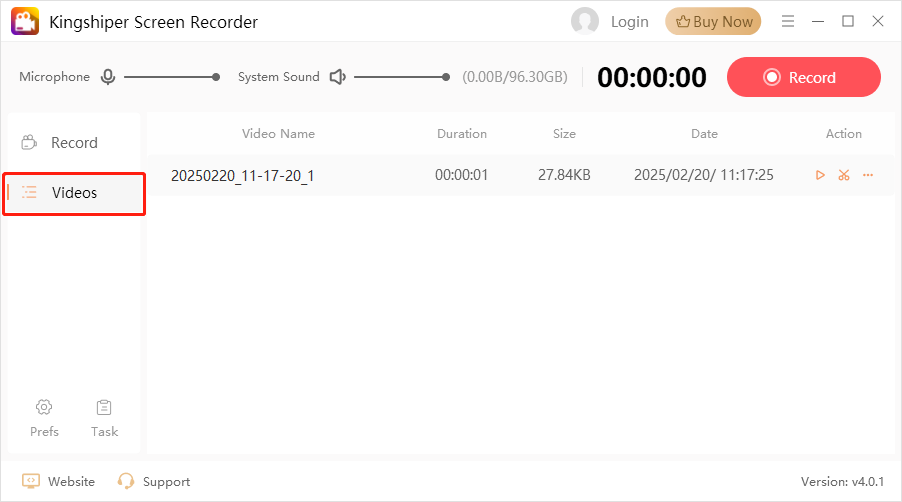
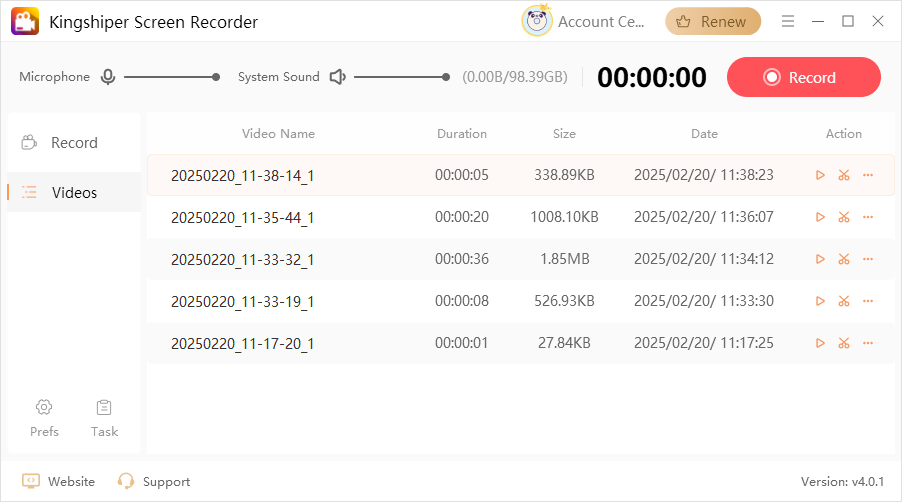
2.1.5 Video Lists
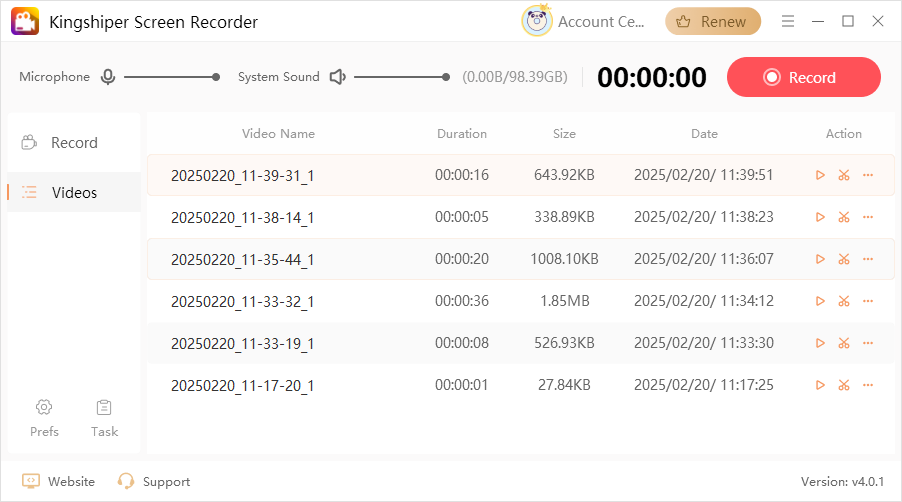
Video Lists help you manage and access recorded videos easily. You can preview, rename, and organize files, all within the built-in video manager.
2.1.6 Common Tools
Kingshiper Screen Recording offers various tools to customize and enhance your recording experience.
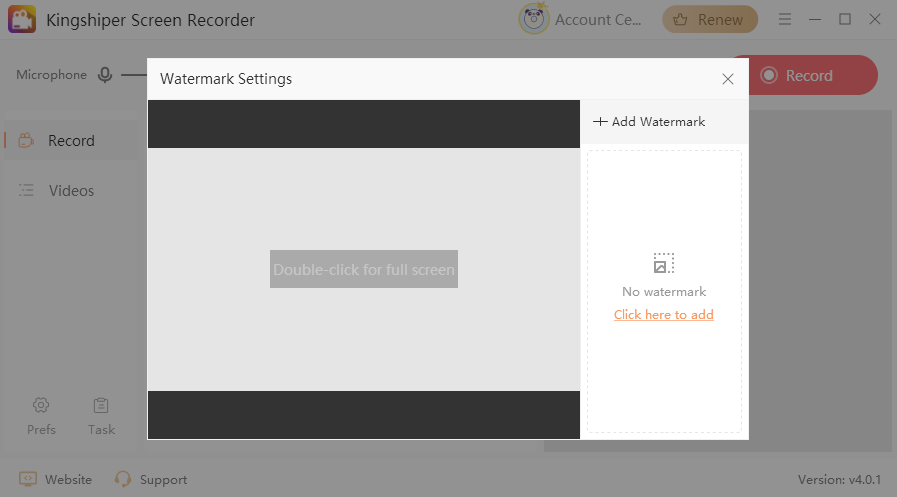
2.1.6.1 Watermark Settings
Add custom watermarks to protect your content or brand your videos. You can upload an image or text watermark and adjust its position, size, and transparency.
2.1.6.2 Keystrocks
Display on-screen keystrokes during recording, making it easier for viewers to follow software tutorials and demonstrations. The keystrokes will appear in the bottom left corner of the screen, providing clear and immediate feedback on the keyboard's actions.

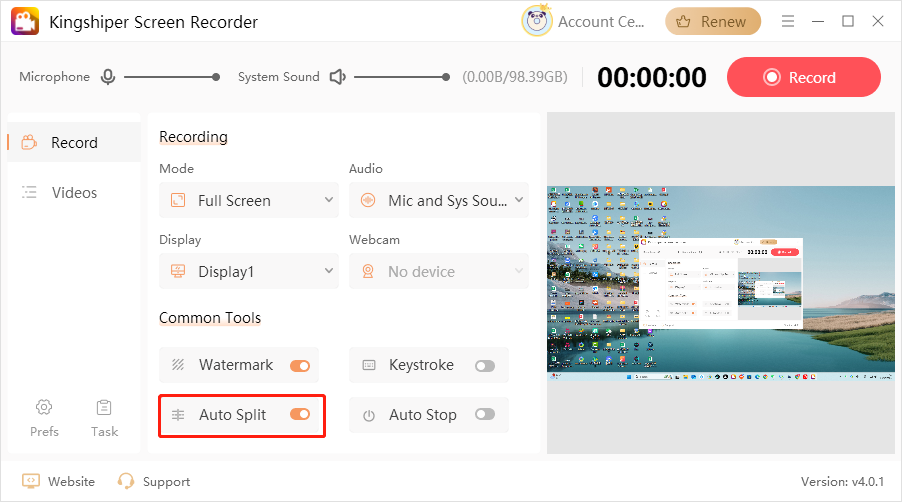
2.1.6.3 Auto Split
Auto Split allows you to set rules to split recordings automatically based on time or file size, making it easier to manage long recordings.
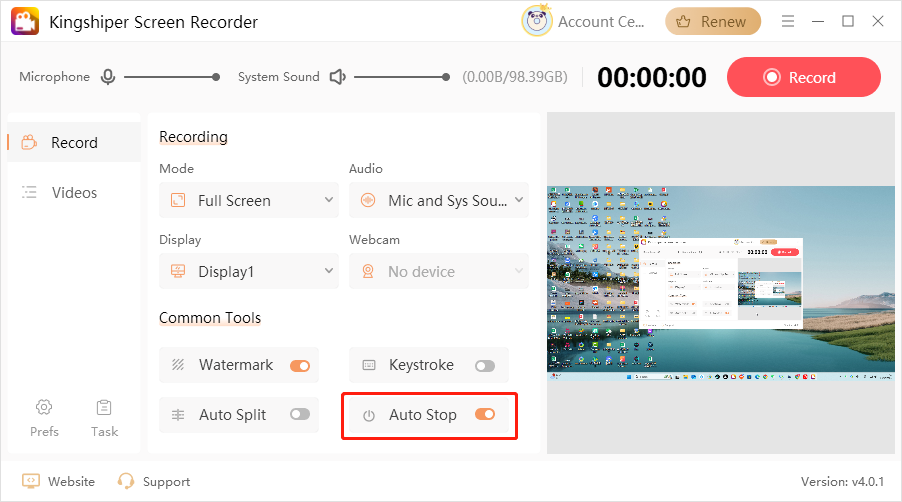
2.1.6.4 Auto Stop
With Auto Stop, you can set conditions to end the recording automatically, such as recording duration, file size limit, or specific end time, avoiding overly long or large recordings.
2.1.7 Preferences
The Settings menu provides extensive customization options to optimize your recording experience.
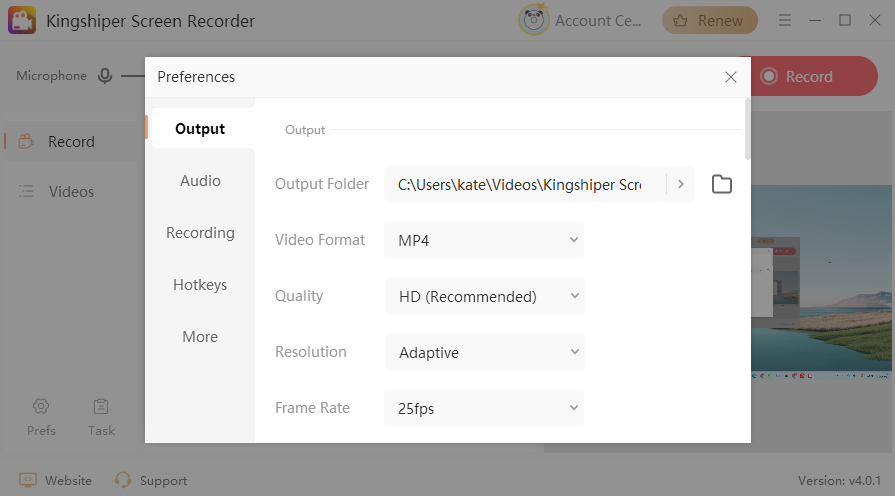
2.1.7.1 Output
In the Output settings, you can customize the video format, quality, resolution, and frame rate, ensuring your recording meets your specific needs. You can also choose the destination folder to save the output files.
Note: For online videos, a frame rate of 30 FPS is standard. Frame rates below 25 FPS may result in choppy playback.
2.1.7.2 Audio
In the Audio settings, both system sound and microphone input are typically set to the default system sources. If needed, you can manually select different audio sources or adjust the system's default sound settings to suit your recording preferences.

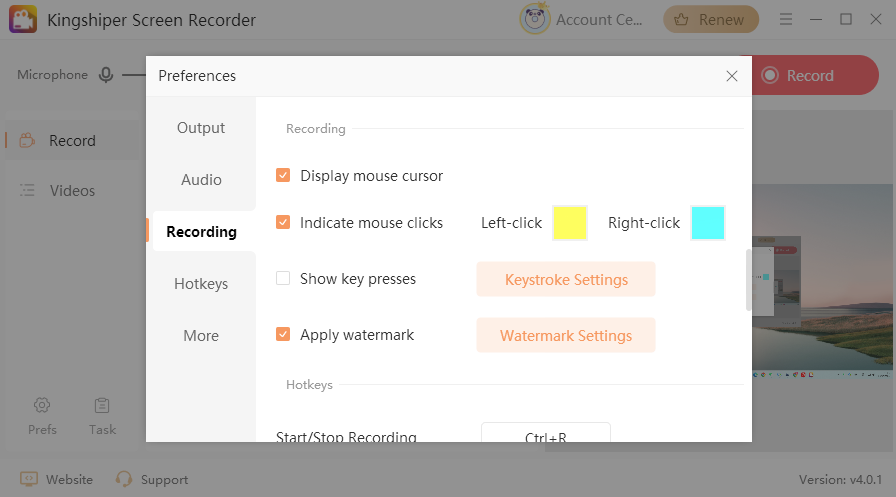
2.1.7.3 Recordings
In the Video settings, you can pre-configure options like mouse display, click effects, keystrokes, and watermarks. By default, two options are enabled at startup, and you can easily check or uncheck the boxes to customize your recording experience based on your needs.
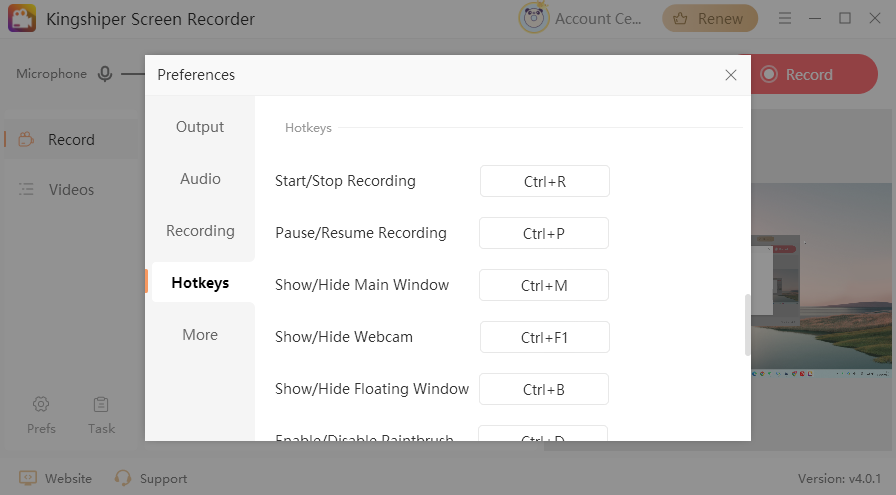
2.1.7.4 Hotkeys
Customize hotkeys for quick control, allowing you to start, pause, and stop recording with ease.
2.1.7.5 More
This section provides additional options for using Kingshiper Screen Recorder, such as customizing the action when closing the software, enabling or disabling the floating ball, setting a countdown before the recording begins, and selecting whether the software should automatically launch upon startup.

2.1.8 Tasks
Kingshiper Screen Recorder offers screen recording tasks, allowing you to set recording rules in advance.
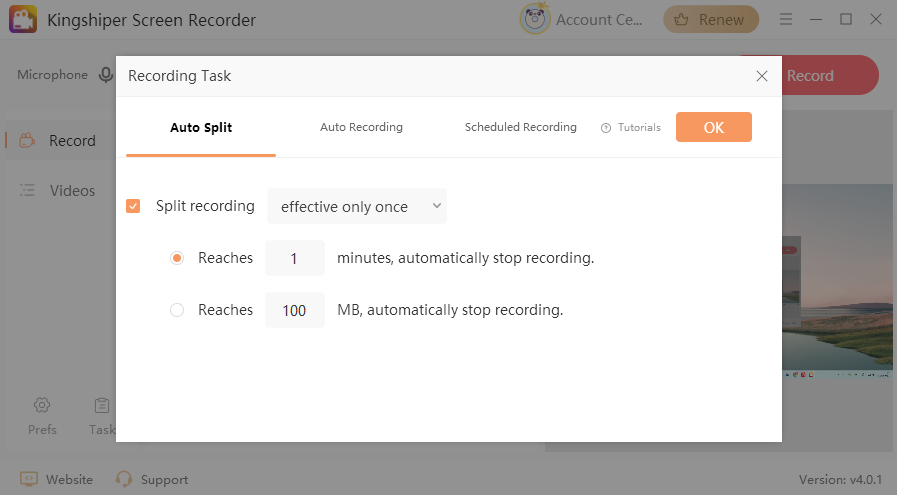
2.1.8.1 Split Recording
You can set up split recording parameters, such as specifying the average recording time or file size for each segment. When the recording reaches the preset value, it will automatically stop.
For example, you can set the software to record every 5 minutes. It will automatically create a new segment each time.
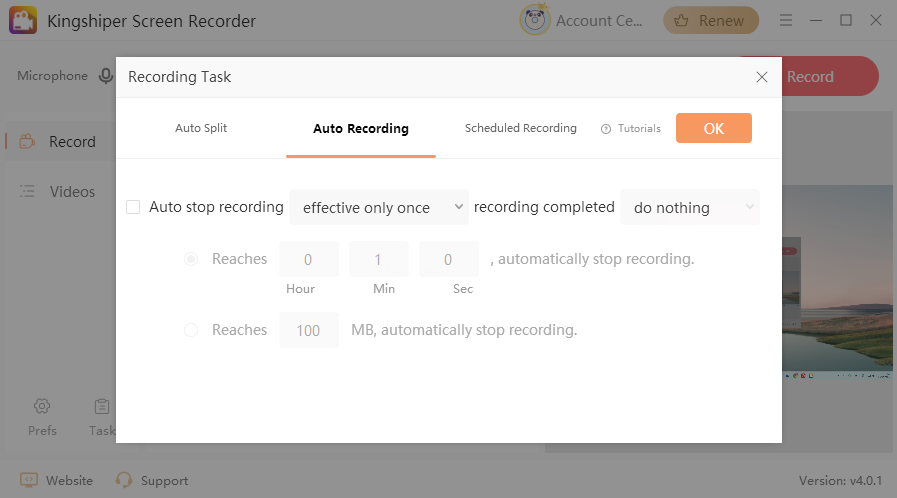
2.1.8.2 Auto Recording
In Auto Recording, you can set parameters for auto recording, such as the recording duration or total file size. Once the recording reaches the preset value, it will automatically stop.
For example, you can set the software to stop recording when the file size reaches 100MB.
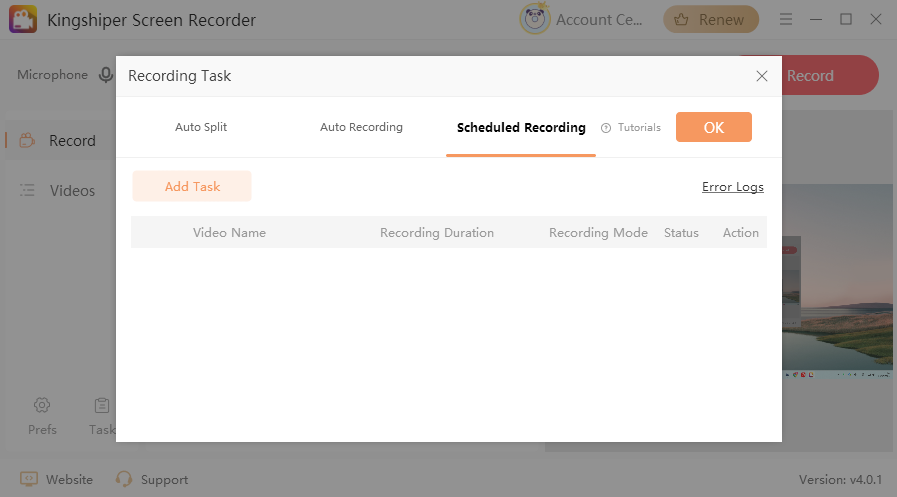
2.1.8.2 Scheduled Recording
In a Scheduled Recording session, you can set up scheduled recordings by defining specific parameters such as start and end time, recording duration, recording mode, and audio sources. When the scheduled time arrives, the software will start recording automatically. It will stop at the set end time, so you don’t need to do anything. This feature is great for when you're away from your computer.
3 Step-by-Step Tutorials
3.1 Recording Both Screen and Webcam
Step 1. Launch Kingshiper Screen Recorder and select "Full Screen" mode for the recording.
Step 2. Choose the audio source you want to record. You can select from several available options.
Step 3. Select the webcam you wish to use. The system will default to the primary webcam.
Step 4. Adjust the webcam window size that pops up, customizing it to fit your recording needs.
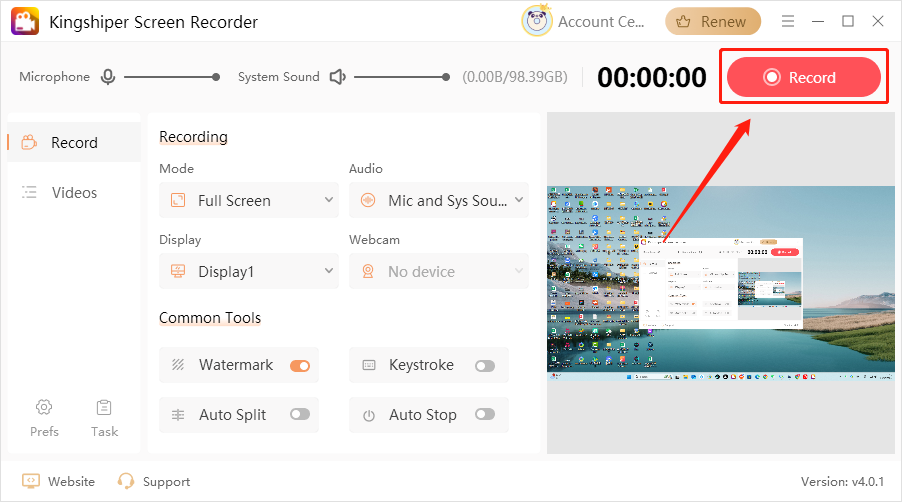
Step 5. Click the "Record" button in the top-right corner to begin.
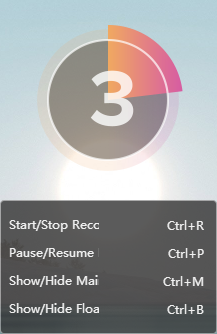
Step 6. After the countdown ends, the recording will officially start.
Step 7. To stop the recording, press the shortcut Ctrl+R. You can view the recorded video files in the Video Lists.

3.2 Recording Application Windows
Step 1. Launch Kingshiper Screen Recorder and select "Window Recording" mode.

Step 2. In the pop-up window, choose the application window you want to record and click "OK".
Note: Ensure the application window is not minimized. If it's not listed, click "Refresh" to update the list.

Step 3. Next, select the desired audio source for the recording.
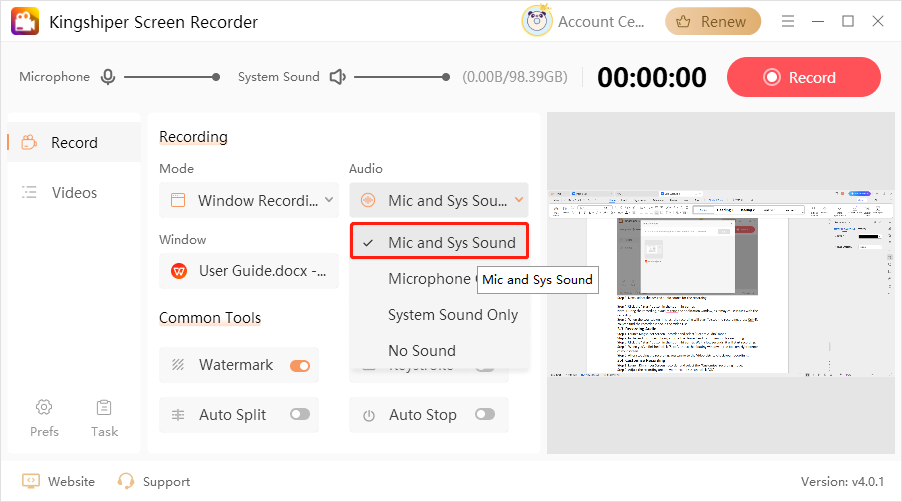
Step 4. Click the "Record" button in the top-right corner.
Note: During the recording, avoid resizing the application window, as it may cause issues with the recording.

Step 5. When the countdown finishes, the recording will start. To stop the recording, press Ctrl+R. You can find the recorded video in the Video List.
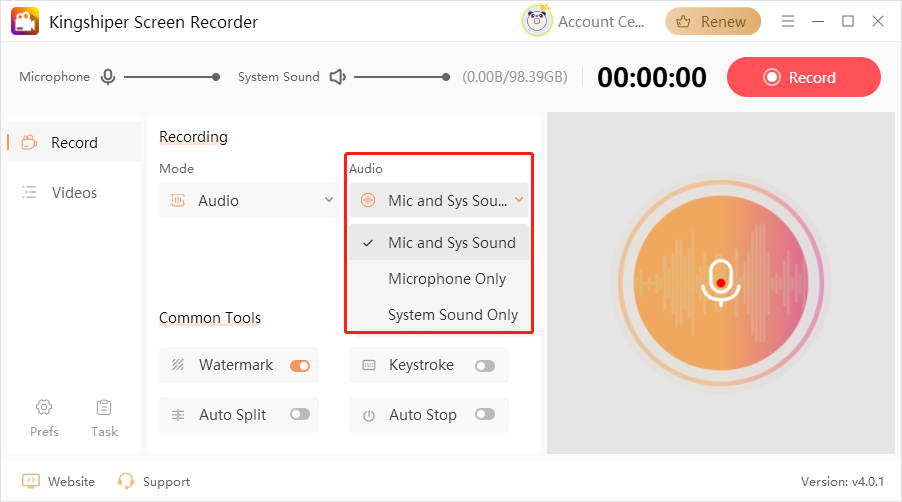
3.3 Recording Audio
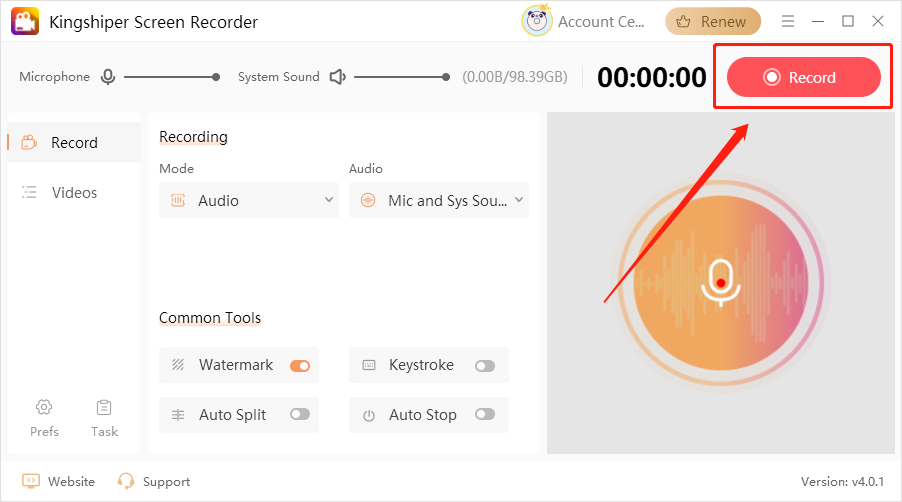
Step 1. Launch Kingshiper Screen Recorder and select "Audio" mode.
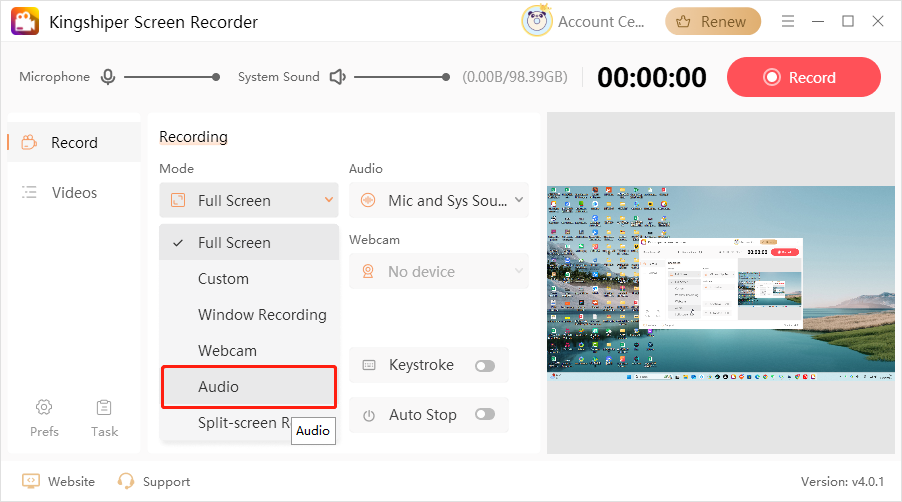
Step 2. In the audio source options, choose the desired audio combination for recording.
Step 3. Click the "Record" button in the top-right corner. Wait a few seconds, it will start recording.
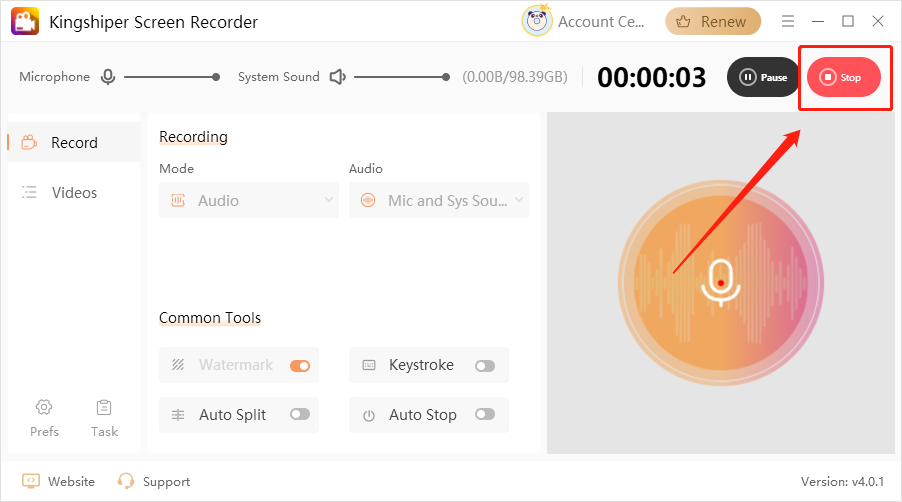
Step 4. When you've finished, click "Stop", or use the floating window in the bottom-right corner of your screen.
Step 5. After stopping the recording, you can go to the Video Lists to check your recordings.
3.4 Customize Recording
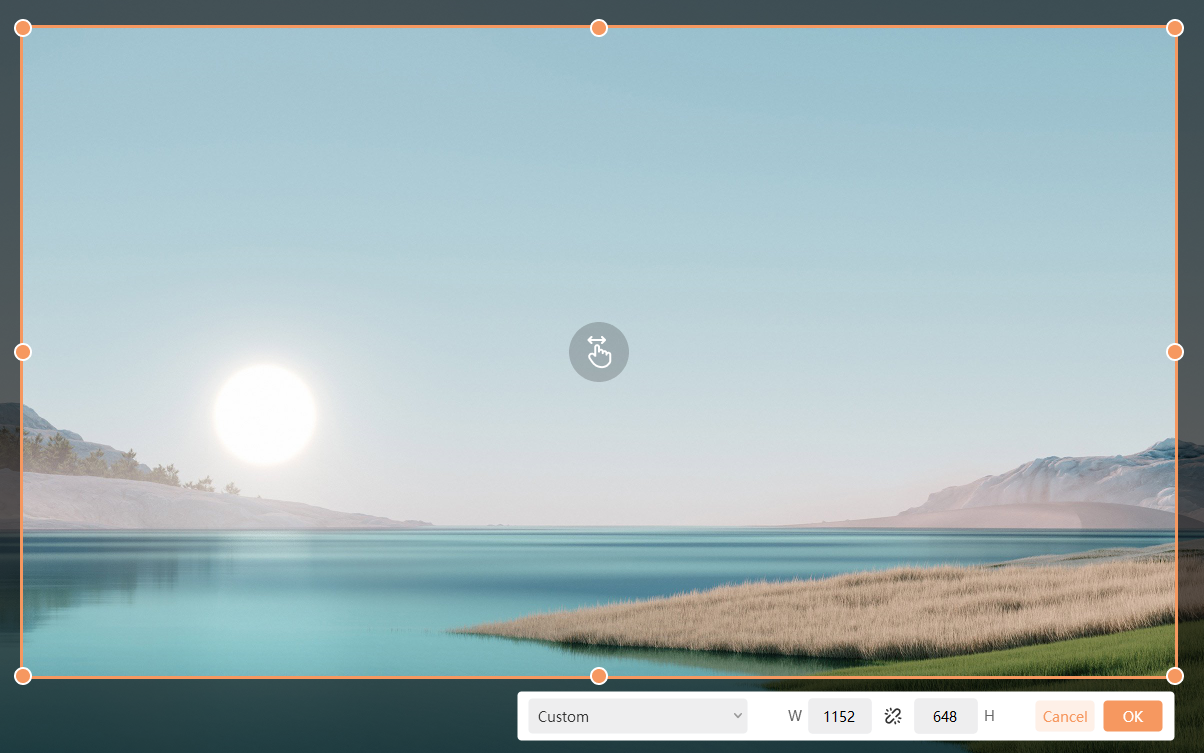
Step 1. Launch Kingshiper Screen Recorder and select the "Custom" recording mode.

Step 2. Adjust the recording area to your desired size and click "OK".
Step 3. Then, set the audio source for the recording.
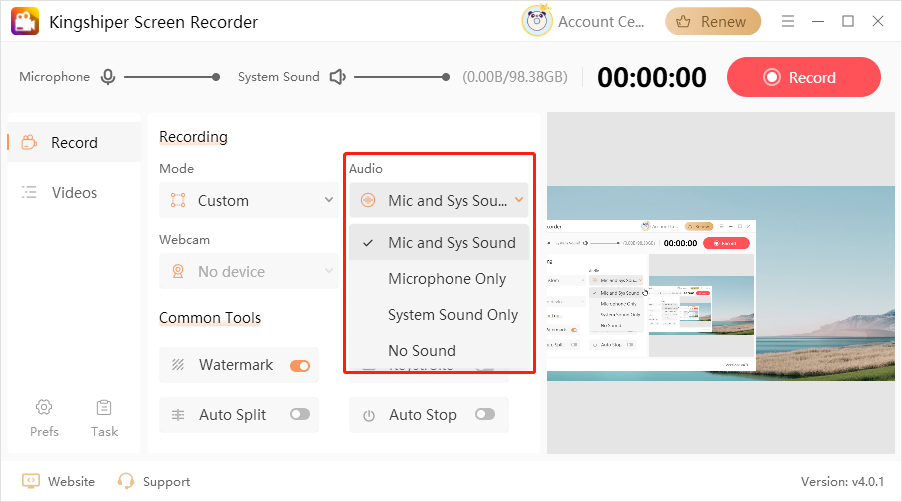
Step 4. Click the "Record" button in the top-right corner. After the countdown ends, the recording will begin. You can control the recording via the floating window at the bottom.
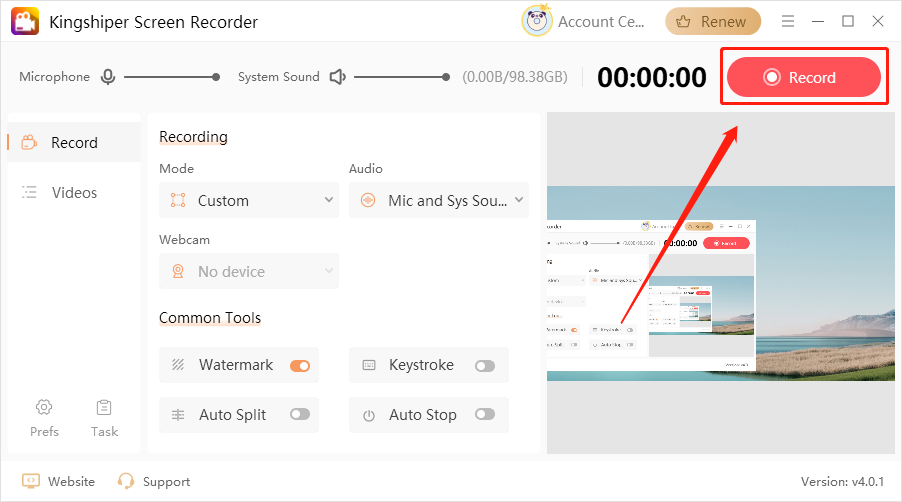
Step 5. Once the recording is complete, you can view the video in the Video Lists.

3.5 Split-Screen Recording
Step 1. Open the software and select the "Split-screen Rec." mode. By default, the software will select all your connected screens.
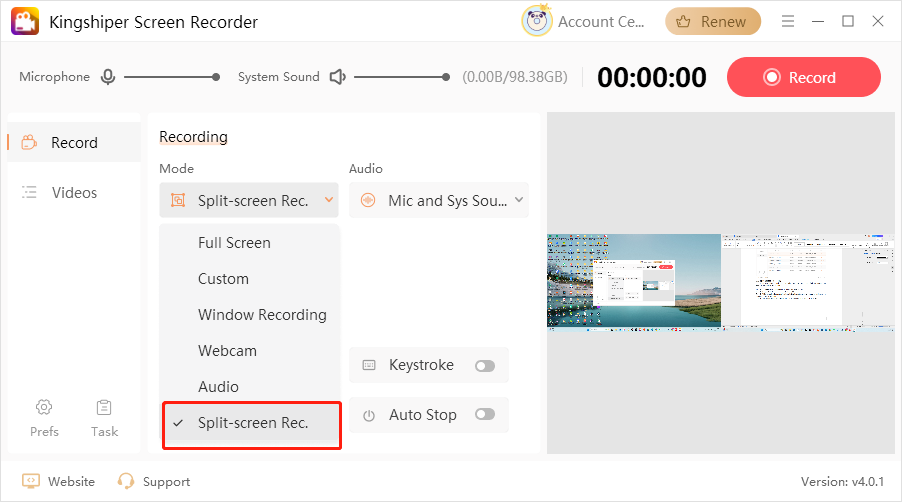
Step 2. Choose the sound you want to record in the “Audio” part.
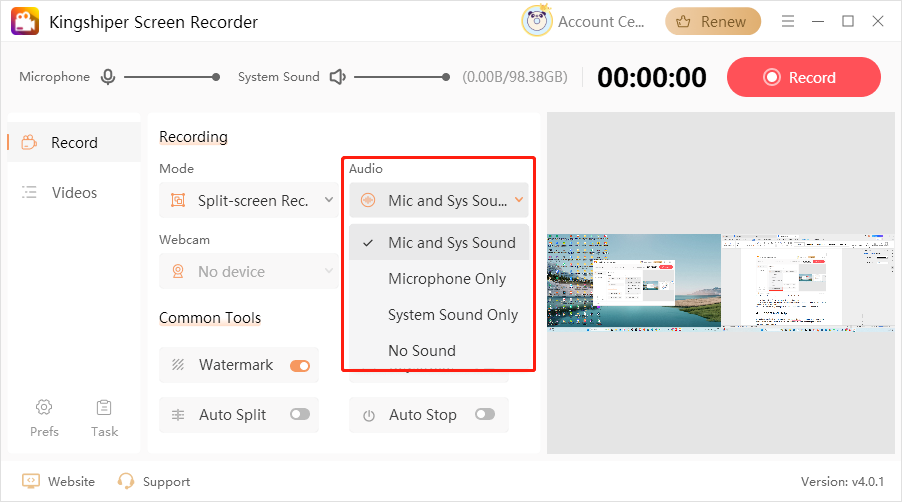
Step 3. Then, click the "Record" button in the top-right corner.
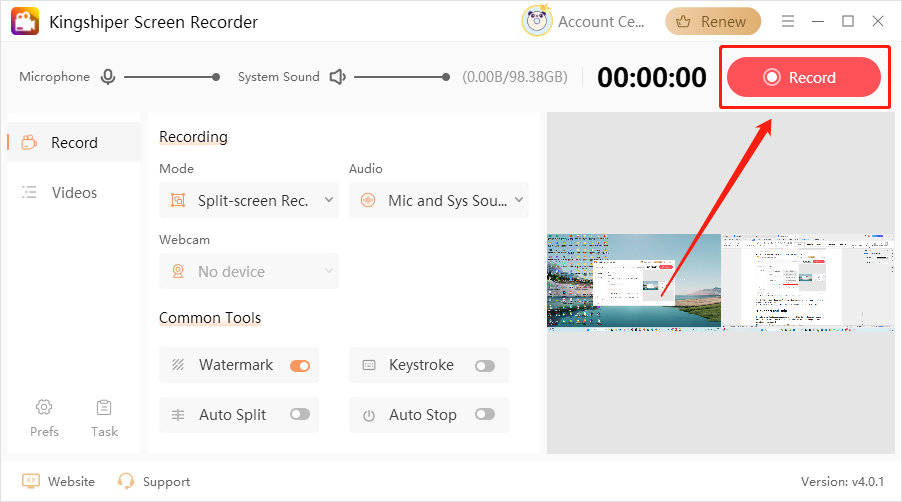
Step 4. While recording, locate the floating window in the bottom-right corner and click the red square to stop the recording.

Step 5. After the recording is complete, you can easily view the video in the Video Lists.

4 Support and Help
If you have any feedback or suggestions on the Kingshiper Screen Recorder, please do not hesitate to let us know. We are also enthusiastic about replying to all your questions about using it.
Please feel free to contact us and we'll help you right away.
Submit Tickets: https://www.kingshiper.com/contact
Email: [email protected]


 All
All


 Hot Products


