Multimedia Tools
Video Tools
Audio Tools
Image tools
Record and Edit Porfessional Videos on Mac
Windows Desktop Screen Recording Software
Easy and Fast Way to Compress Video and GIF
Screen Mirroring App for iPhone/Android/PC/Pad
All-in-one video toolkit that supports converting over 1000+ formats
Portable audio format converter, which supports common audio format conversion, multiple audio merging, audio compression, audio segmentation, and one click batch conversion of audio formats
Cut, copy, paste, insert audio, add effects and other editing functions, which can easily re edit the recorded audio files and make ringtones, adding a unique personality to your life.
Karaoke Maker and Vocal Extractor on Mac
Extract vocals and instrumentals from any audio and video track with the latest AI technology.
Best Voice Recording Software for All Windows Users
Convert Audio/Video to MP3/WAV/FLAC/OGG
Utilities
Office Utilities
Simple and powerful office solution for file compression, extraction, transferring, and sharing. Easily to process multiple files in seconds!
A powerful, simple and easy to operate PDF to word converter, which supports the conversion between PDF documents and multiple formats such as doc, ppt, pictures and txt documents; The software has the functions of fast conversion, batch conversion, high-quality identification, etc
Fast Way to Reduce Your File Size
The best and perfect tool to convert various ebook files with ease.
Convert Videos, Audios, Images, PDFs, and Word with Ease
Seamless Conversion for PDF to JPG & JPG to PDF
Shrink size of PDFs, images, and videos without losing quality
Extract & Manage & Compress Files in Seconds
System & Recovery
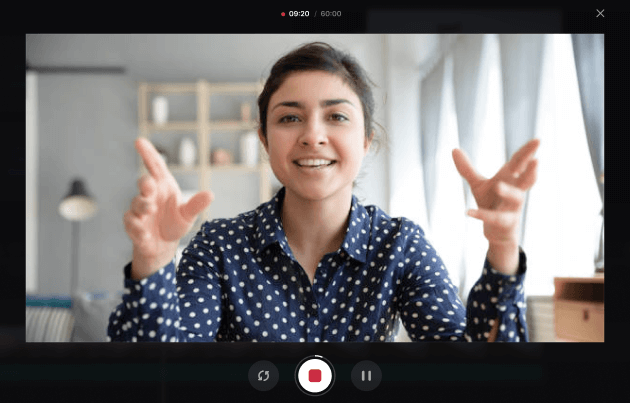
Nowadays, recording your own videos or audio has become a part of many people's daily activities. For content creators or even regular users, capturing and saving their voice or video is a smart choice. It allows them to review their performance anytime or share the content with others.
Whether you're using a Windows laptop, a Mac, or online recording tools, it's easy to use recording software to capture your voice and video. Then, how to record yourself on laptop or PC? Read this article and discover various methods that work across various devices.
Devices | Tools | Effectiveness | Difficulty |
Windows Laptop/PC | Kingshiper Screen Recorder for Windows | High: 4K recording with audio, no lag or stuttering issues | Super easy |
Camera App | Medium: Simple tool for recording, but limited in features | Easy | |
Mac | iMovie | Moderate: Offers robust editing options but requires setup and familiarity | Moderate |
Kingshiper Screen Recorder for Mac | High: Easy to use with high-quality recording features, real-time annotations, and no lag | Super easy | |
Online | 123 APPS Video Recorder | High: No signups, downloads, or installations required | Easy |
If you want to record yourself on a Windows laptop, the good news is there are multiple options available. The key is to pick the right tool that suits your needs and ensure that both audio and video are recorded during the process. Follow the steps below to record yourself on PC.
To efficiently record yourself on a laptop, it's essential to choose a powerful tool right away. If you're looking for an affordable yet high-quality solution to record yourself and screen at the same time, turn to Kingshiper Screen Recorder. This screen recording software helps record videos on Windows 11/10/8/7 with simple clicks. It has many highlights.
Download this webcam recorder and record yourself on a Windows PC/laptop.
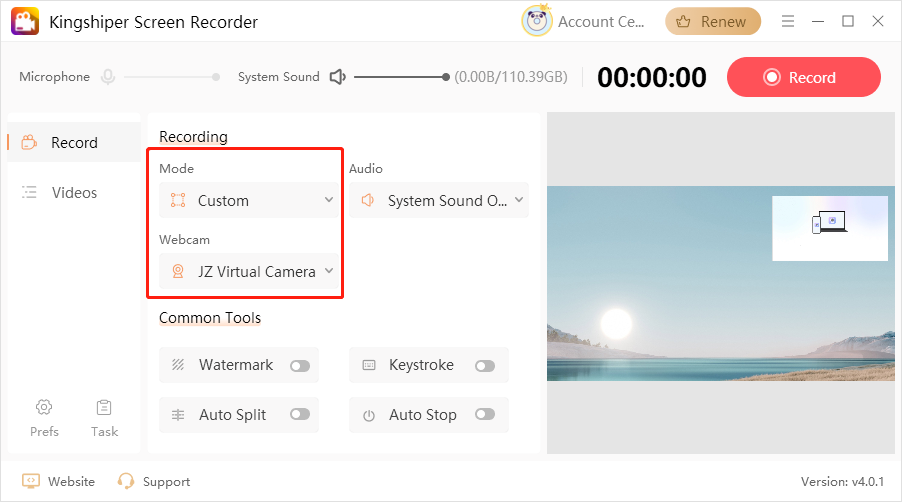
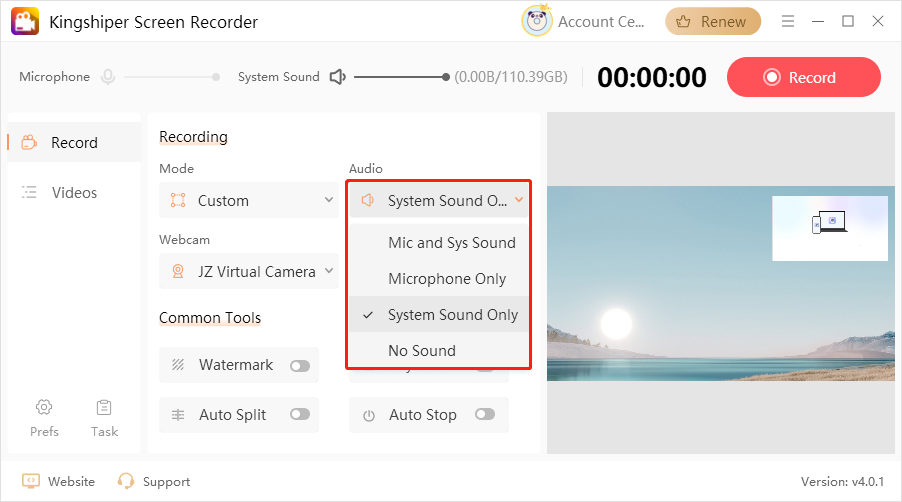
Step 1. Launch the program and select “Full Screen” or “Custom” mode. Then, choose your camera from the Webcam dropdown menu and click to select it.
Step 2. Adjust the recording settings, such as display, audio, and other parameters based on your needs.
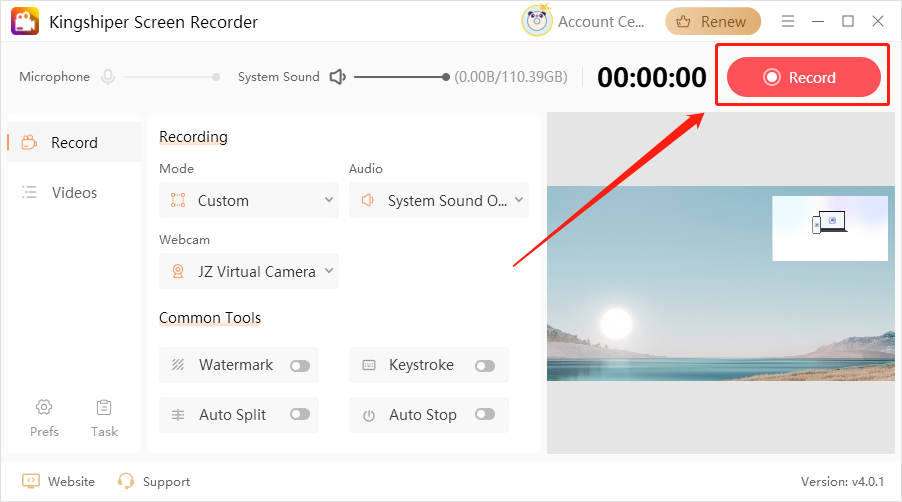
Step 3. Once you're set-up, click the “Record” button in the top-right corner of the main interface to start recording. After you're done, the software will automatically save your video.
You may also like: Record Your Gameplay on PC; Best 6 Valorant Recorders to Highlight Gameplay Clips; How to Crop Screen Recordings
One effective way to record yourself is using the built-in Camera app on your Windows laptop. Follow the steps below to record the webcam:
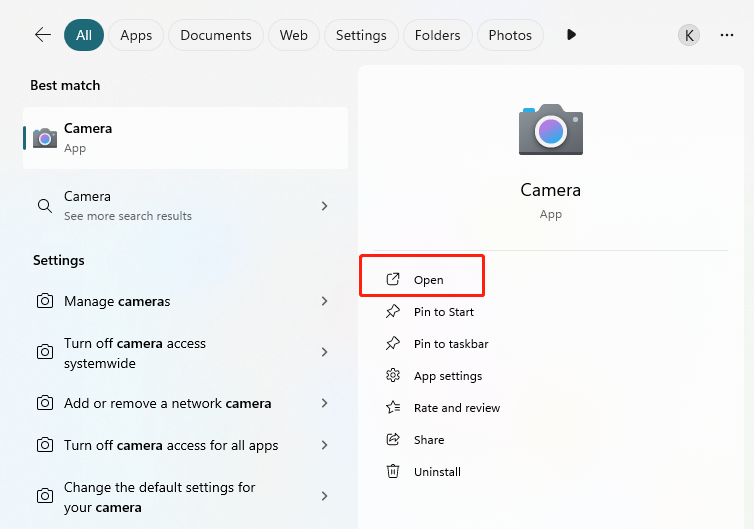
Step 1. Go to the Windows search bar and type “Camera”. Find the app and click on the “Open” button to launch it.
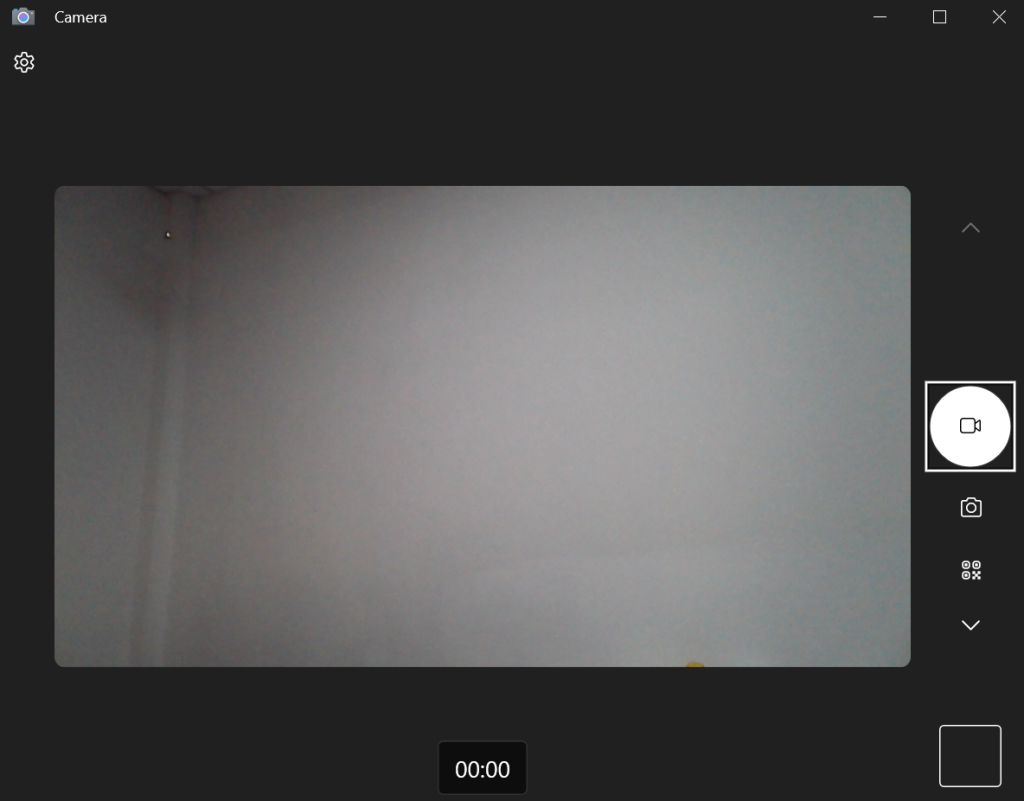
Step 2. Once the app is open, you can click the “Take videos” icon to record yourself.
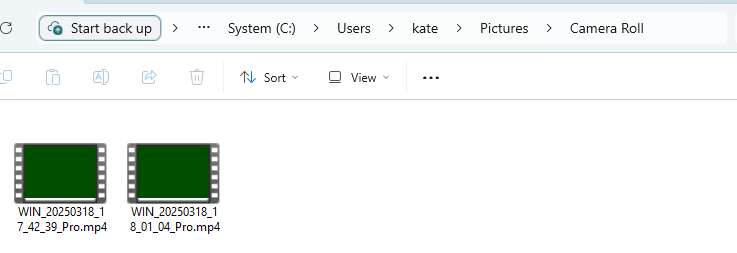
Step 3. When you're done, click the red “Stop taking video” button to finish recording. Your video will automatically be saved in the "Camera Roll" folder.
But if you are eager to record yourself and screen at the same time, consider using the Kingshiper Screen Recorder.
Recording yourself on a Mac can be an easy and straightforward task. You can use the iMovie or other third-party recording software. Keep reading to get the full guide.
iMovie is a powerful multimedia editing tool built into macOS devices. It is commonly used as a video editor, providing features such as cutting, rearranging, and adding effects. However many users may not know that this tool can also be used to record videos of yourself, capturing directly from your webcam.
Step 1. Launch iMoive on yur Mac. Go to the menu bar and select “File” > “Imort Media” to create a new project.
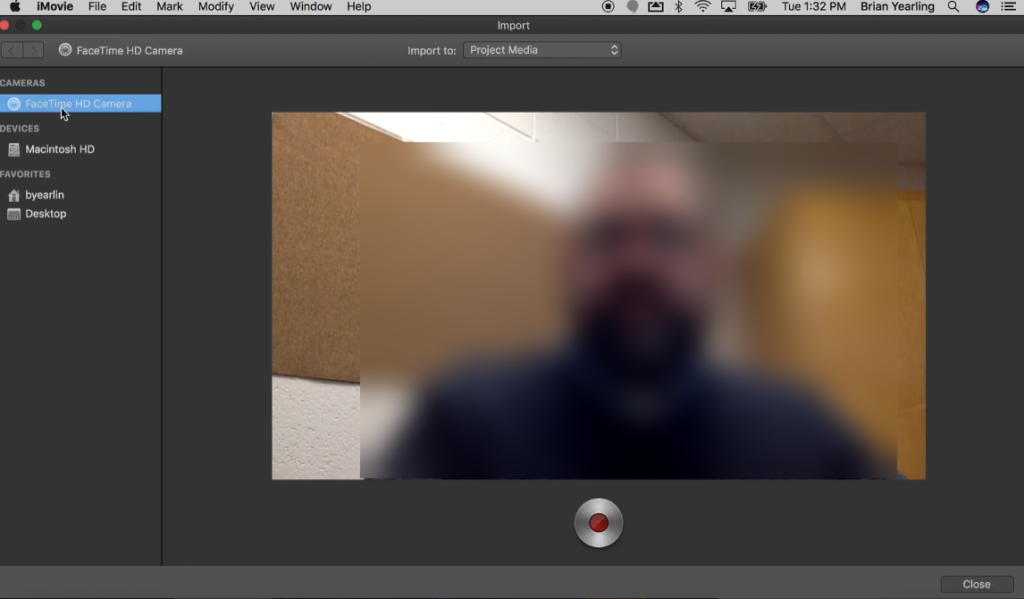
Step 2. In the left panel, under the Camera section, choose “FaceTime HD Camera” and grant it permission to access your camera.
Step 3. Now, click the red “Record” to begin recording yourself.
Recording yourself on a Mac can be a bit tricky, but thanks to the Kingshiper Screen Recorder for Mac, it is now very simple. Kingshiper Screen Recorder for Mac is an effective and reliable screen recorder that supports high-quality video and audio recording on your Mac. It features powerful recording mods, so you can capture both screen and webcam simultaneously, making it ideal for various needs such as tutorials, meetings, gaming, and more.
Download Kingshiper Mac Screen Recorder and record yourself on Mac with the steps below:
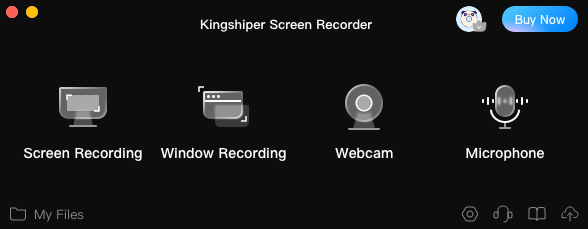
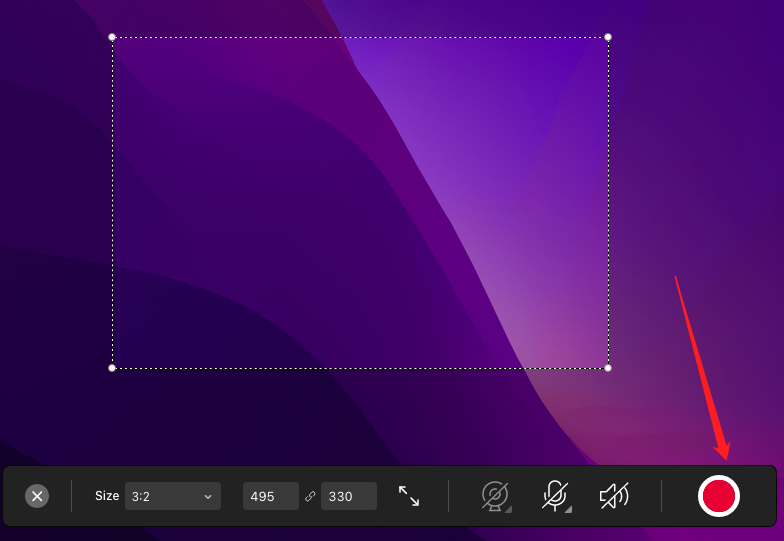
Step 1. Launch Kingshiper Screen Recorder on your Mac computer and choose “Screen Recording”.
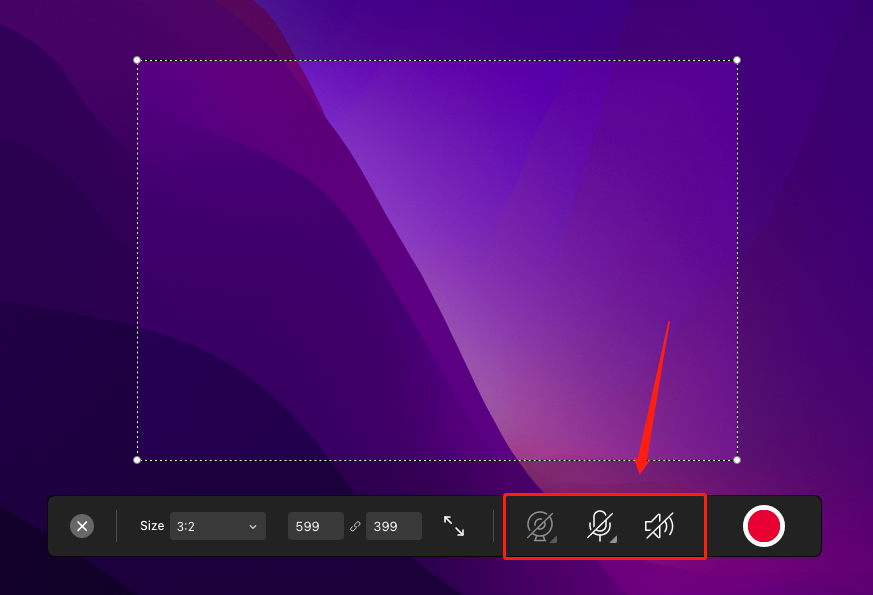
Step 2. Turn on the webcam, microphone sound and system sound from the floating menu bar to record yourself and the screen at the same time.
Step 3. Click the red “Record” button to start recording. When you’re done, click the same icon again. Your recording will be saved in the “My Files” list.
For those who prefer to record themself online on PC, 123APPS is a great free choice. It is a powerful online tool to record the webcam from your browser. This tool is particularly useful for hassle-free recording and you don’t need to download and install other software on your desktop.
Here’s the step-by-step tutorial on how to record yourself via an online webcam recorder:
Step 1. Visit the 123APP website and find the Video Recorder tool.
Step 2. Click the “Start Recording” button. Select your camera and microphone as the recording sources. You can adjust the audio and video settings as needed.
Step 3. Finally, click "Record" to start recording yourself online.
● Check Audio & Video Quality: Before starting the recording, do a test to check the audio and video quality. Play back the test recording to ensure the sound and video are clear.
● Use a High-Quality Microphone: Choose a dedicated microphone for recording, as it can significantly enhance the recording quality and make the audio sound more professional.
● Keep the Background Simple: Choose a clean and uncluttered background to keep the focus on you and your content.
● Adjust the Camera: Ensure you are positioned in the center of the frame, and stay within the frame during the recording. Avoid frequent movements to prevent the focus from shifting away.
● Screen Recording Modes: Make sure to select the appropriate recording area, such as a full screen or a selected region. Avoid fast animations or quick movements on the screen to make the video easier to follow.
From desktop programs, and built-in tools to online options, all can help you record yourself on a laptop. Among them, Kingshiper Screen Recorder is the best choice for recording yourself. It provides a simple solution and supports recording 4K video and audio. You can access this tool from multiple platforms like Windows and Mac. It also enables you to annotate the screen content in real-time during recording, with no lag or stuttering issues. You can download it now by pressing the button below.