Got it

How to Screen Record on MSI Laptop: 7 Steps

Want to learn how to record high-resolution and lag-free screen videos on your MSI laptop? This tutorial is going to share a free screen recorder to effortlessly help you record and compress videos without losing any quality. Whether you're capturing gameplay, tutorials, or online meetings, this tool can meet your needs. Let’s get started with how to screen record on MSI laptop with the app.

My Test Equipment for Screen Recording Evaluation

CategorySpecification / Model
Operating SystemWindows 11 Pro 22H2
CPUIntel® Core™ i7-12700H (Max Turbo 4.7GHz)
GPUNVIDIA GeForce RTX 3060 6GB
RAM16.0 GB DDR4
Storage1 TB NVMe SSD (Approx. 800GB Free)
Display15.6” FHD (1920x1080, 144Hz)
Recording SoftwareKingshiper Screen Recorder (latest version)

Why Record Your MSI Laptop?

MSI laptops, designed with high-performance hardware and advanced optimization technologies, provide smoother and more professional screen recording capabilities. Here are some practical scenarios:

  • Create a Professional Portfolio: Record your programming, design, or 3D modeling workflow to visually showcase your skills and create a standout digital resume.
  • Record Gaming Highlights: Take advantage of high refresh rate displays and powerful GPUs to smoothly record gameplay and highlight your best in-game achievements.
  • Boost Remote Collaboration: Clearly document meetings and lectures, with noise-canceling mics ensuring no important details are missed.
  • Optimize Hardware Performance: Record overclocking settings and benchmark results for performance analysis, troubleshooting, and optimization.
  • Produce High-Quality Videos: Utilize color-accurate displays to record 4K video, perfect for video editing or product reviews.

How to Screen Record on MSI Laptop - Easiest and Free

Kingshiper Screen Recorder is a light and powerful screen recorder for Windows 11, 10, 8, and 7. Its default settings intelligently balance video quality and file size, while offering extensive customization options, allowing everyone to have the ability to adjust the recording settings according to their needs.

Kingshiper Screen Recorder

Official

Download

After downloading, installing, and launching Kingshiper Screen Recorder, let’s see how to screen record on MSI laptop.

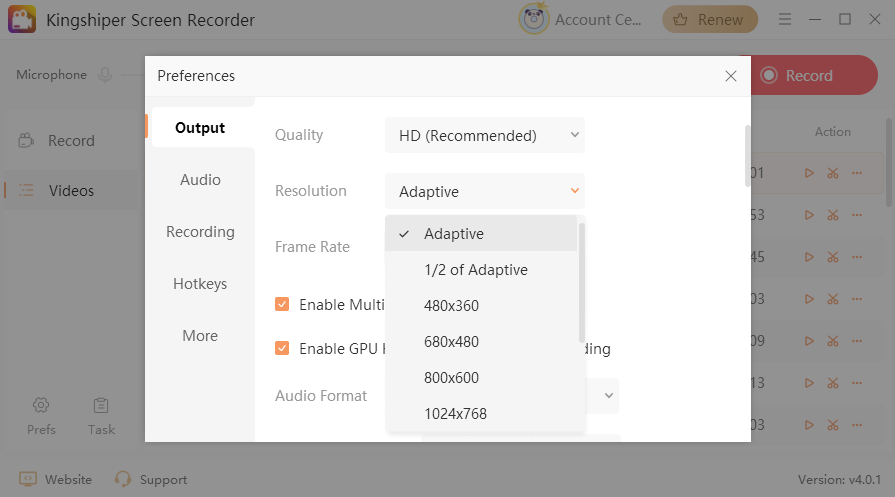
Step 1Choose Video Resolution

Best Choice: Adaptive

With the "Adaptive" mode, the program automatically adjusts the resolution based on your MSI laptop configuration, ensuring fast screen recording without any lag while maintaining professional video quality.

kingshiper-screen-record-msi

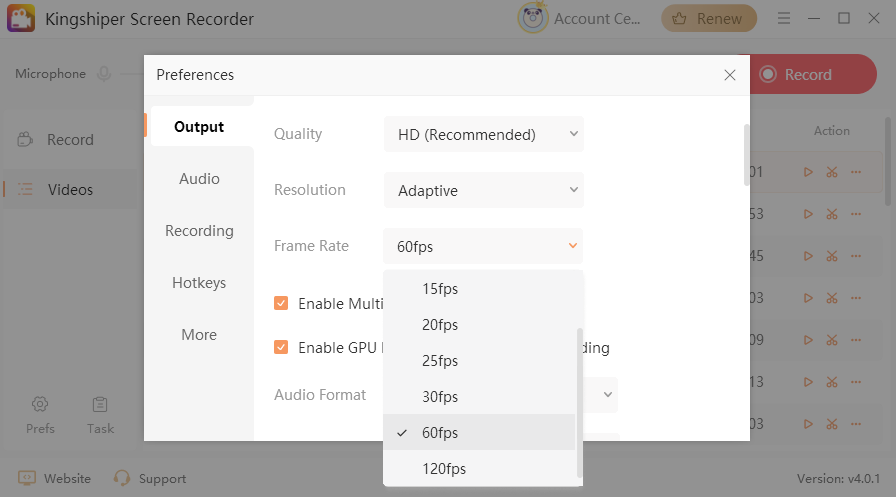
Step 2Choose the Frame Rate (FPS)

Best Choice: 60fps

If you are recording fast-paced scenes like game videos, 60fps will ensure smooth visuals and clear details. It is suitable for most high-dynamic content.

kingshiper-screen-record-msi-2

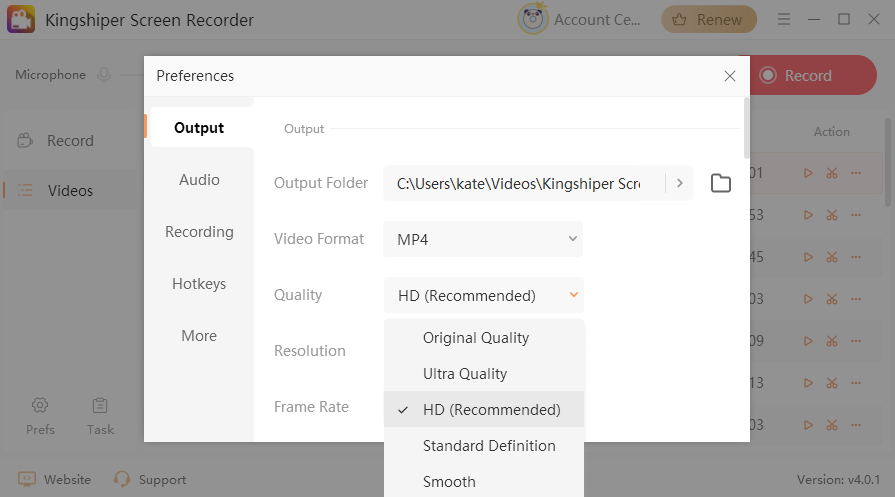
Step 3Adjust Video Quality

Best Choice: HD

Kingshiper Screen Recorder offers five video quality options to choose from:

  • Smooth: Low quality, suitable for a low-end PC.
  • SD: Standard definition, good for regular recording needs.
  • HD: High definition, suitable for most usage scenarios.
  • Ultra Quality: Ultra high definition, perfect for recordings that require the best possible quality.
  • Original Quality: Keeps the original quality, with larger file sizes.
kingshiper-screen-record-msi-3

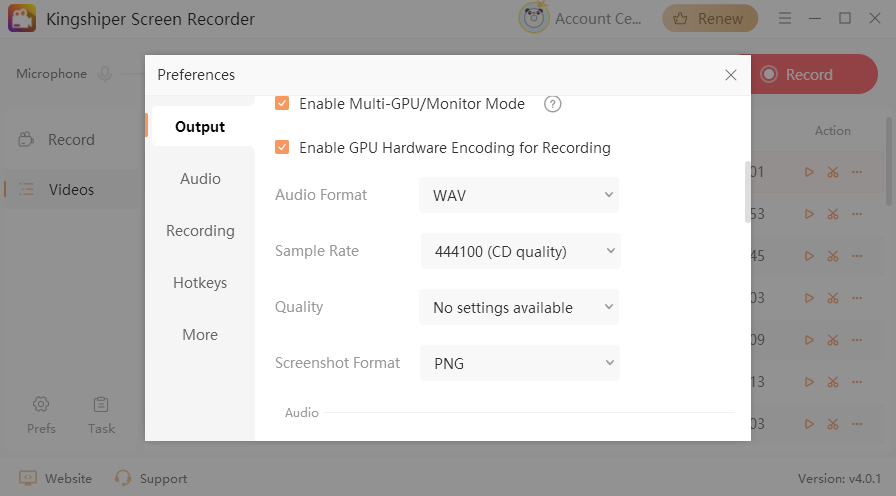
Step 4Optimize Audio Parameters

Choose the appropriate audio output parameters, including Sample Rate, Format, and Quality, based on your recording needs to ensure optimal audio quality for your recordings.

kingshiper-screen-record-msi-4

Step 5Select Recording Mode

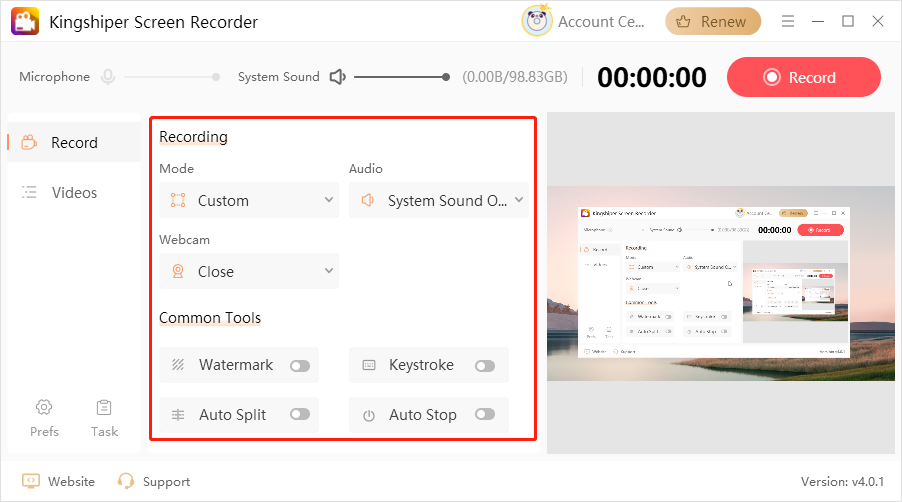
Once the video and audio settings are configured, return to the main interface and select the recording mode (full screen, custom, etc.) and audio source. You can also use common tools available below, such as scheduled recording or keystroke.

kingshiper-screen-record-msi-5

Step 6Start Recording

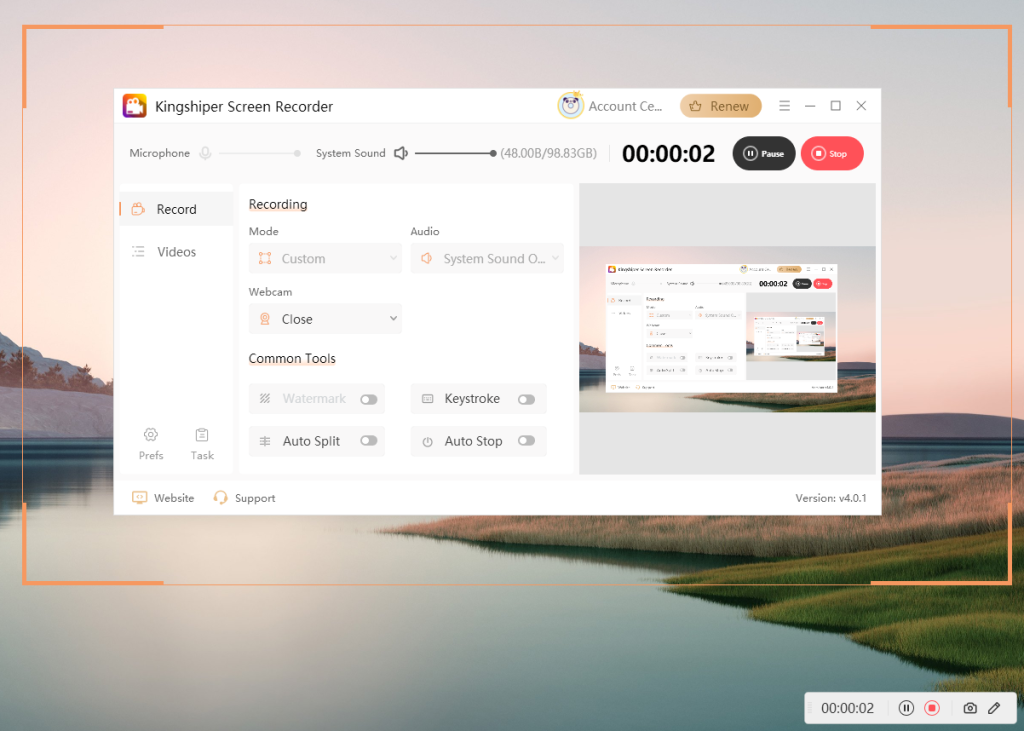
Click the red “Record” button in the top-right corner of the interface to start screen recording. During the recording, you can add real-time annotations, highlights, and more. Once the recording is complete, click the “Stop Recording” button in the floating window to end the recording.

kingshiper-screen-record-msi-6

Step 7View the Recorded File

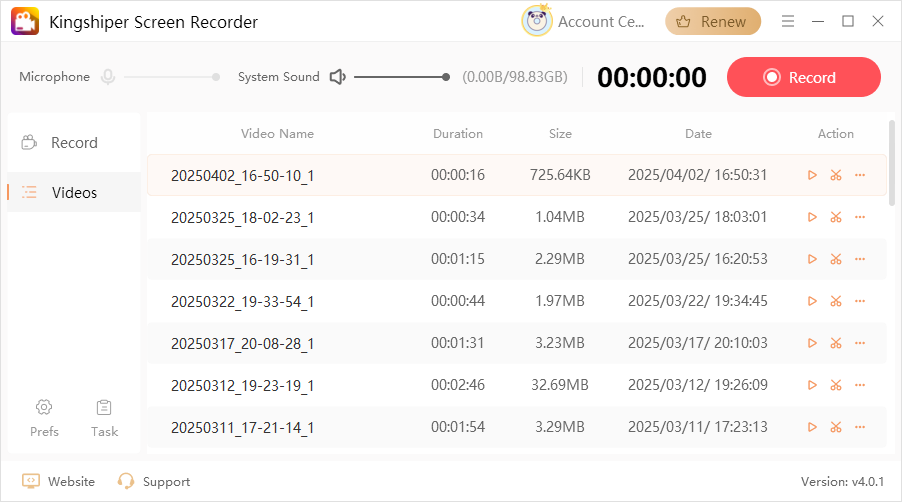
After recording, the file will be automatically saved to the default export folder. You can view, play, or rename the recorded file from the “Videos” list.

kingshiper-screen-record-msi-7

FAQs about Screen Recording on Your MSI Laptop

We introduced you to the best method and screen recorder on MSI laptops. Now it’s time to give you answers to the most frequently asked questions related to this feature.

Q1: Why is My MSI Laptop Laggy When Screen Recording?

Screen recording lag may be caused by high hardware load, excessive recording settings, or outdated graphics drivers. You can use a screen recording tool with hardware acceleration, like Kingshiper Screen Recorder, or lower the FPS to improve recording smoothness.

Q2: How to Record Microphone Sound While Recording Gameplay?

Enable microphone access in the audio settings of your recording software and select the “Mic and Sys Sound” input. Using an external microphone is recommended to reduce keyboard noise interference.

Q3: What to Do if the Recorded Video File is Too Large?

You can use a Kingshiper Video Compressor to reduce file size. Adjusting recording parameters, such as lowering the bitrate, can also help balance quality and file size.

Summing Up

This article provides detailed steps on how to screen record on MSI laptop. Hopefully, those instructions will help you understand how you can record video without any lag and optimize recording settings for the best results. It is very easy to record your screen on an MSI laptop with Kingshiper Screen Recorder. The process is simple and quick, making it easy for even beginners to get started. This is a great chance to enhance both work and entertainment experiences.

Latest Articles