Lecture recording is a smart study strategy. It significantly benefits in-person, online, and asynchronous learners. Based on related 51 studies, students use the lecture recordings as a study aid or to review complex and hard-to-grasp information.
Recording lectures is not challenging to implement, but there are aspects warrant focus, such as how-to, best apps, and practices in accordance with regulations.
In this article, I will introduce the best way to record lectures for different scenarios including tools and tips to record efficiently. Besides, how you can record lectures in a policy-compliant way.
How to Record Lectures in an In-Person Class? 3 Ways
For a traditional style lectures - students and teachers physically present in the classroom, the best way to record lectures is to use a recording device to capture the presentation and teacher voice. In this way, you will not miss the details on the slides and record the teacher's explanation.
1Use your smart phone/tablet
Make good use of the native camera and voice recorder in your smartphone or tablet. This is the most convenient and accessible way to record a classroom lecture.
Modern smartphones have high-quality microphone and camera capable of capturing clear audio and images. Like Samsung Galaxy and iPhone are able to offer 5x or 10x optical zoom.
Tips: ● Turn on Airplane or Do Not Disturb Mode to prevents interruptions. ● To get clear audio, consider to use an external clip-on (lavalier) mic with your phone. ● As for advanced recording features, such as AI summary or speech-to-text transcription, you can install a powerful 3rd screen recorder to help.
2Use digital voice recorder watch
A wearable vioce recorder can be one of the best lecture recording tools for students. The device has capabilities of high-quality audio recording and ample storage (some even up to 1000+hours audio recording).
If you prioritizie audio quality for lectures, you should try a recorder watch.
3Use a video recorder device
Using a video recorder for lecture recording is somewhat professional. But for colleges, those use very large classrooms for teaching, a video recorder is the best solution.
For examlpe, Zoom's Q2n-4K offers a 150° wide-angle lens to capture wide classroom view and presentation. Its XY stereo microphone will help record the teacher voice clearly.
In addtion, video recorders commonly allow to use extra SD cards for long lecture recording. So, storage isn't an issue.
How to Record Online Lectures? 4 Ways
Joining online lectures via laptop or PC is common. When it comes to recording, various tools remain helpful.
1Use native screen recorders on Windows/Mac
This methods is best for pre-recorded lectures recording. You can just open the materials on your computer and start screen recording with the device's built-in tool. Shortcut keys are as follows:
● For Wins (Xbox Game Bar): Windows key + Alt + R.
● For Mac (Screen Recording Toolbar): Command (⌘) + Shift + 5.
2Record with in-app screen recording feature
Many teachers bring virtual classes through live video conferencing, using platforms like Zoom, Google Meet, Microsoft Teams, and others.
A good point is that the platforms often come with built-in screen recording feature. This makes lecture recording very easy.
To use the in-app screen recording on Zoom, Google Meet, and Teams, check out the instructions below. As you join the online lecture session, you can start recording right away.
How to Start
Scope
Zoom
● On Mobile: tap More > Record to the Cloud ● On Desktop: click Record at the bottom toolbar
Shared screen content; all audio; in-meeting chat messages; audio transcription
Google Meet
● On Mobile: not support ● On Desktop: click the three dots > Record meeting > Start recording
Video and audio of all participants; presentations; screen shares; chat message
Teams
● On Mobile: tap More actions > Start recording ● On Desktop: Click the three dots > Start recording
Video, audio, and screen sharing; no chat, whiteboards, or annotations
Learn more recording tips:
AI transcription is an important feature to enhance efficiency, accuracy, and accessibility. When you're recording a lecture, you can activate the audio transcription feature with the platform you used.
For example, Zoom provides native AI transcription, you can set it up in the Zoom web portal > Account Management > Account Settings > Recording > Cloud Recording > Advanced Cloud Recording Settings > Create audio transcript.
Of course, you can consider to use a third-party options (e.g. Krisp, Notta) which will act as an assistant bot and can be integrated with Zoom.
3Use OBS Studio
OBS is actually a livestreaming tool but with powerful screen recording feature. Its free and open-source advantages make it an ideal choice for students to record lectures.
The tool is able to capture different video and audio sources and put them together to record. These sources are available: the entire display, a specific window (browser or app), webcam feed, microphone audio, system audio, etc. Besides, OBS gives you control over recording quality including resolution, rame rates, and bitrate.
How to use OBS for lecture recording?
Step 1. Open OBS and find the Sources menu.
Step 2. Click the + button to add and customize what you need to capture.
Step 3. Select one or more sources.
● Display Capture: choose it if you want to record the entire screen or a selected monitor. ● Window Capture: a specific app or program window. ● Browser: able to enter a specific url and capture the web content. ● Video Capture Device: use it if you want to record webcams and capture cards.
Step 4. Adjsut and manage the sources in the preview area.
Step 5. Click Start Recording.
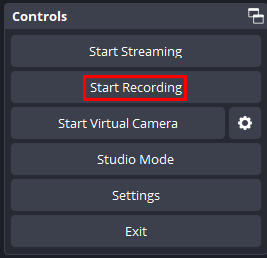
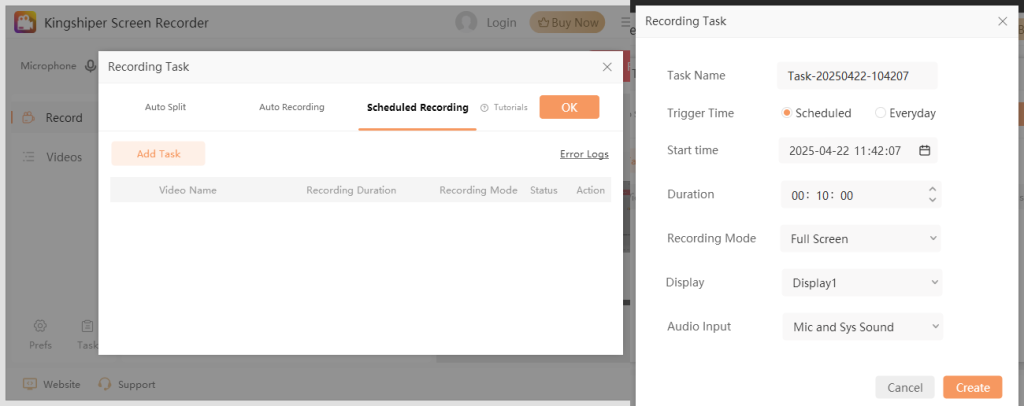
4Kingshiper Screen Recorder
Assume you have scheduled online lectures. But sometimes, you may not be able to attend on time. A screen recorder with scheduled recording feature sounds great, isn't it? Use it and you will not miss the online lesson.
Kingshiper Screen Recorder's Scheduled Recording allows you to set a time and record automatically.
Step 4. Complete the settings of Duration, Mode, Display, and Audio.
Step 5. Keep Kingshiper running in the background and do not shut down the computer.
Now you can leave the recording task.
Is Recording Lectures Legal? How to Record in Compliance with Policy?
You should know that lectures are generally protected by copyright. They belongs to the lecturer or the institution that employs them. So, you can not record lectures secretly and privately. Otherwise, it's illegal.
But that doesn't mean you can't do it at all. Meeting these conditions makes it legal:
Permission Required - Obtain explicit permission from the professor or appropriate university authority before recording lectures. Recording without consent is often against institutional policies and may infringe on the professor’s copyright.
Personal Use Only - Even when recording is allowed, the recordings are usually for personal study use only. Sharing, distributing, or publicly posting recordings without permission is typically prohibited and may violate copyright laws.
In addtions, students with documented disabilities or approved ADA accommodations have a legal right to record lectures. Laws like Section 504 of the Rehabilitation Act of 1973 give aid to such cases.
Other Best Practices
Thinking you need study resources, you can ask if your teacher will post the video for those who did not attend. Many teachers will upload their lectures on LMS.
Or, you can search it on the college website or library resources. These are public resources. Check the licenses ands terms before using them.


 All
All