Nowadays, steam recording has become essential for sharing epic moments and building audiences for gamers and content creators. As the largest digital game distribution platform in the world, Steam offers over 50,000 games, attracting millions of players every day to dive into popular titles like “CSGO”, "Overwatch," and “Fortnite.”
Want to record Steam on PC or macOS without spending a dime? We've got you covered. This article will teach you to record Steam without any cost. Let’s check for more information.
Quick Answer:How to Record on Steam Efficiently
The best way to record Steam on PC or Mac depends on your operating system, recording needs, and feature preferences. Here we offer 7 Steam recorders for both Windows and Mac users. Let's have a quick navigation, and you may choose the way that suits you most:
Kingshiper Screen Recorder: A professional yet lightweight screen recorder compatible with Windows 7/8/10/11. It supports 1080P and 4K game recording, capturing both system audio and microphone simultaneously. You can also record webcam and the screen in one picture. It is ideal for gameplay tutorials or live commentary videos.
Built-in Steam Screen Recorder: Steam comes with a built-in screen recording feature. It’s perfect for gamers who only need basic recording without installing any third-party software. Simple and easy to use.
Xbox Game Bar: A built-in recording tool for Windows 10 and 11. Press “Win + G” to launch. It allows simultaneous recording of system audio and microphone. However, it only supports full-screen or current window recording.
Bandicam: A user-friendly third-party recorder that supports game recording, webcam, and separate audio tracks. It covers most gamers’ needs for recording Steam gameplay for free.
OBS Studio: A free and open-source tool for screen recording and live streaming. It offers multi-audio track input, source overlays, scene transitions, and more. It delivers excellent recording quality but has a steeper learning curve for beginners.
Record Go: A Mac-exclusive recorder supporting full screen, custom region, and webcam capture. It also offers virtual background features to help protect your privacy while recording gameplay.
Snagit: Best for light recording tasks. It supports basic editing, microphone recording, and a simple interface. Great for creating Steam tutorial videos, but not suitable for high-frame-rate or heavy gameplay recording.
How to Easily Record Steam on PC Without Lag
For a novice or professional, using a free third-party screen recording software to record on Steam is one of the easiest and most efficient methods.
Kingshiper Screen Recorder offers a simple and intuitive interface to record Steam games without putting a strain on your system. It ensures smooth, lag-free recordings so you can focus on the game without any interruptions.
Features:
Record your gameplay in sharp detail and smooth resolution.
Flexible recording options let you choose to record Steam.
Optimized hardware acceleration for smooth recording, even on lower-end PCs, without any lag or delays.
Save your recording in multiple formats, including MP4, AVI, MOV, and more.
Download Kingshiper Screen Recorder to your Windows or Mac desktop to start recording your Steam gameplay for free.
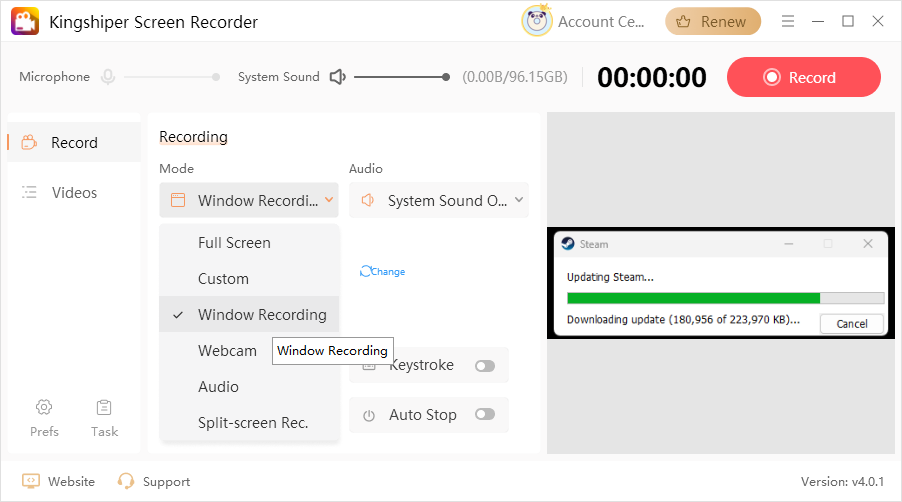
Step 1. Run Kingshiper Screen Recorder, and choose “Window Recording” mode.
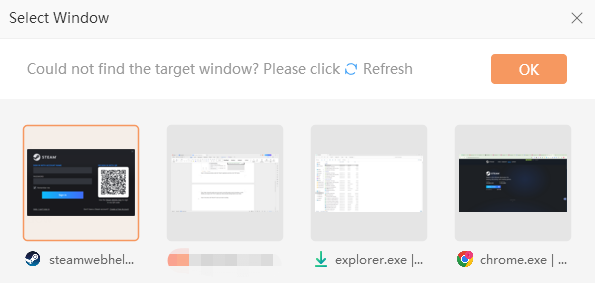
Step 2. In the pop-up window, select the “Steam” application and click on the “OK” button.
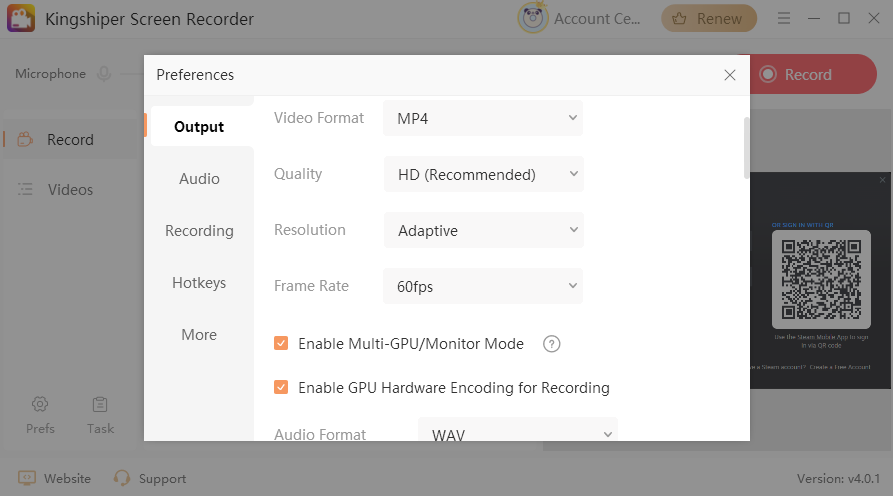
Step 3. Next, choose the audio source you want to record, like system sound, microphone, or both. Besides, you can go to the “Prefs” to adjust your video and audio settings based on your needs.
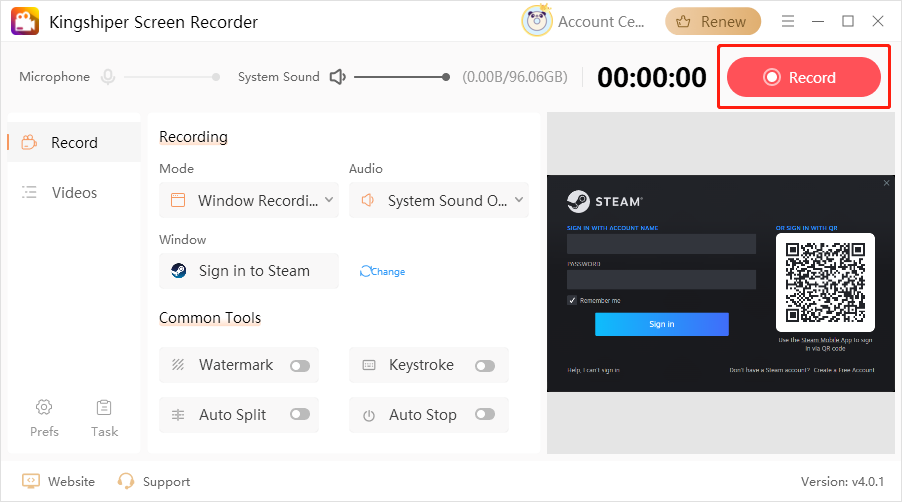
Step 4. Once done, click “Record” to start your Steam recording.
Record on Steam with Built-in Steam Game Recorder
If you're using Windows 11 and want to record your Steam gameplay, you can use Steam's built-in game recording feature, which saves you from the hassle of installing additional software. This feature allows you to capture both video and audio from games played through the Steam client, and it works on nearly all Windows computers.
Let’s see how to record on Steam:
Step 1. In the Steam application, click on the “Steam” menu in the top-left corner, then select “Settings.”
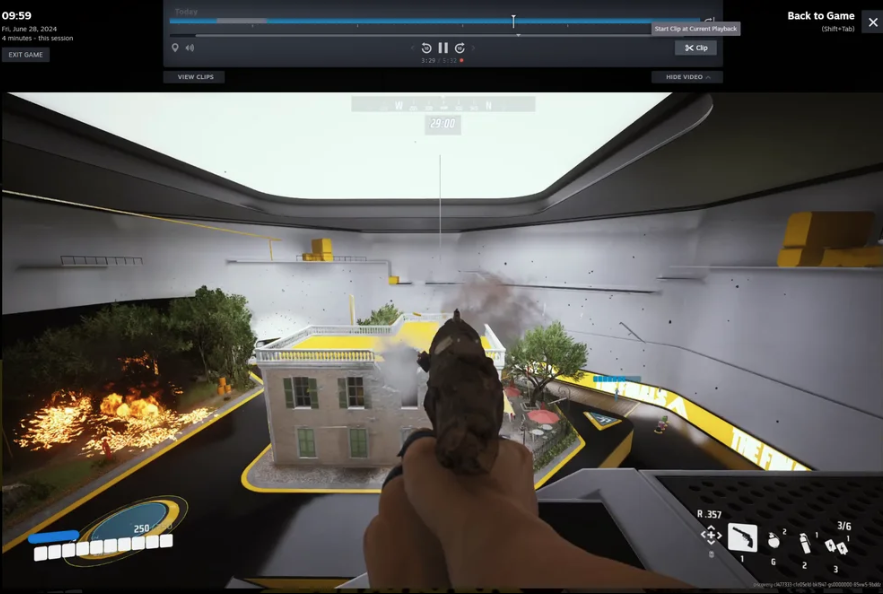
Step 2. In the Settings window, click on the “Game Recording” option. Or, while playing a game, press “Shift + Tab” to open the Steam toolbar, then click the "Game Recording" tab at the bottom of the screen.
Tip: You can choose from three recording modes: Off (no recording), Record in Background (which records every time you play a game), and Record on Demand (which only records when you manually start it).
Step 3. After selecting your preferred recording option, return to your game and click the “Record” button to begin recording.
Step 4. Once your recording is complete, stop the recording and go to the “View > Recordings & Screenshots” section to view your recorded files, or check the “Media” tab to access them.
Use Xbox Game Bar for Steam Recording on Windows 10 and 11
For Windows 10 and 11 users, you can also use the Xbox Game Bar, one of Windows' built-in screen recorders, to record your Steam. To do so:
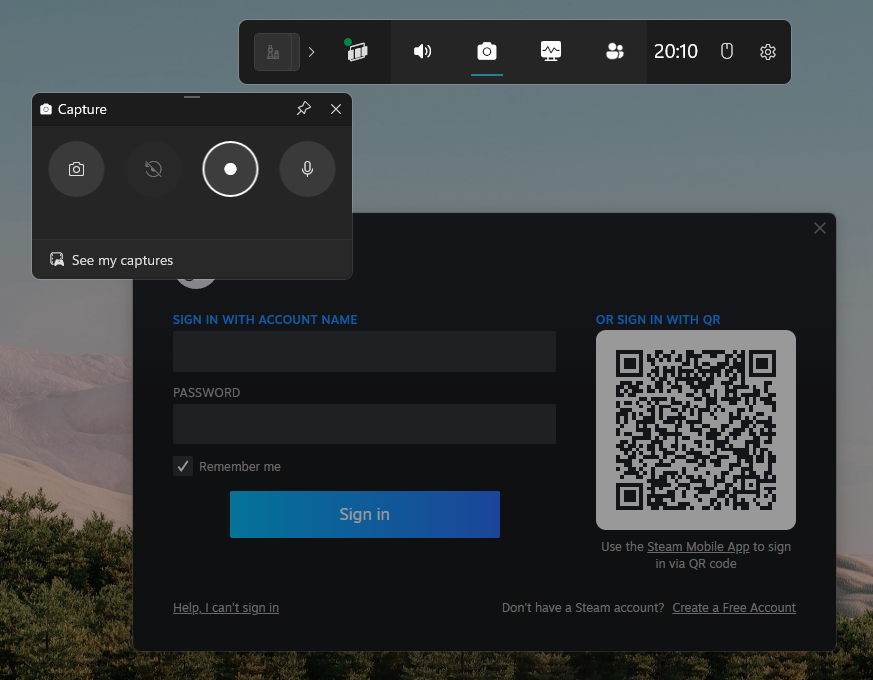
Step 1. Press “Win + G” to open the Xbox Game Bar panel.
Step 2. Click the “Capture” icon on the toolbar. If you need to record audio from an external microphone, make sure you have enabled the microphone input option.
Step 3. Hit the “Start recording” button (the white circle) or press “Win+Alt+R” to start and stop recording.
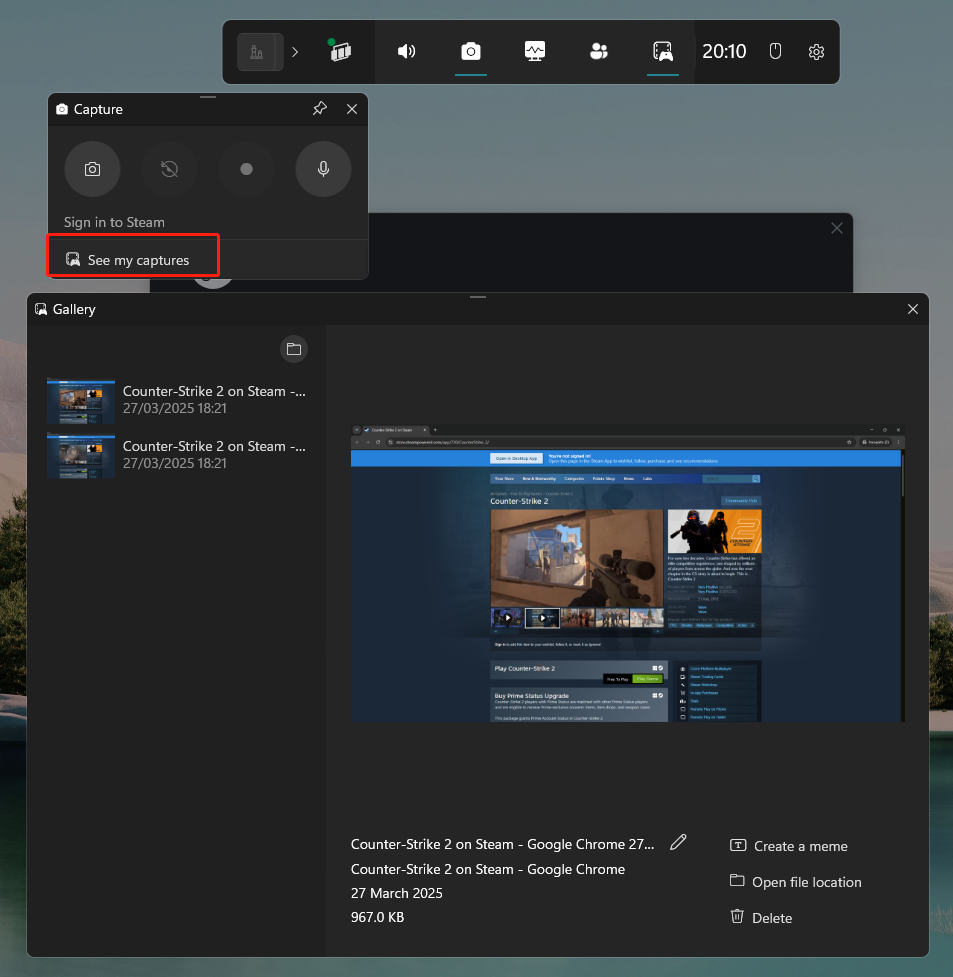
Step 4. Go to “See my captures” to find your recorded files. The Xbox Game Bar is great for basic recordings. For more advanced features like live annotations or recording only microphone audio, you can refer to the first method in this guide.
Record on Steam via Bandicam Game Recorder
Bandicam is also a highly popular PC game recorder, particularly well-suited for Steam recording. It can not only capture the computer screen but also record games from external devices like game consoles and Android emulators. This tool supports high frame rate recording up to 120FPS, making it especially ideal for competitive games that require smooth pictures.
How to record a Steam game with Bandicam:
Step 1. Download and install Bandicam on your Windows 11 PC.
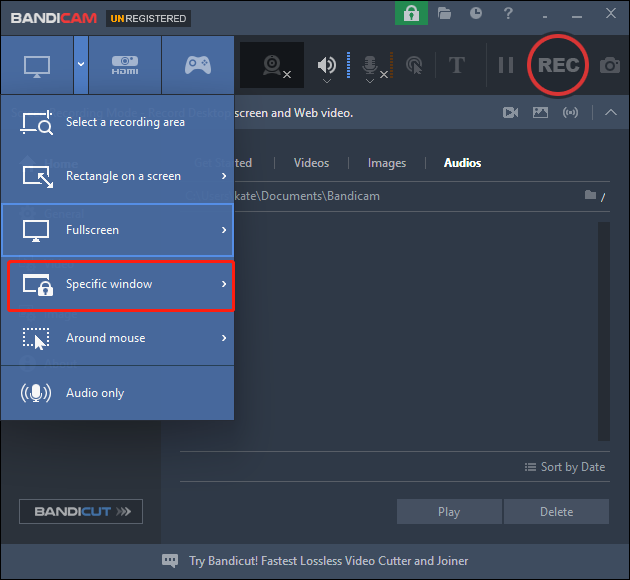
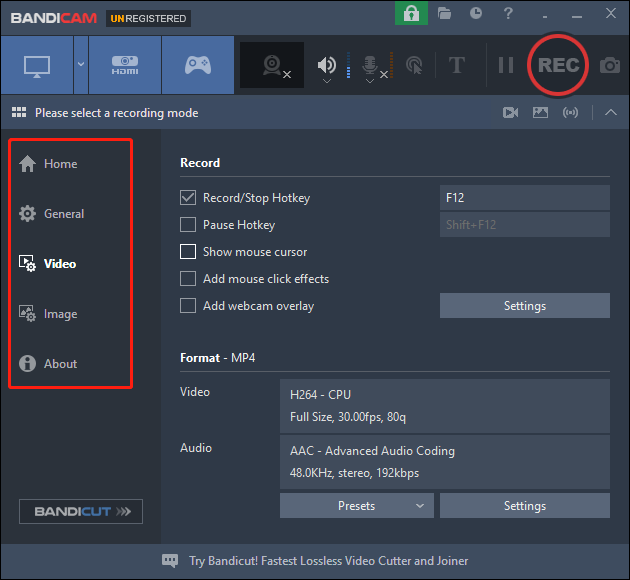
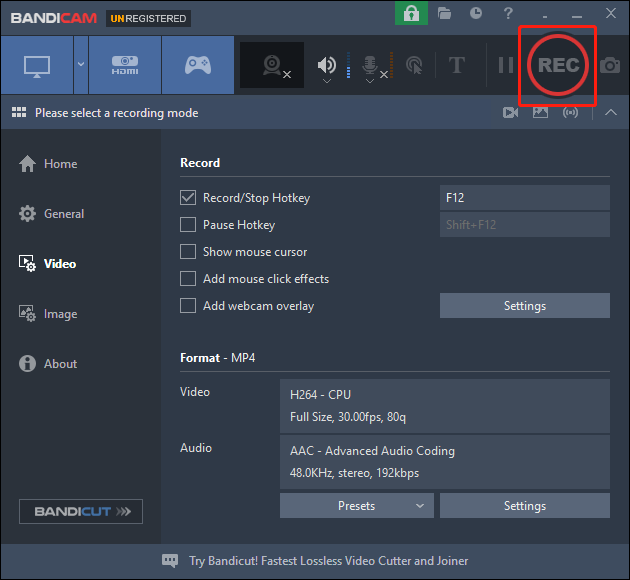
Step 2. In the drop-down list of screen recording modes, select “Specific window”.
Step 3. Then, you can adjust the parameters below, including General, Video, Image, and Audio.
Step 4. When you’ve finished all the settings, click the “REC” button to start the recording process.
Steam Recording on Mac with OBS Studio
In the above tutorials, we focused on how to record Steam on a Windows PC. Now, we’ll also share the steps to do it on a Mac. OBS Studio can record Steam with system audio on macOS. You can follow these steps to finish the job:
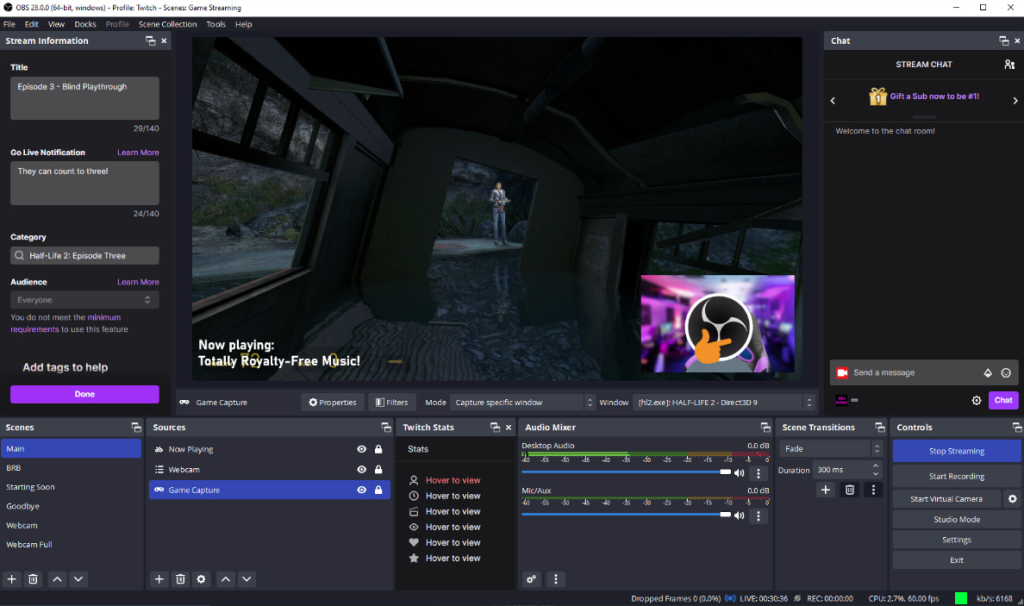
Step 1. Open OBS Studio > Click the "+" in the "Sources" panel > Select "Application Capture" > Add the Steam game window as a video source.
If you want to record both game audio and microphone sound, you can use a virtual audio tool as the input device. You can also click the “Settings” button to adjust the video and audio information.
Step 2. Then, click the ”Start Recording” button in the main interface to simultaneously capture gameplay, system audio, and microphone sound.
Step 3. After recording, go to “File” > “Show Recordings” to save the video to your desired location.
Record Steam Game on Mac with Record Go
Record Go supports full-screen, specific window, and partial screen recording. You can also use it to record a webcam with the option to blur the background to protect your privacy. This software is especially suitable for players creating Steam game tutorials, as it can record both in-game audio and microphone commentary at the same time.
Steps on how to record Steam on your Mac for free:
Step 1. First, launch Record Go and steam on your Mac.
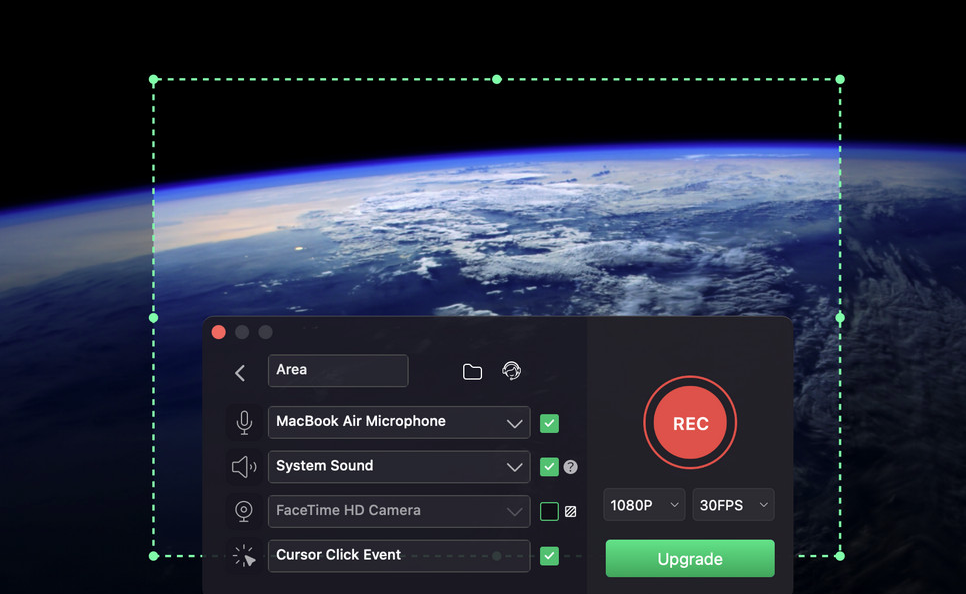
Step 2. Select “Window” recording and capture the Steam game windows. You can also adjust the audio, camera, and video settings based on your needs.
Step 3. Tap the “REC” button to start the recording. Once done with capturing the steam, just hit the “Stop” icon.
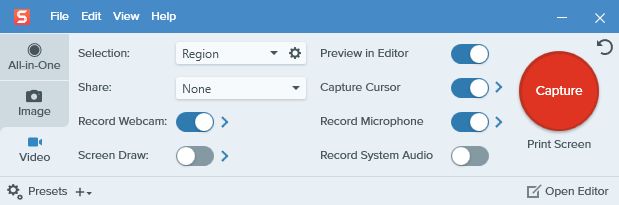
How to Record Steam on Mac via Snagit
The last free Mac Steam recorder you can use is Snagit. If you want to record the game and do some light editing without dealing with complicated software, this is an ideal solution. With just a few simple steps, you can record Steam on your Mac, capture external audio, and export the video in your desired format.
Here is how you can use it:
Step 1. Double-click the recorder icon to launch it on your Mac.
Step 2. Click “Capture” > “Video” to make a screen recording.
Step 3. Next, choose “Region” under “Selection” and pick the steam window.
Step 4. Click on the “Capture” button. Then, select “Audio Recording”.
Step 5. Tap “Record” to start recording your Steam game.
Final Thoughts
There are many ways to record Steam on PC/Mac efficiently. Every method has its own advantages and limitations. You can choose the one to best meets your basic requirements.
For better recording results, using a stable, high-performance computer can help ensure smooth gameplay. Pair it with a reliable screen recording tool to efficiently capture every exciting moment.
Kingshiper Screen Recorder is recommended for users who want to record Steam games with high clarity, smooth performance, and support for multi-track audio capture.


 All
All