4 Easy Steps to Trim Audio or MP3 Files for Free on Windows, Works Fast
- Support
- Software Tutorials
- Kate
934
- 2024-06-03 19:22:00
Trimming audio files is a fundamental skill that comes in handy in various scenarios. Whether you want to remove unwanted sections, shorten the length of the file, or fine-tune your audio for a seamless result, knowing how to trim audio files is a valuable skill. In this article, we will guide you through the process of trimming audio or MP3 files using Kingshiper Audio Editor.
To trim audio or an MP3 file, proceed as follows.
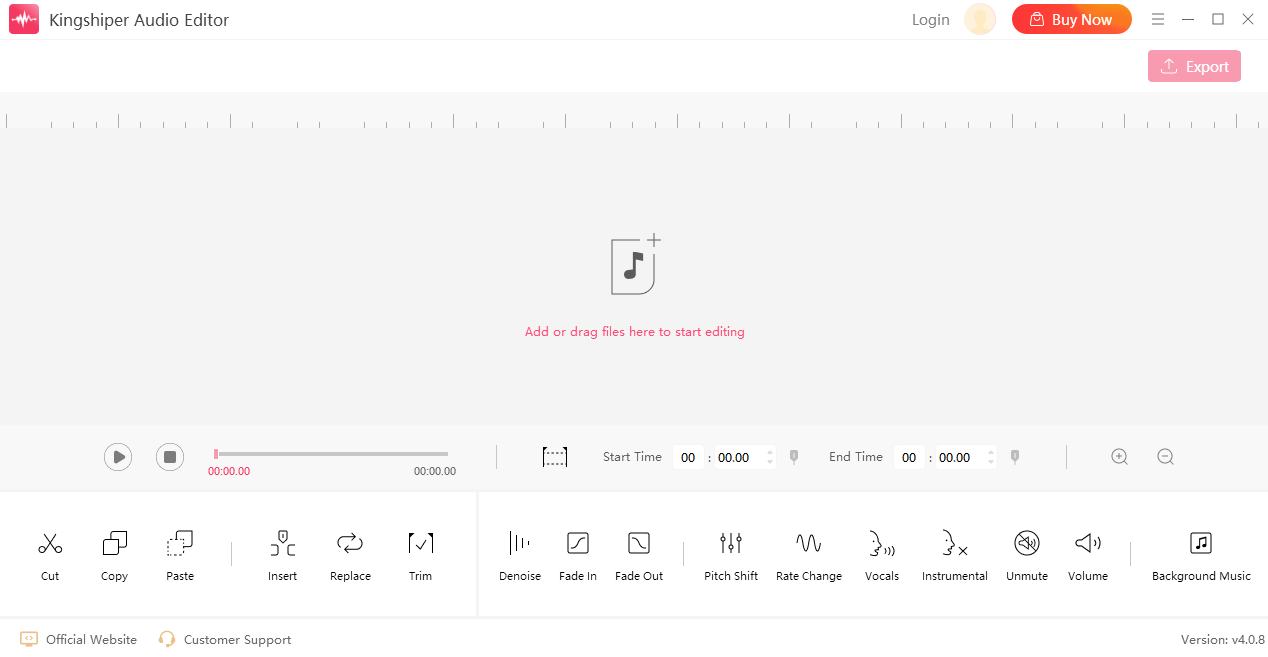
Step 1. Launch Kingshiper Audio Editor on PC
Launch Kingshiper Audio Editor, and add or drag an audio file from the computer to the software.

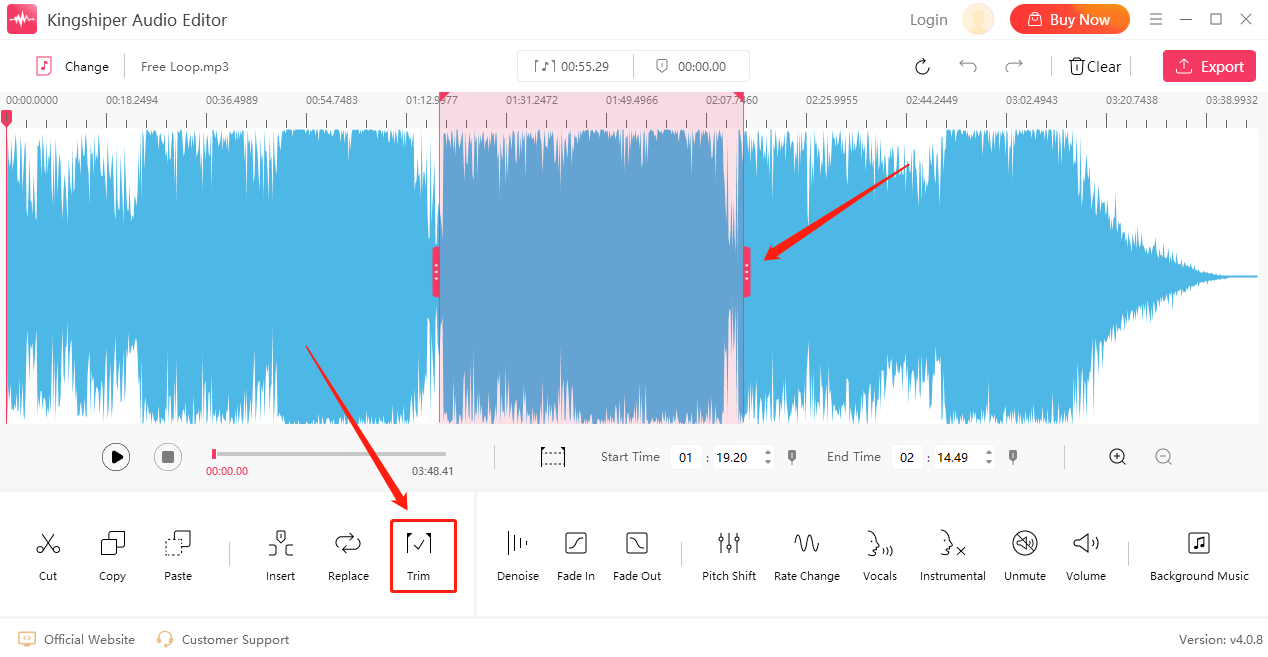
Step 2. Select a clip you want to trim
Move the red line to select a clip and click “Trim”.

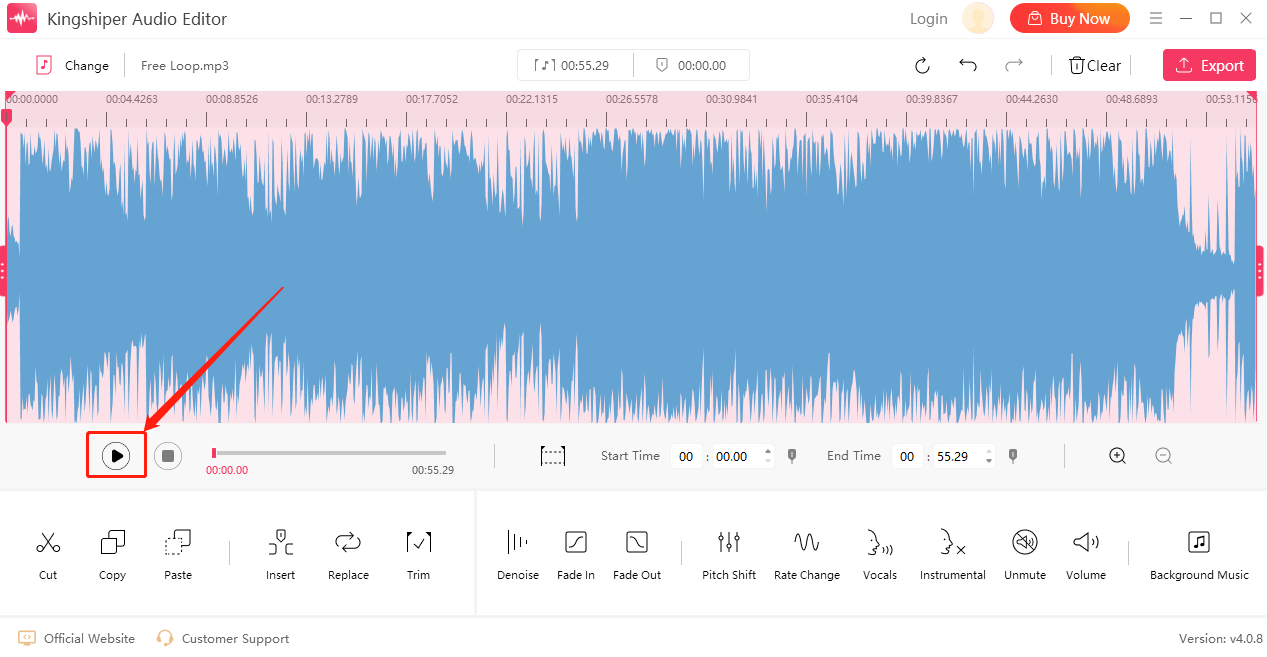
Step 3. Click “Play” to listen to the music
Now the selected part has been kept, you can click the “Play” button to preview the trimmed audio file. If you don’t satisfy it, click “Undo” to readjust the selected timeline.

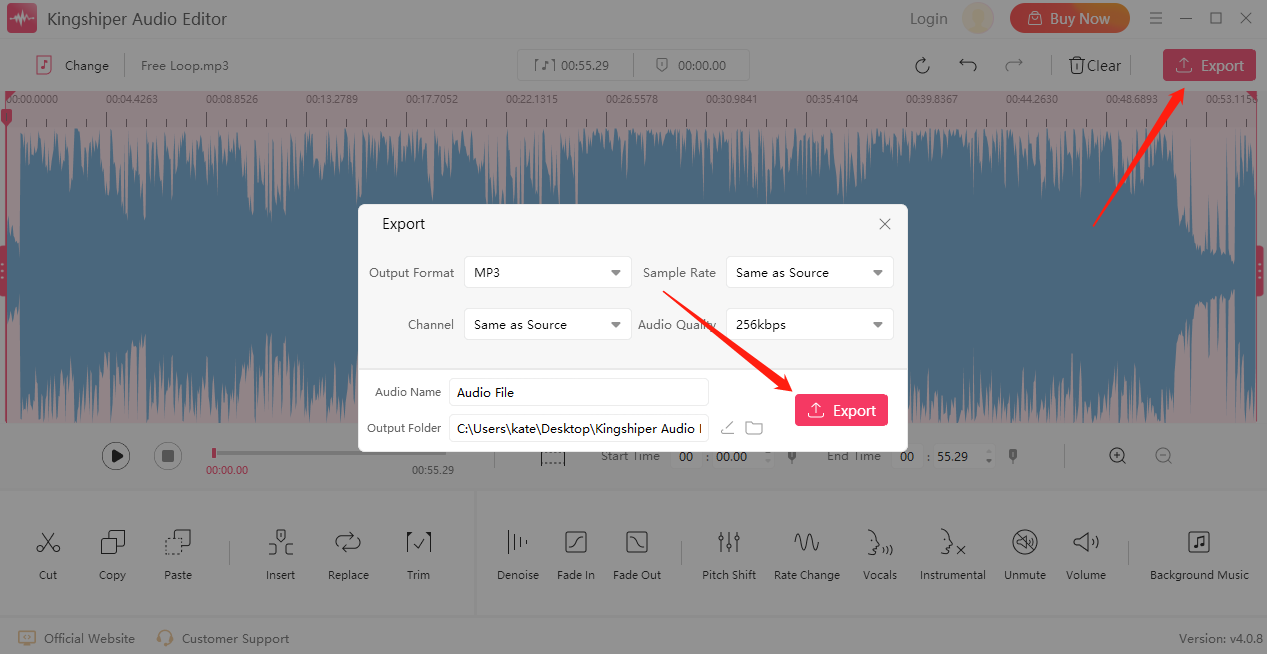
Step 4. Export the trimmed audio file to your PC
After you select the part you want, click “Export” at the top right corner. Here, you can set the Audio Name, Output Format, Sample Rate, Channel, Audio Quality, and Output Folder. When you have finished, click "Export".

Once the audio has been successfully exported, press “Go to the output folder” to check if fast on your PC.

By now you should know how to easily trim audio files or MP3 files. Kingshiper Audio Editor can easily help you edit a specific clip. Download the software today or use the latest Version!
Related Articles
1. How to Cut an Audio File in 5 Steps, 100% Works
2. How to Quickly Use Kingshiper Audio Editor for Audio Files Editing in 2024


