[3 Useful Methods] How to Fade In/Out Audio on Windows, 100% Works
- Support
- Dynamic News
- Kate
583
- 2024-06-03 19:20:29
Upon concluding the video or audio clip, you might contemplate the optimal method for synchronizing the music with the visuals flawlessly. A sudden noise has the potential to disrupt the entire video and negatively impact the viewing experience. Implementing the fade effect assists in creating a smoother audio playback. This technique effectively reduces the abruptness of sound attacks by providing a gradual transition.
Method 1. Add Fade In/Out with Kingshiper Audio Editor
For Windows users, the most convenient approach to achieve audio fading is through the utilization of Kingshiper Audio Editor. This software is specifically designed to address such needs and provides users with a dedicated desktop solution. With this tool, you can seamlessly incorporate audio content and execute various editing tasks, including clipping, trimming, inserting additional audio elements, as well as applying effects like fade-in, fade-out, and mixing.
Steps for a fast way to add fade-in and fade-out effects:
Step 1: Launch Kingshiper Audio Editor, and drag and drop the audio file into the software.
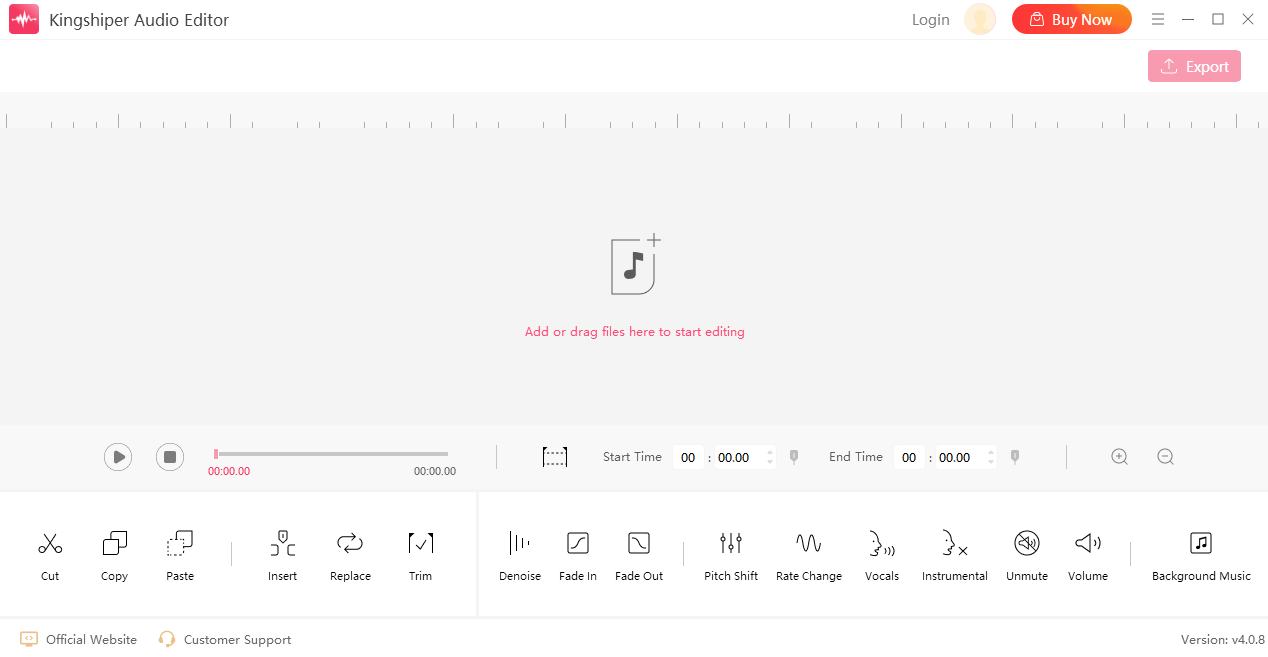
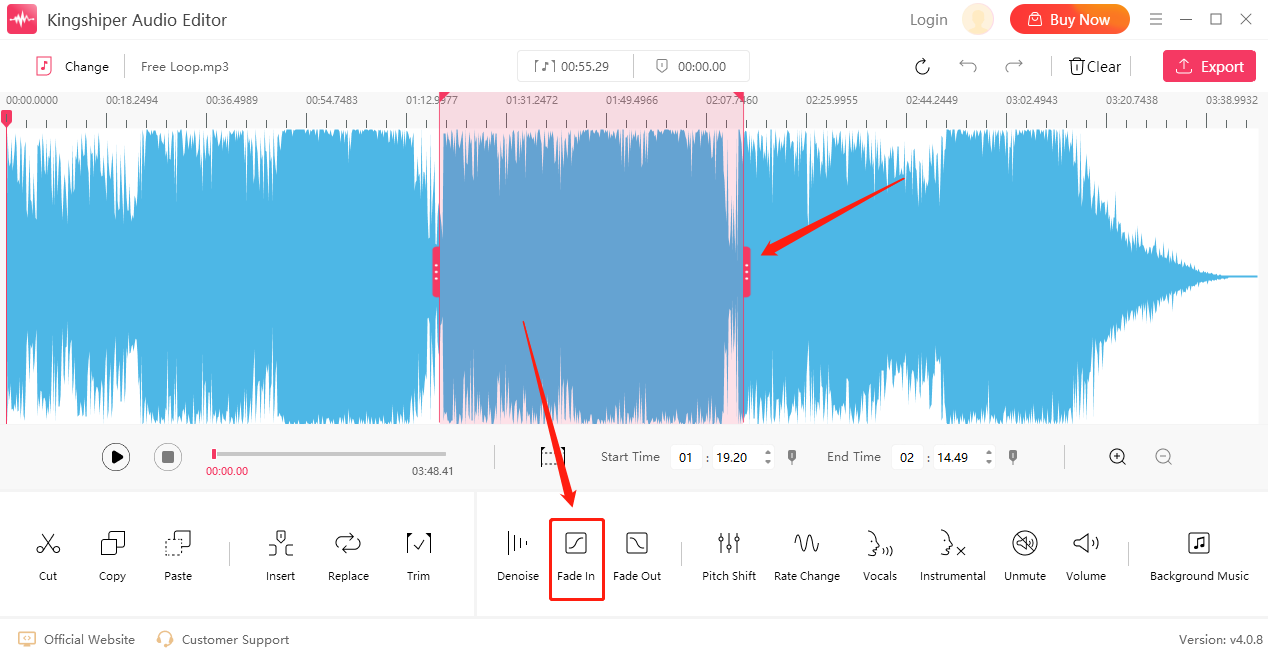
Step 2: Select a clip and click the “Fade in” button.
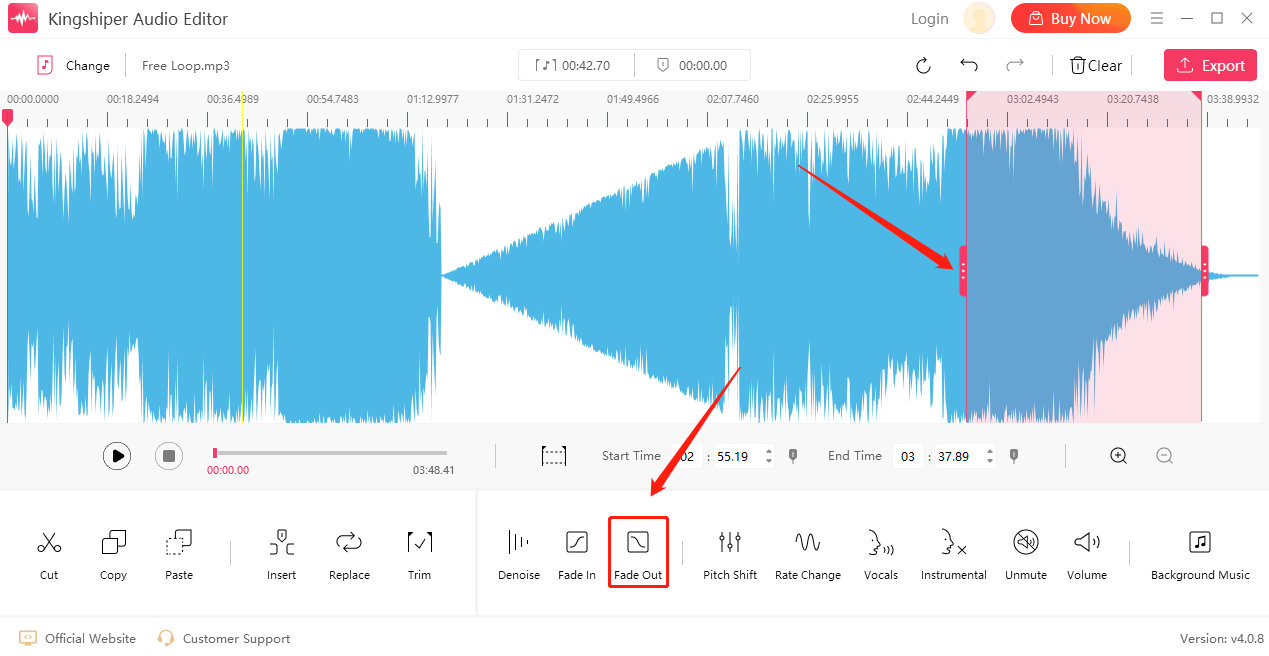
Step 3: In the same way, you can choose another clip and click “Fade out”.
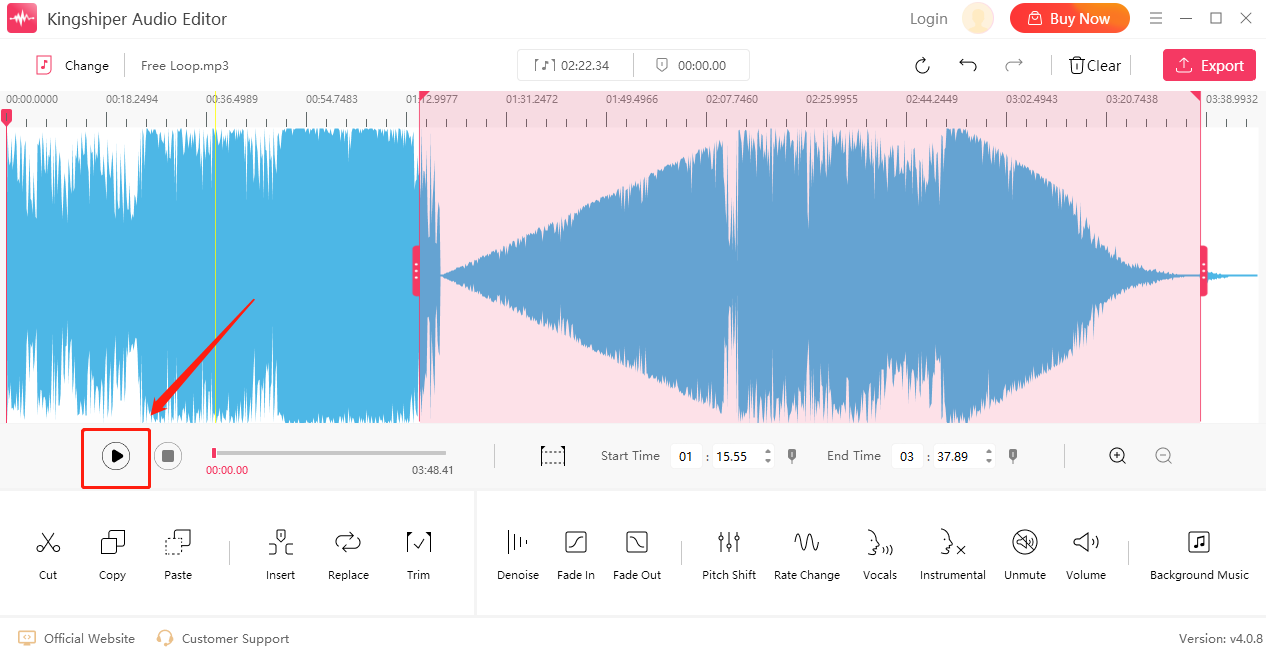
Step 4: Press “Play” to listen to the music.
Step 5: If everything goes well, click “Export” at the top right corner. Here, you can adjust the output settings in the export window. When you have finished, click “Export”.
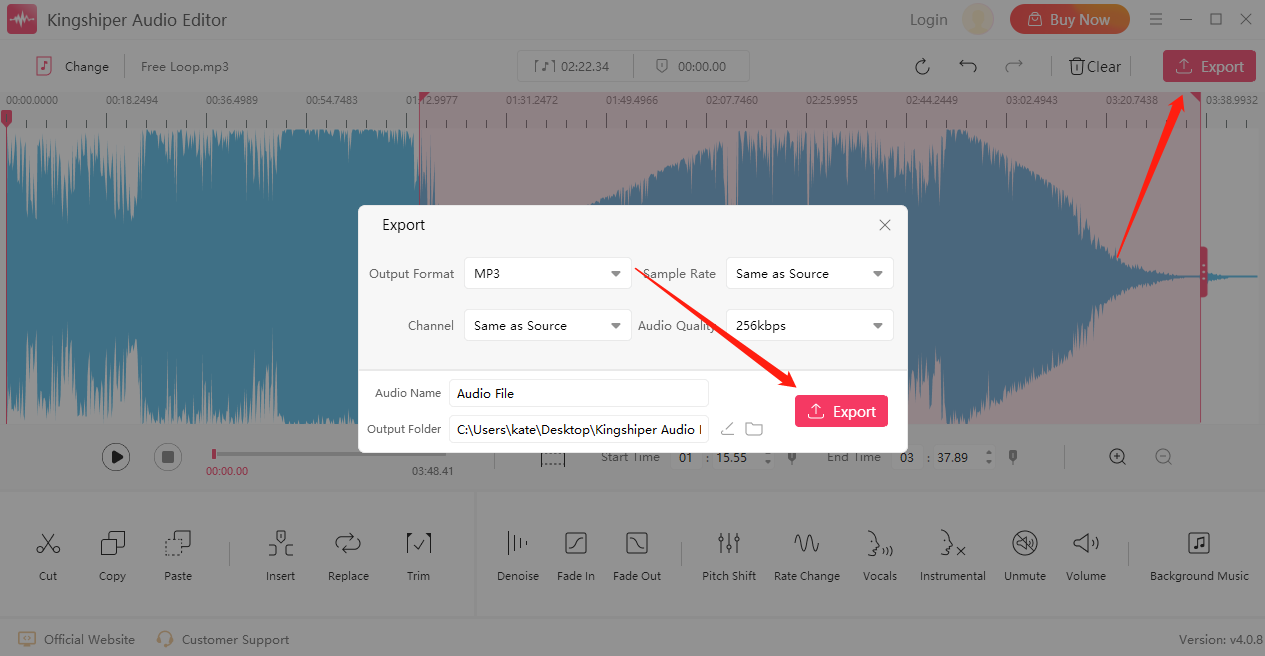
Once the audio file has been successfully exported, click “Go to the output folder” to check it fast!

Method 2. Add Fade In/Out with Audacity
Audacity, a popular and free audio editing software, offers a wide range of features to enhance your audio files. Among these features, the ability to add fade-in and fade-out effects plays a crucial role in creating smooth transitions and improving the overall quality of the listening experience.
Step 1: Launch Audacity and import the audio file you want to fade in or out.
Step 2: Place your cursor to select where you want to edit.
Step 3: From the upper corner of Audacity, click "Effect" and then choose "Fading" > “Fade in” or “Fade out”.
Step 4: Once you're satisfied with the fade effect, you can preview it by clicking the play button. To save the faded audio, go to "File" > "Export" and choose your desired audio format.

Method 3. Add Fade In/Out with Windows Media Player
If you prefer a simpler solution and don't need extensive audio editing capabilities, you can use the built-in Windows Media Player to apply basic fade-in/out effects to your audio files. But before you start to edit, you should install a plugin, such as the “DFX Audio Enhancer” or “SRS Audio Essentials”. Now you can do it as follows.
Step 1: Right-click the audio file, and click “Open with” > “Media Player”.
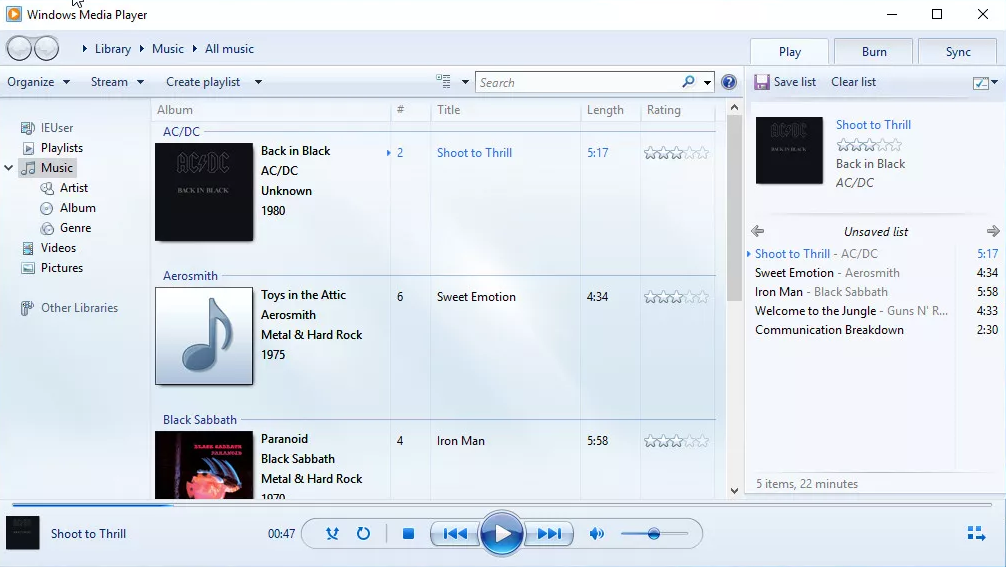
Step 2: Select the “Switch to Now Playing” icon in the lower right of the screen.
Step 3: Right-click anywhere on the Now Playing screen and choose Enhancements > Crossfading and Auto Volume Leveling.
Step 4: In the "Enhancements" menu, click on "Crossfading and Auto Volume Leveling." Here, you can adjust the duration and level of fade-in/out effects
Step 5: Use the slider on the window to set the duration of the overlap between songs. When you're done, close the window and return to your music.
The Final Words
In this article, we list three software for Windows users. These tools offer advanced features and greater control over the fade effects, making them suitable for professional audio editing projects. For beginners, the best option is to use Kingshiper Audio Editor, you can easily import the audio file and perform a wide array of editing tasks, including trimming, merging, and changing tempo without losing any quality.
Related Articles
2. 5 Essential Audio Editing Tips in 2024
3. Best Sources for Free Songs to Elevate Your Video Editing


