How to Eject the NTFS Disks Safely in 2023
- Support
- Software Tutorials
- Kate
1435
- 2023-11-15 10:07:12
Safely ejecting an NTFS disk is not only important for data integrity but also for the overall health and performance of the disk itself. It is a simple yet crucial step to ensure the safe and reliable operation of your NTFS disk. By following the proper steps, you can prevent potential damage and avoid issues such as data corruption or file system errors. In this post, we will show you how to eject the NTFS disk safely on Mac with 3 easy steps.
Step 1. Download Kingshiper NTFS for Mac and Launch it on your Mac.

Step 2. Select the NTFS disk that you want to eject and click "Eject" in the upper right corner.

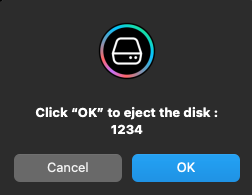
Step 3. After clicking "Eject", a pop-up window will appear. Then, click "OK" to confirm the ejection of the NTFS disk. The software will safely eject the disk without affecting any saved files or data.

By now you have mastered the method to eject NTFS Disk safely on Mac. If you want to make further edits to NTFS on your computer, try to use Kingshiper NTFS for Mac to unlock more functions!
You May Also Like
How to Check if System Integrity Protection (SIP) is Enabled
How to Disable SIP and Enable Kernel Extensions in Kingshiper NTFS for Mac


