How to Format A USB Drive to NTFS on Mac in 2023
- Support
- Dynamic News
- Kate
1294
- 2023-11-11 15:45:16
Formatting a USB drive to the NTFS file system on a Mac might seem like a complex task, especially given the native differences between macOS and the Windows-oriented NTFS format.
However, with the help of some powerful solutions, this process has become more straightforward and accessible than ever before. In this guide, we'll show you how to format a USB drive to NTFS on your Mac in 2023, enabling cross-platform compatibility and seamless file management.
Part 1. How to Format A USB Drive to NTFS on Mac
NTFS is a robust file system format developed by Microsoft that offers advanced features such as file compression, encryption, and access control. While macOS supports the exFAT format, which is more suitable for cross-platform use, NTFS remains the ideal choice when you require seamless compatibility with Windows systems or need to manage files larger than 4GB. By formatting a USB drive to NTFS on your Mac, you open the door to bi-directional data exchange between the two platforms.
Step 1. Go to Launchpad and launch Disk Utility.
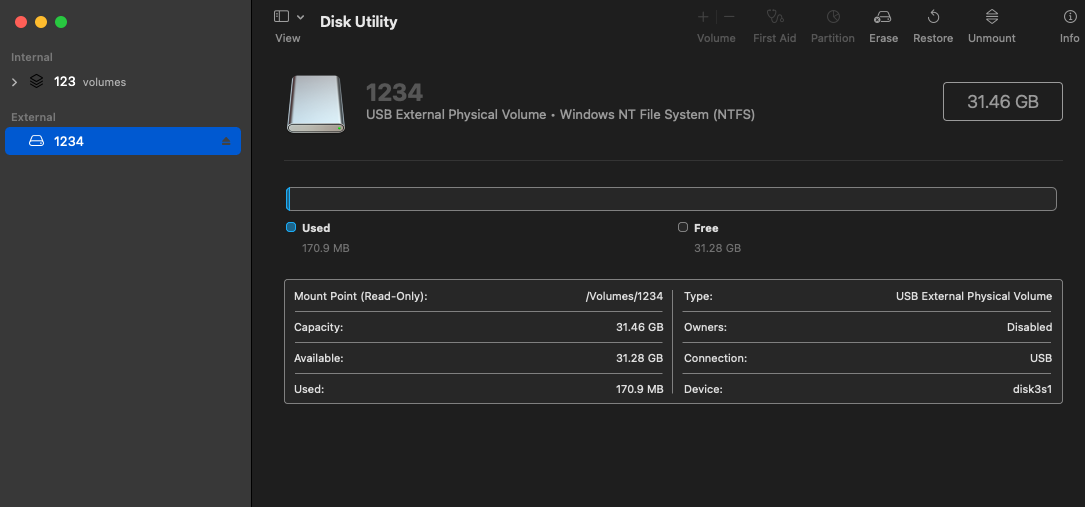
Step 3. Insert your USB drive and highlight it in the Disk Utility.
Step 4. Right-click the drive and choose "Erase".
Step 5. Under the Format option, choose the option for NTFS.
Step 6. Give a name to your drive and click on the option Erase to continue.

Part 2. How to Write to NTFS Formatted Drive
Kingshiper NTFS for Mac emerges as a solution tailored to the specific needs of Mac users who frequently engage with Windows-formatted drives. Built on the foundation of intuitive design and powerful functionality, this software promises to redefine the way you interact with NTFS drives on your Mac. With Kingshiper NTFS for Mac, sharing files between Mac and Windows systems becomes hassle-free. This software enables users to bridge the gap between two distinct file systems, enhancing collaboration and data exchange.
Step 1. Launch Kingshiper NTFS for Mac on your Mac and connect an NTFS drive to your Mac. Then, it will automatically detect and mount the device.

Step 3. Click “Open” at the top right corner.

Step 4. It will pop up a window to help you check, read, write, and even modify the data on the NTFS drive.

The Bottom Line
Now you should know that formatting a USB drive to NTFS on Mac is an easy thing. Just follow the above steps and you will obtain the desired results. Nevertheless, it’s imperative to emphasize the significance of backing up all your essential files before formatting.
And also, if you would like to get the quickest access to read and write NTFS files. The best option is to use Kingshiper NTFS for Mac which not only can support you edit files on Mac but also can help you repair the drive.
You May Also Like
1. How to Enter Recovery Mode in Kingshiper NTFS for Mac
2. [4 Methods] How to Use NTFS Drive on Mac 2023
3. exFAT vs NTFS: Which is Better


