[2024 Update] How to Fade In & Out Audio in Premiere Pro
- Support
- Dynamic News
- Kate
528
- 2024-06-03 19:24:04
Adobe Premiere Pro is a powerful video editing software used by professionals and enthusiasts around the world. Among its many features is the ability to handle audio files with ease. One common technique for creating smooth transitions is to fade audio in and out, which can make the sound more natural or less abrupt.
In this way, you can handle various audio editing tasks with Premiere Pro. Now, follow this guide, you’ll find the most optimal steps to fade audio in and out with the professional tool.
Part 1. Why Need to Fade Audio In and Out?
If you want your audio to better suit your video and make it sound better, you need to add fade-in at the beginning or fade-out at the end of the audio. In other words, fading audio in or out is a fundamental technique in audio and video production. It can serve various purposes, such as:
Smoothing Transitions: A fade in or out can help make the transition between audio tracks less abrupt, making it easier on the listener's ears.
Creating Emphasis: By fading the audio, you can create emphasis or de-emphasis on certain parts of your video.
Narrative Pacing: Audio fades can also aid in narrative pacing, giving the audience audible cues that signal the beginning or end of scenes.
Part 2. How to Fade In and Out Audio in Premiere Pro
Adobe Premiere Pro is a leading industry-standard tool for video editing and post-production. It allows users to work with footage in a flexible, non-destructive manner. This means you can import various media formats, such as video clips, audio files, images, and graphics, and arrange them on a timeline to create a seamless video production. Its timeline-based interface gives users the freedom to edit, trim, and arrange clips, as well as apply effects and transitions to achieve a polished end result.
To fade audio in or out with Premiere:
Step 1: Import and Arrange Your Audio.
In Premiere Pro, start by importing the audio files you want to edit. You can drag files directly from your computer into the "Project" window. Once your files are imported, drag and drop them onto the timeline.
Step 2: Choose the Crossfade effect.
Select the audio track, go to “Windows” at the top menu bar, and choose “Effects”. Then, you’ll see an Effects tab next to your Project and Media Browser tabs.
Step 3: Add Fade In/Out effect.
In the Effect panel, click “Audio Transition” > “Crossfade”. Here, you can find three options and choose Constant Gain. Drag it into the timeline.
Step 4: Adjust the Duration
To change the fade duration, just select the audio clip in your timeline. And you can pull on the Constant Gain bar by holding your cursor. Then, the fade duration will be adjusted accordingly.
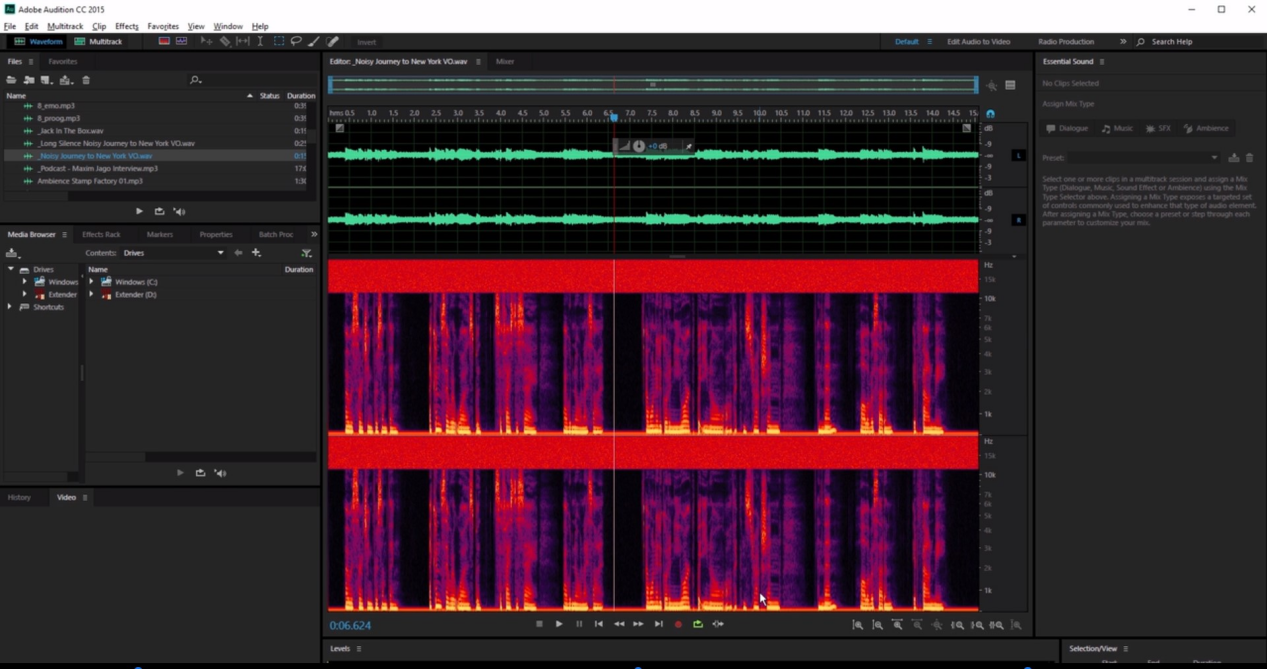
Although Adobe Premiere Pro has many great features that you can deal with your audio, it also has some drawbacks:
1. It Can be expensive for non-professional users
2. Its complex and professional user interface makes it difficult for beginners
3. It Requires a powerful computer system for optimal performance
4. Some advanced features may be unnecessary for basic audio editing needs.
These problems may affect your experience in adding fade-in and out effects in an audio clip. As a result, we recommend you use an alternative to Premiere Pro to do the same thing. There are numerous alternatives available and we would like to share one of the best options with you.
Part 3. Best Alternative to Premiere Pro - Kingshiper Audio Editor
Kingshiper Audio Editor is an all-in-one audio editing software that has garnered popularity for its ability to help millions of users produce high-quality audio files. As a free option, it offers a comprehensive set of features that cater to various audio editing needs. More importantly, with an intuitive interface, KingShiper Audio Editor facilitates effortless navigation and easy access to its multitude of features, making it suitable for both beginners and experienced users.
Some advanced features like that:
1. Fade audio in and out.
2. Trim an audio file to make a ringtone.
3. Remove vocals from an audio file.
4. Combine multiple audio files into one track.
5. Mix different audio files.
6. Support more than 1000+ audio file formats.
If the above effects can satisfy your needs, just download it now and give it a try.
To add fade in/out effect with Kingshiper Audio Editor:
Step 1. Launch Kingshiper Audio Editor and drag an audio file into it.
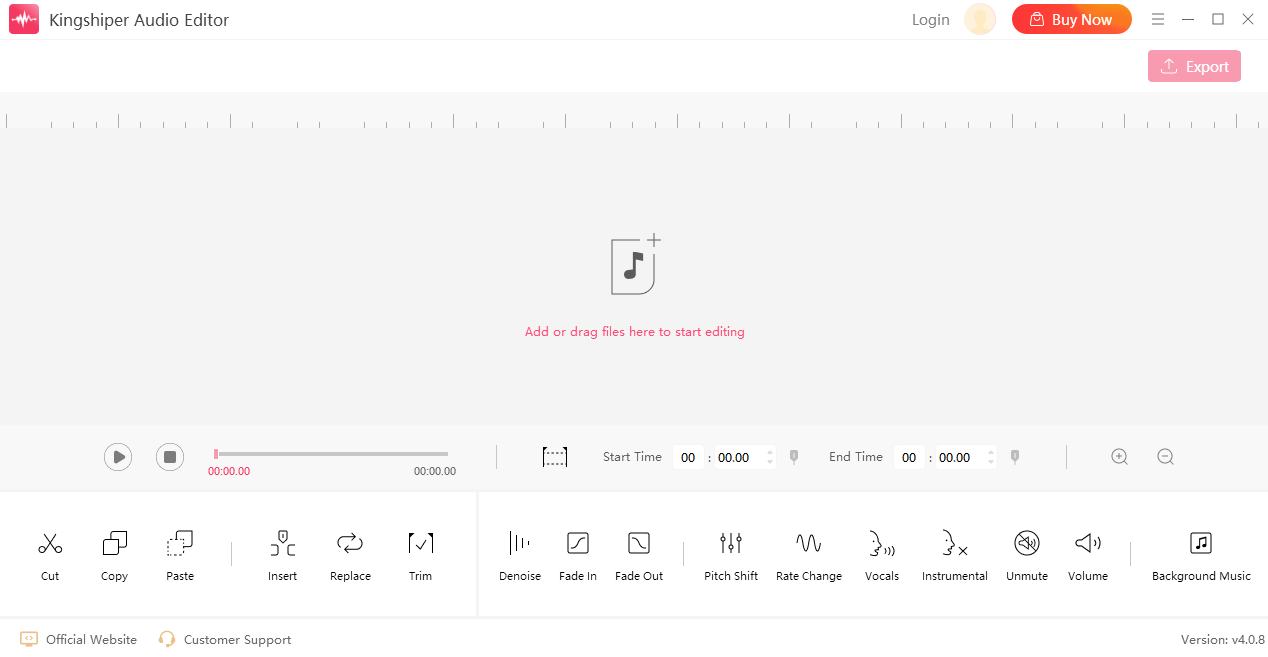
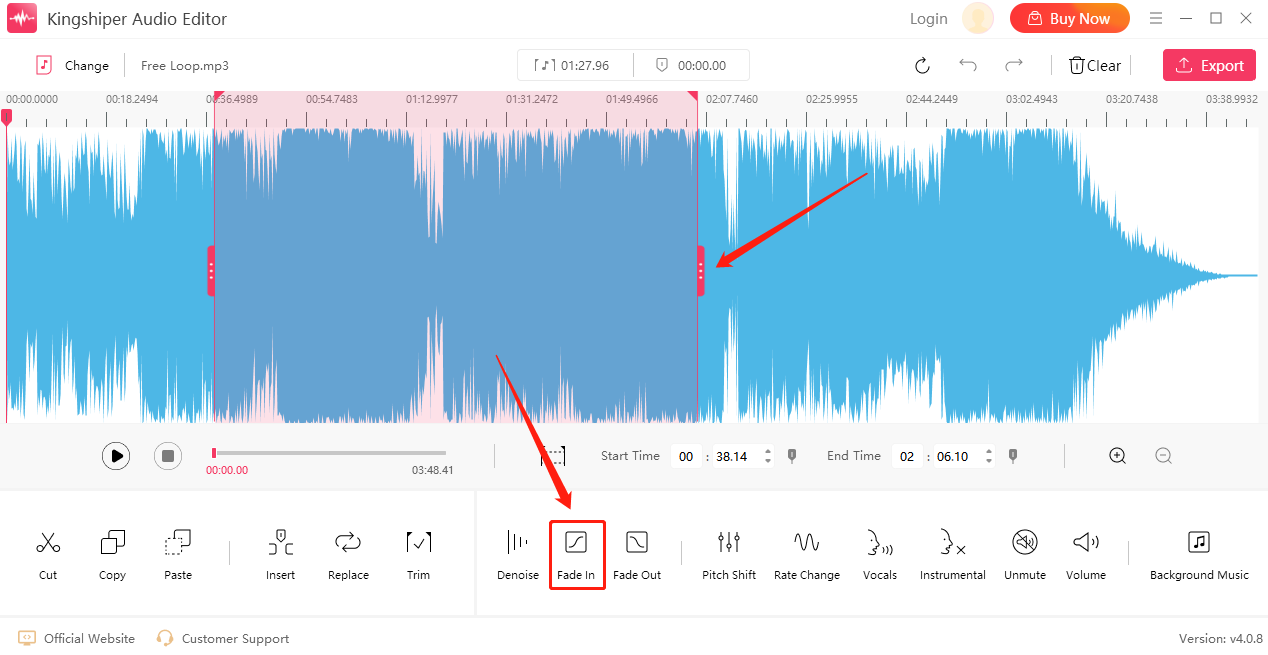
Step 2. Select a clip and click “Fade In”.
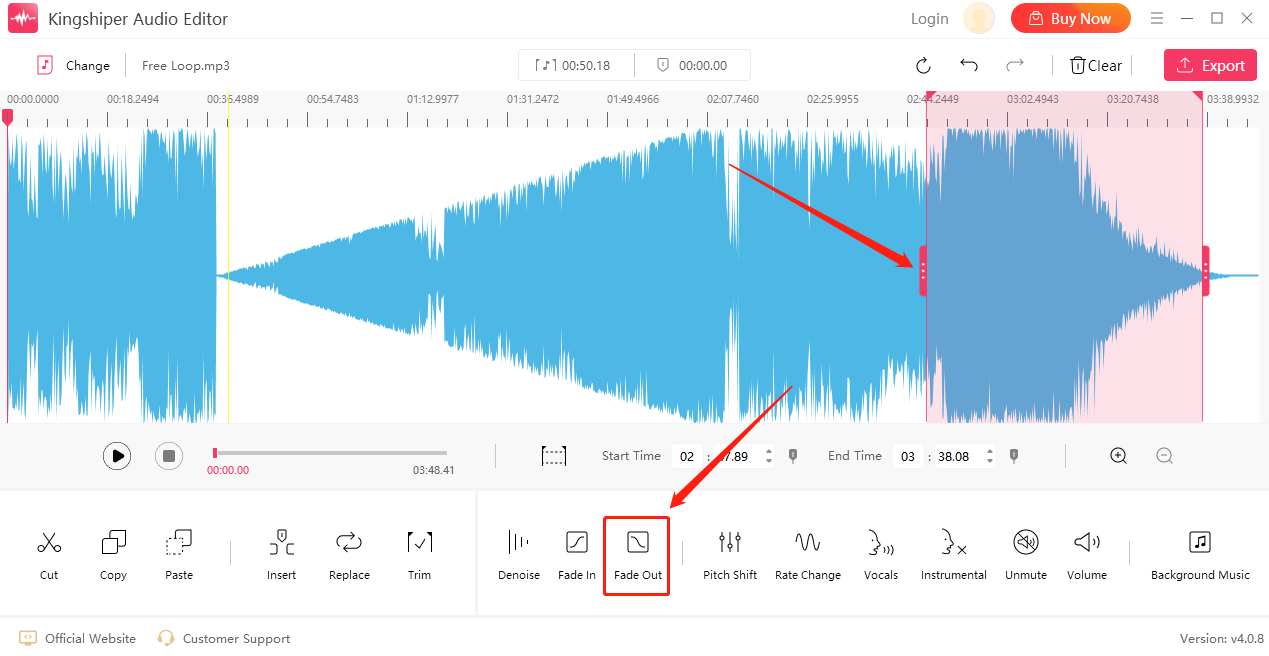
Step 3. Likewise, choose another clip and click the "Fade Out" effect.
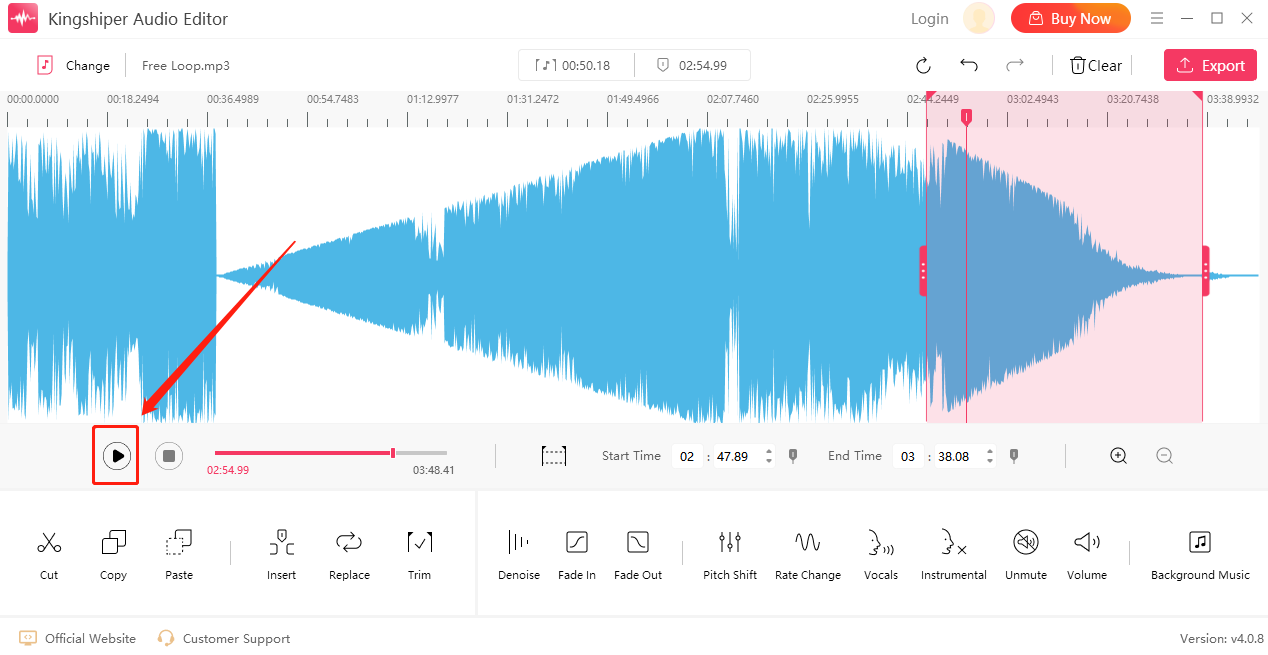
Step 4. Press "Play" to preview the effect.
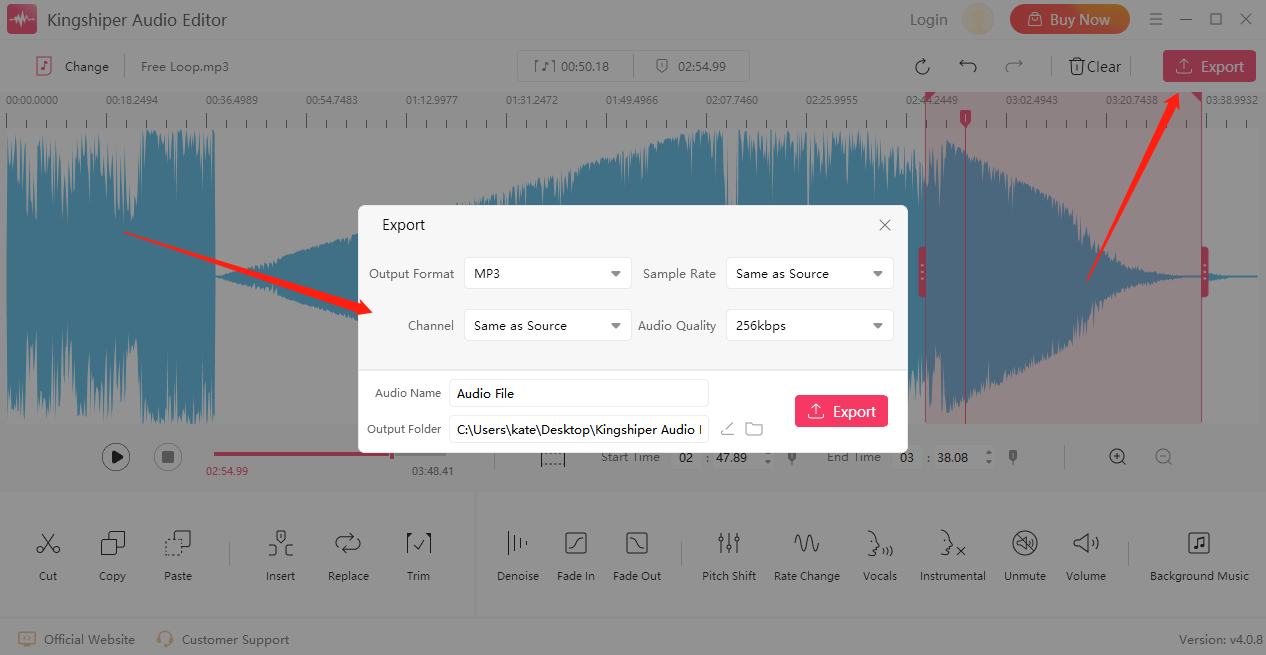
Step 5. Click "Export" at the top right corner. Here, you can customize the Export information in the pop-up window.
Once the audio file has been successfully exported, click “Go to the output folder” to check it fast!

The Bottom Line
Above are two useful methods to fade audio in and out. The first one is using Premiere Pro. But if you are a novice and the first to try to edit audio files, it mightn't be a suitable option for you. So in this article, we also introduce another option is to use a Premiere alternative like KingShiper Audio Editor, which makes audio editing easy, and any level of user can take advantage of it without having any previous training.
You May Also Like
1. How to Change Sound Volume in Kingshiper Audio Editor, Easy and Fast
2. 6 Quick Tips to Improve Your Audio in Kingshiper Audio Editor
3. Easy Guide to Edit the Background Music for Your YouTube Video


