[2023] 3 Useful Methods to Delete Files From NTFS on Mac
- Support
- Dynamic News
- Kate
1254
- 2023-11-13 14:55:02
When you work across both Windows and macOS environments, you're bound to encounter some challenges, especially when dealing with different file systems. NTFS, primarily used by Windows, presents certain limitations on Mac. Now that we have understood this limitation, let's take a closer look at how we can overcome it.
Why Can’t I Delete Files From NTFS Drive on Mac?
In addition to the ability to read NTFS-formatted drives, macOS does not grant the ability to write to them by default. This limitation means that when you connect an NTFS drive to a Mac, you can view its contents but cannot delete, modify, or add new files. As a result of potential data corruption risks and licensing concerns, macOS does not natively support full access to the NTFS file system on the basis of data integrity concerns.
Method 1. How to Delete File from NTFS on Mac with Kingshiper NTFS for Mac?
Kingshiper NTFS for Mac is a reliable and powerful solution that empowers you to manage NTFS drives and delete files on your Mac. It's equipped with features that help you overcome read-only limitations, allowing you to delete files effortlessly.
The following are some of Kingshiper NTFS for Mac’s most useful features:
l Read and write NTFS drives
l Mount and unmount NTFS drives quickly
l Ensure data integrity and prevent data loss
l View and monitor the disk space usage
l Free and professional technical support
Download Kingshiper NTFS for Mac to get your work down now.
Here's how to use Kingshiper NTFS for Mac to delete files:
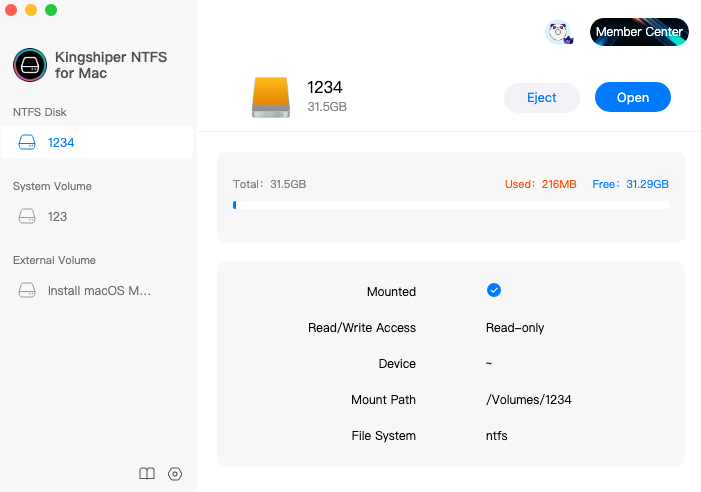
Step 1. Launch Kingshiper NTFS for Mac and Connect to your NTFS drive.
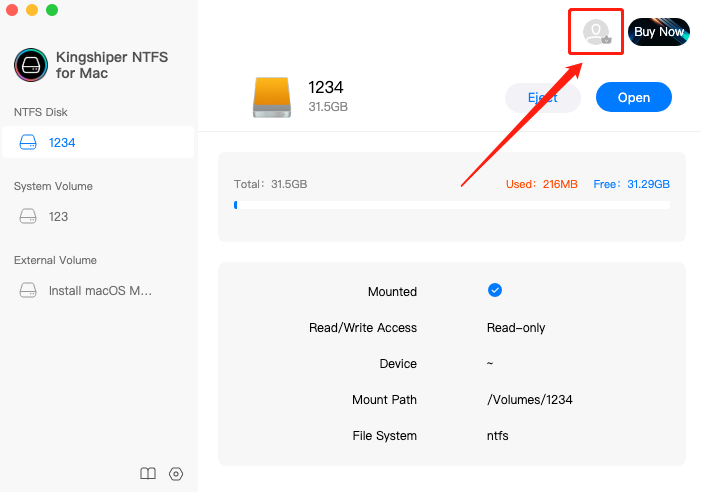
Step 2. Click the Personal icon to log in to your account.
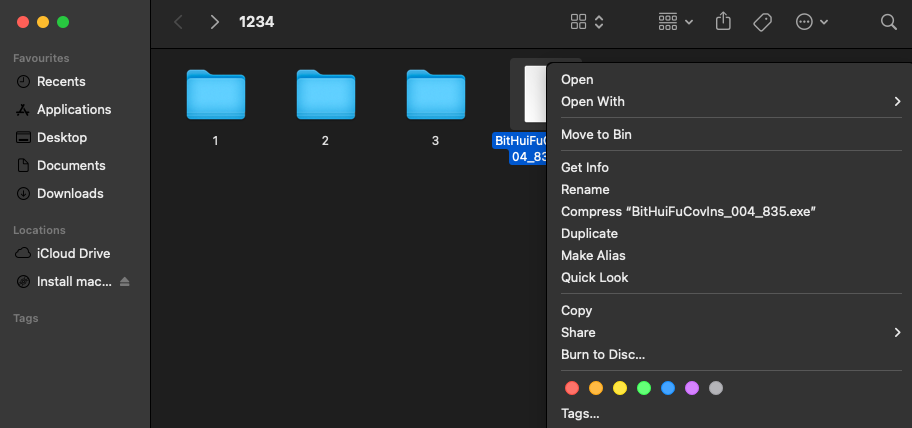
Step 3. Click "Open". Then it will pop up a window. You can edit, delete, and even modify the file.
Method 2. How to Delete File from NTFS on Mac with Disk Utility?
If you want to permanently delete all the data on the NTFS drive, Disk Utility can help you do that. But before you proceed, make sure you have a backup of any important data on the drive.
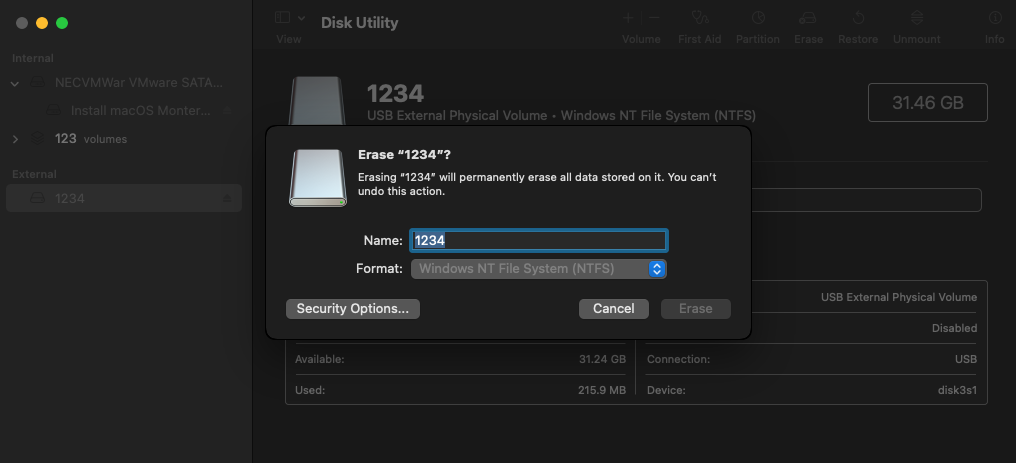
Step 1. Open the disk utility on your Mac and select the drive you wish to erase.
Step 2. After selecting the right disk, click on the Erase button at the top bar.
Step 3. There will appear a pop-up box and you will need to enter a name for the drive as you want. Next, click on the Format drop-down box to pick one of the formats.
Step 4. Click on Erase and it will start to format your desired settings.
Step 5. Once completed, you can see that all your data is successfully deleted.
Method 3. How to Delete File from NTFS on Mac with Terminal?
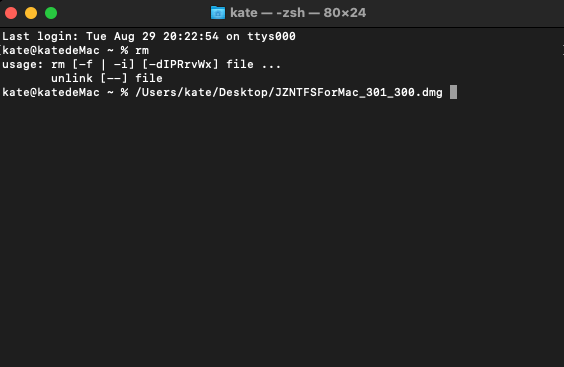
The Terminal is a powerful tool that allows you to interact with your system through text-based commands. To delete files from an NTFS drive using Terminal, follow these steps:
Step 1. Go to "Applications" > "Utilities" and launch "Terminal."
Step 2. Type rm and a space in the Terminal window. Then, drag the file you want to delete into the Terminal window.
Step 3. Press Enter and the file will be deleted.
The Bottom Line
As a summary of what has already been discussed, let us choose the most appropriate solution from the list above. Once you've pinpointed the most suitable method, you can confidently delete files from your NTFS drive. For a hassle-free and efficient experience, we suggest opting for Kingshiper NTFS for Mac. This reliable tool offers a swift and safe resolution to your NTFS challenges on Mac. Why not give it a shot?
You May Also Like
1. [4 Methods] How to Use NTFS Drive on Mac 2023
2. How to Change Read-Only File Systems on Mac? 100% Free
3. How to Format NTFS Drive on Mac in 2023, 100% Free


