How to Delete Files from NTFS on Mac[2023 New Guide]
- Support
- Dynamic News
- Kate
2705
- 2023-11-14 11:23:09
Are you looking for an efficient way to delete files from NTFS drives on your Mac? Mac users have long enjoyed the elegance and functionality of macOS, but when it comes to interacting with NTFS-formatted drives, they often encounter a roadblock. NTFS (New Technology File System) is the standard file system for Windows, and while macOS can read from NTFS drives, it restricts write access by default. This means you can't delete files from NTFS drives using the standard methods.
Can I Delete Files from My NTFS Drive on Mac?
Yes, you can delete files from your NTFS drive on a Mac. However, it's important to note that macOS provides read-only access to NTFS-formatted drives by default. This means you can view and copy files from NTFS drives to your Mac, but you cannot modify or delete them directly.
To delete files from an NTFS drive on your Mac, you will need to use third-party software that provides write access to NTFS drives. In this way, you can read, write, and delete files on NTFS drives as if they were native to macOS.
Alternatively, you can format the NTFS drive to a different file system using Disk Utility, which will erase all data on the drive. However, remember to back up your data first if you want to choose this method.
Method 1. Using Kingshiper NTFS for Mac to Delete Files
When it comes to removing files from NTFS drives, the easiest way to do so is to use a third-party software application like Kingshiper NTFS for Mac that can help you do the job. With Kingshiper NTFS for Mac, you will be able to create and modify NTFS drives on your Mac and then be able to add, modify, delete, and transfer data between your NTFS drives. This program has a user-friendly interface, which makes it easy for both professionals and beginners to get up and running quickly. In addition, it offers some exceptional features, including:
1. Supports M1-based Mac
2. Ensure data integrity and prevent data loss
3. Mount disks automatically
4. View and monitor the drive space usage
5. Free use for 1 day
Step 1. Launch Kingshiper NTFS for Mac and connect your NTFS drive to your Mac.
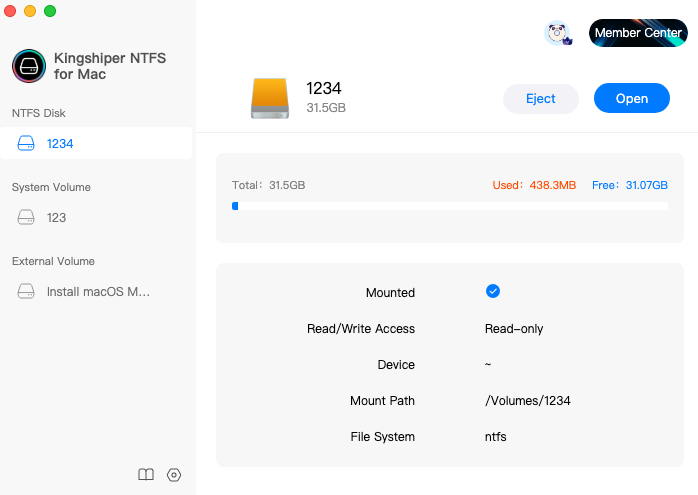
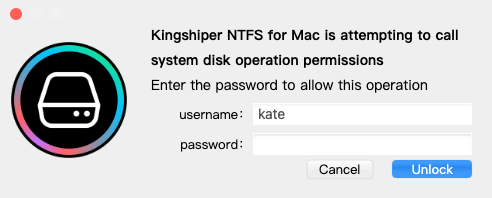
Step 2. Select the NTFS drive and click "Open" (enter password if prompted).
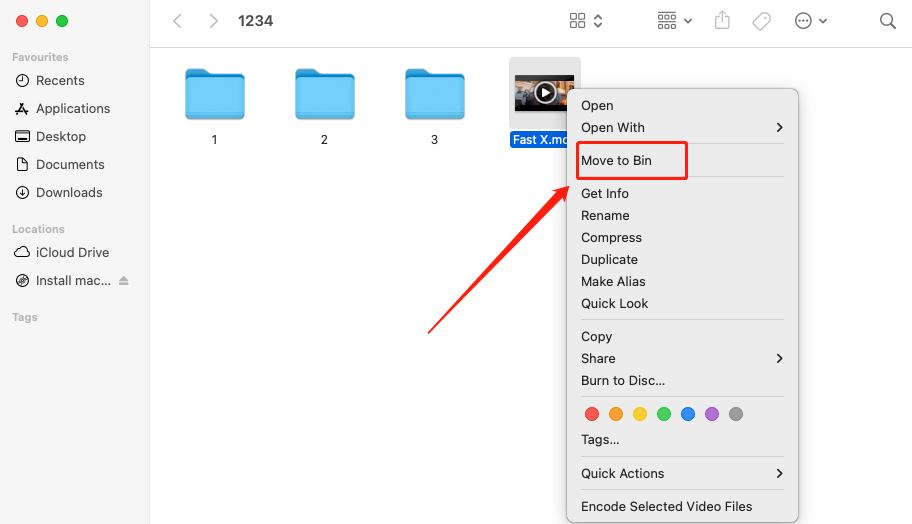
Step 3. It will pop up a window. Here, choose the file you need to remove and right-click to choose "Move to Bin". Also, you can edit, copy, and even modify the saved data on the NTFS drive.
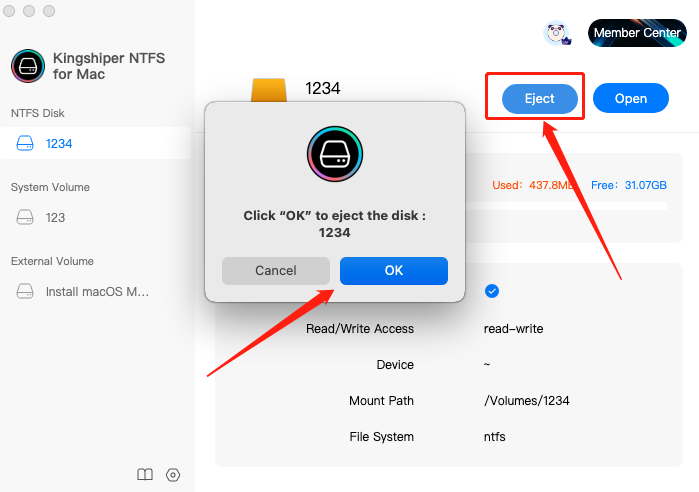
Step 4. When you’ve finished, click "Eject" to safely remove your drive on Mac.
Method 2. Using Disk Utility to Format NTFS drives
Disk Utility is a powerful built-in utility tool on macOS that allows you to manage and format storage devices, including external drives, USB flash drives, and even NTFS drives. Formatting a drive with Disk Utility involves erasing all existing data on the drive and configuring it with a new file system, making it compatible with macOS for both reading and writing operations.
Step 1. Click "Launchpad" > "Utilities" > "Disk Utility".
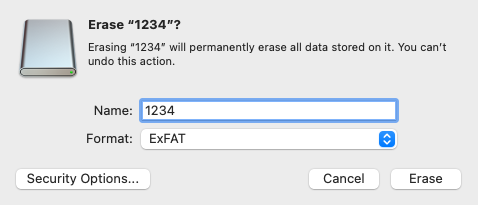
Step 2. Select the NTFS to drive you to want to delete files and click "Erase".
Step 3. Set a new name and choose the format you want to change.
Step 4. Click "Erase".
The Bottom Line
Formatting a hard drive is a highly effective method for clearing out old files and restoring them to a like-new state. If you still have the need to use it on Windows, you can opt for Kingshiper NTFS for Mac to write or delete files on your Mac. This software provides impressive features and offers compatibility with nearly all major operating system versions.
You May Also Like
1. 2023 Top 5 NTFS Mounters for Mac
2. 3 Ways to Change Permissions on External Hard Drives, 100% Works
3. [2023 Updates]FAT32 VS NTFS VS exFAT, Which is the Best File System


