3 Proven Ways to Format USB to NTFS on Mac/Windows[2023]
- Support
- Dynamic News
- Kate
12852
- 2023-11-14 11:36:48
Are you tired of dealing with the limitations of the FAT32 file system on your USB drive? Do you want to store large files on your USB drive without having to split them into smaller parts? If you would like to do that, NTFS is your first solution, which enables you t store and manage massive files without any effort. So, we will show you how to format USB to NTFS on this post. Let’s see the answers together.
Method 1. How to Format USB to NTFS with Disk Management - Windows
Disk Management is a built-in utility in Windows that allows users to manage their hard drives and storage devices. With Disk Management, users can create, delete, and format partitions, as well as change drive letters and paths.
Step 1. Right-click on This PC and choose "Manage".
Step 2. Select "Disk Management" and locate and right-click on your USB flash drive and then choose "Format".
Step 3. In the pop-up window, choose NTFS file system, tick "Perform a quick format" and click "OK".

Method 2. How to Format USB to NTFS with Disk Utility - Mac
Disk Utility is a built-in application on macOS that serves as a versatile toolbox for managing your storage devices. If you need to create, erase, partition, or format disks and drives, Disk Utility is your go-to solution. It provides a user-friendly interface and a range of functionalities that make it a powerful tool for various storage-related tasks.
Step 1. Click Spotlight to search for Disk Utility and open it on your Mac. You can also find and launch the Disk Utility from "Launchpad" > "Utilities".
Step 2. In the left sidebar of Disk Utility, you can see all connected drives. Select the USB flash drive or external hard drive that you want to format to NTFS.
Step 3. Click the "Erase" button on the toolbar of Disk Utility. In the new window, click the drop-down icon in the "Format" and select "Microsoft NTFS" format.
Step 4. After the configuration, click the "Erase" button to start formatting the USB or external hard drive to NTFS on Mac.

Method 3. How to Format USB to NTFS with Terminal Commands - Mac
If you are experienced and comfortable with command-line operations, I strongly recommend using the Terminal. It offers greater control and customization options for formatting a USB drive to NTFS on a Mac.
Here is how to format USB to NTFS with Terminal Commands:
Step 1. Go to "Launchpad" > "Utilities" > "Terminal".
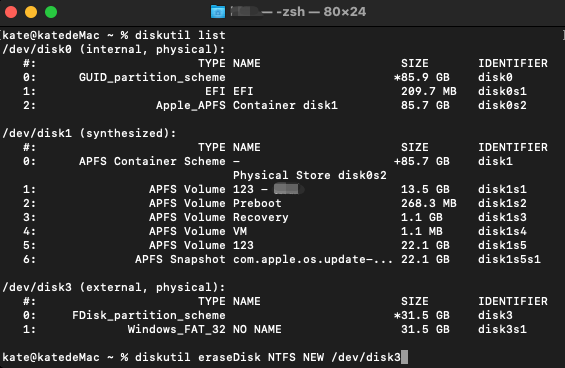
Step 2. Type "diskutil list" in the Terminal window. Press Enter and then it will show all the disk information below.
Step 3. Type "diskutil eraseDisk NTFS NEW /dev/disk3" to format the drive to NTFS on Mac. Remember to replace "NEW" with the desired name for your NTFS volume and "/dev/disk3" with the appropriate disk identifier for your USB drive.
Bonus Tips: How to Use NTFS drives on Mac
Kingshiper NTFS for Mac is a third-party application that provides comprehensive support for NTFS drives. You can read, write, copy, move, and delete files and folders with ease on Mac without any limitation.Whether you're accessing an external hard drive, USB stick, or a shared network drive, Kingshiper NTFS for Mac ensures that you can interact with your NTFS drives effortlessly.
What’s more, the Kingshiper software is optimized for speed, ensuring that your data transfers happen quickly and efficiently. With its intuitive interface and high-performance capabilities, Kingshiper NTFS for Mac simplifies file management and enhances your overall user experience.
Step 1. Launch Kingshiper NTFS for Mac and connect your NTFS drive.
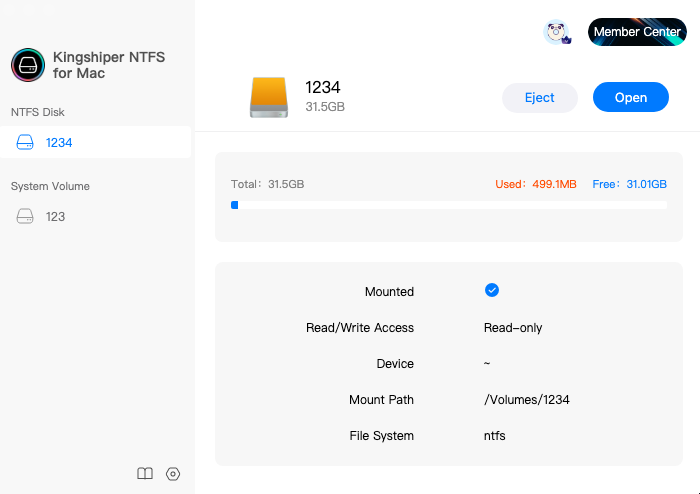
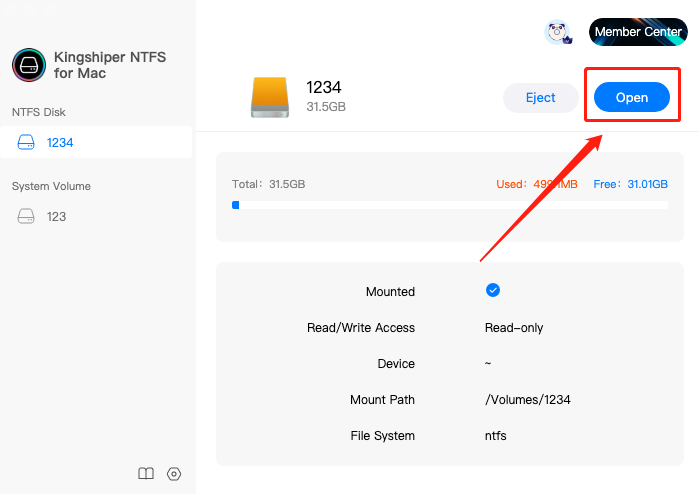
Step 2. Select the drive and click "Open" to get writable access(Enter your password if any).
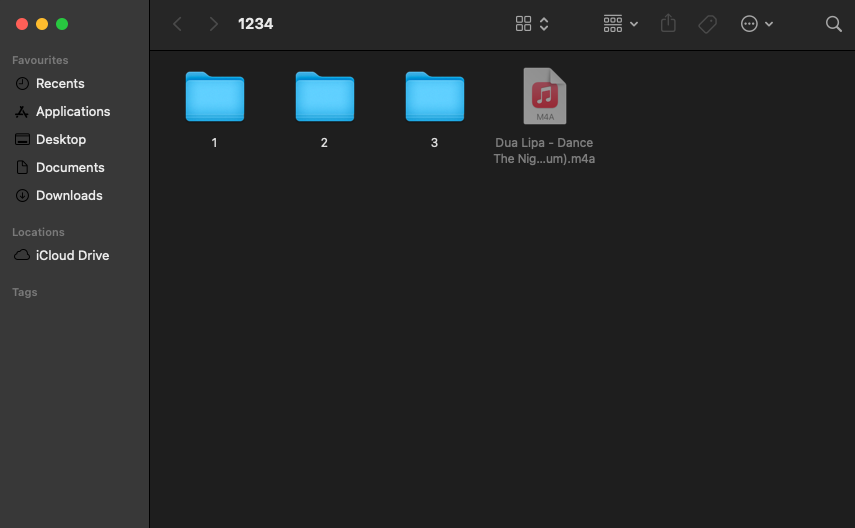
Step 3. It will pop-up a window that you can edit, copy and even modify the data on the drive.
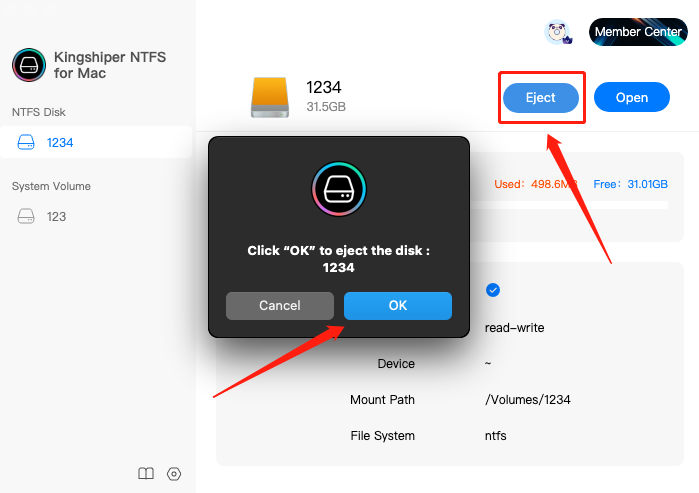
Step 4. If you’ve finished, click "Eject" and then click "OK" to safely remove the drive from your Mac.
The Bottom Line
Therefore, you can see that it is very simple to format USB to NTFS on Mac and Windows.If you're a Mac user looking to format a USB drive to NTFS, you might encounter limitations as macOS does not natively support NTFS write access. In such cases, you can consider using Kingshier NTFS for Mac. This software not only provide a free trial for every users to experience all the features but also can protect your data security and integrity when writing on Mac.
You May Also Like
1. How to Write NTFS Drives on M1 Mac[Totally Free]
2. 2023 Top 3 NTFS for Mac Software Free Download
3. How to Delete Files from NTFS on Mac[2023 New Guide]


