How to Record Video on Mac [3 Methods]
- Support
- Dynamic News
- Kate
682
- 2024-02-01 19:59:55
Are you ready to capture moments and create stunning videos on your Mac? Recording videos on a Mac can be a valuable skill for a variety of purposes, such as creating engaging tutorials to share your expertise, capturing unforgettable moments with family and friends, or producing high-quality content for your business or personal projects. Here, we provide some useful solutions to help you record video on Mac with some simple steps. Let’s take a look!
Part 1. How to Record Video on Mac with Kingshiper Screen Recorder
If you are seeking a screen recorder that can allow you to record any activities on Mac, you shouldn’t miss Kingshiper Screen Recorder which is a versatile and user-friendly software that help you record screen or audio with just a few clicks. It offers a seamless recording experience, enabling you to capture high-quality videos, screenshots, and audio, ensuring that you never miss a moment that matters. Whether you want to record your entire screen, a specific application or window, or even a selected area, Kingshiper Screen Recorder offers diverse recording modes to suit your needs. In addition, Kingshiper Screen Recorder also allows you to edit and export your recorded videos conveniently.
Here's how to use Kingshiper Screen Recorder on your Mac:
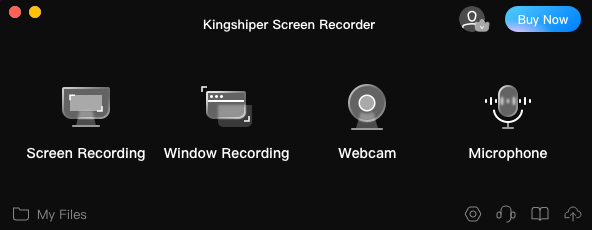
Step 1. Launch Kingshiper Screen Recorder on your Mac.

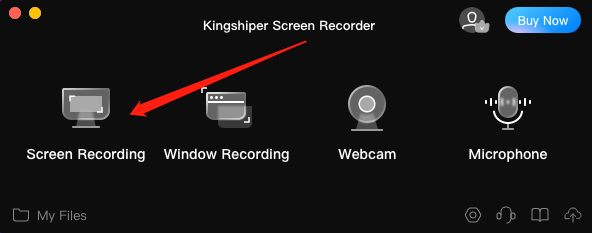
Step 2. Choose “Screen Recording” to begin your recording.

Step 3. Click on the "Record" button to start capturing your screen. You can choose to record the entire screen or select a specific area.
Step 4. Once you finish recording, click on the "Stop" button to end the recording session. And then click on “My Files” to check your recordings.
Part 2. How to Record Video on Mac with QuickTime Player
If you're looking for a simple yet effective way to record videos on your Mac, QuickTime Player is your go-to tool. It comes pre-installed with macOS, so you won't have to go through the hassle of installing any additional software. It is worth mentioning that QuickTime Player supports various file formats and offers basic editing functionalities like trimming, merging, and adding annotations to your videos.
Step 1. Open QuickTime Player from your Applications folder.
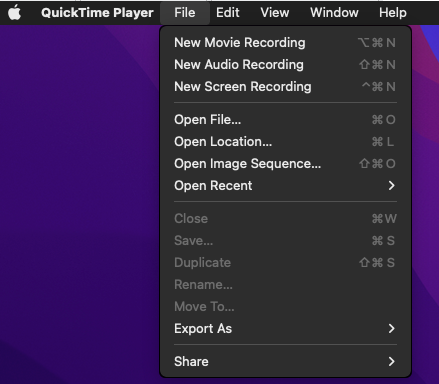
Step 2. Click on "File" in the menu bar and select "New Screen Recording".
Step 3. Click on the red record button to start capturing your screen. You can choose between recording the entire screen or a selected portion.
Note: Once you finish recording, click on the stop button in the menu bar or press Command + Control + Esc.

Part 3. How to Record Video on Mac with OBS Studio
OBS Studio, also known as Open Broadcaster Software Studio, is a popular and powerful software for live streaming and screen recording. Its flexibility and extensive features make it a valuable tool for both beginners and experienced streamers or content creators.
Here's how to use OBS Studio to record video on your Mac:
Step 1. Download OBS Studio from the official website and install it on your Mac.
Step 2. Launch OBS Studio and configure your preferred settings.
Step 3. Create a new scene and add a source. Choose between capturing your entire display or a specific window.
Step 4. Click on "Start Recording" to begin capturing video. To stop, click on "Stop Recording."
.png)
Conclusion
On this page, we have discussed 3 simple methods to record videos on a Mac, and you can pick the one that best fits your requirements. To make things easier, we highly recommend using Kingshiper Screen Recorder for Mac which can give you have the ability to capture both system sound and external audio effortlessly while recording your Mac screen.
You May Also Like
1. How to Install Virtual Soundcard on Mac
2. [4 Methods] How to Cut MP3 Files Quickly and Simply, Works Fast


