


5 Methods to Record Audio on Your Computer
- Support
- Dynamic News
- Kate
 891
891- 2024-02-01 20:08:47


Are you looking to record audio on your computer? Recording audio can be useful in various situations, whether you want to create a podcast, record a voiceover, or simply capture a memorable moment. But, sometimes it would be a challenging thing about how to record audio on your computer. Fortunately, there is a wide range of tools available that simplify the process and allow you to record high-quality audio directly on your computer. On this page, no matter why you're recording, the following instructions will provide a complete overview of recording and editing sound files on both Mac and Windows.
Page Content:
1. Part 1. Record Audio with Kingshiper Voice Recorder----Most Recommended
2. Part 2. Record Audio with Kingshiper Screen Recorder for Mac
3. Part 3. Record Audio with Audacity
4. Part 4. Record Audio with Windows Built-in Tool
5. Part 5. Record Audio with an Online Tool
Part 1. Record Audio with Kingshiper Voice Recorder----Most Recommended
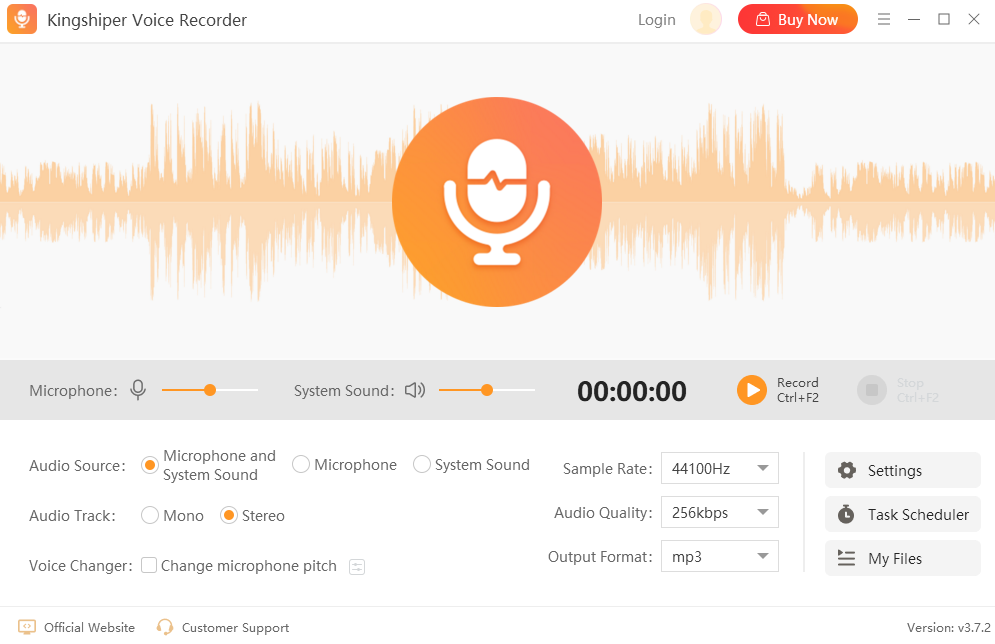
Kingshiper Voice Recorder is a reliable and user-friendly software that allows you to record audio on your computer effortlessly. With its simple interface, you can start recording with just a few clicks. The software offers various features like customizable audio settings, pause/resume recording, and the ability to save recordings in different formats. Moreover, if you have the need for scheduled recording, this tool also can meet your needs. With its scheduling feature, you can set specific dates and times for recording to start automatically.
Here are some key features of Kingshiper Voice Recorder:
1. Allows you to record system sound, microphone sound, and both.
3. Enables you to change your audio pitch when recording.
4. Provides sound check before recording.
5. Provides Task Scheduler to set periodic scheduled tasks.
6. Supports microphone boost and microphone noise reduction.
If the above features can fully meet your needs, please click the below button to use it now.

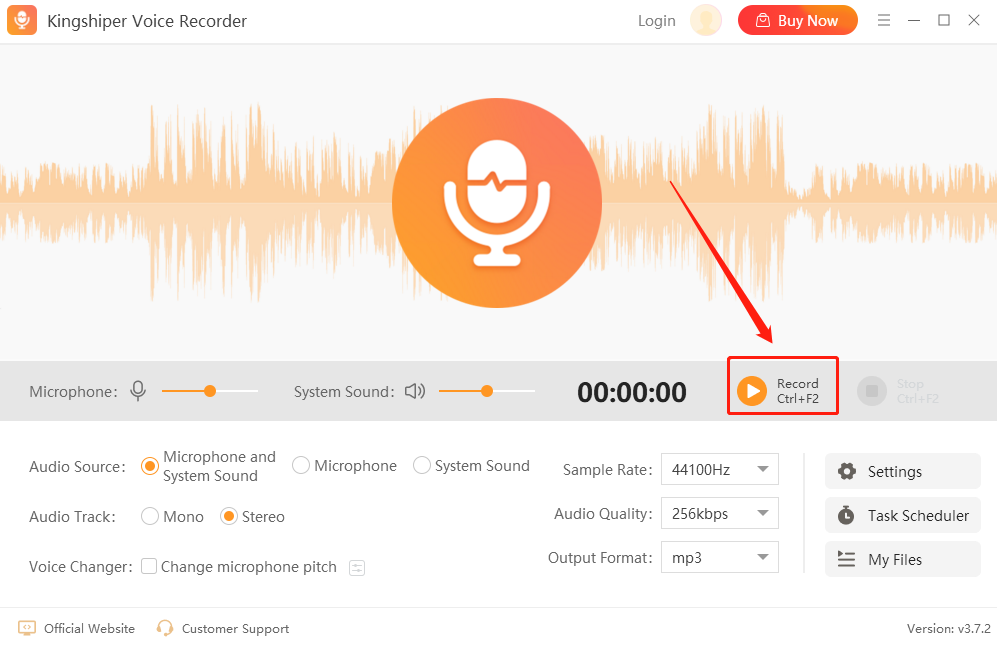
Step 1. Launch Kingshiper Voice Recorder and choose the sound that you need to record.
Step 2. Click “Record” to start the recording.
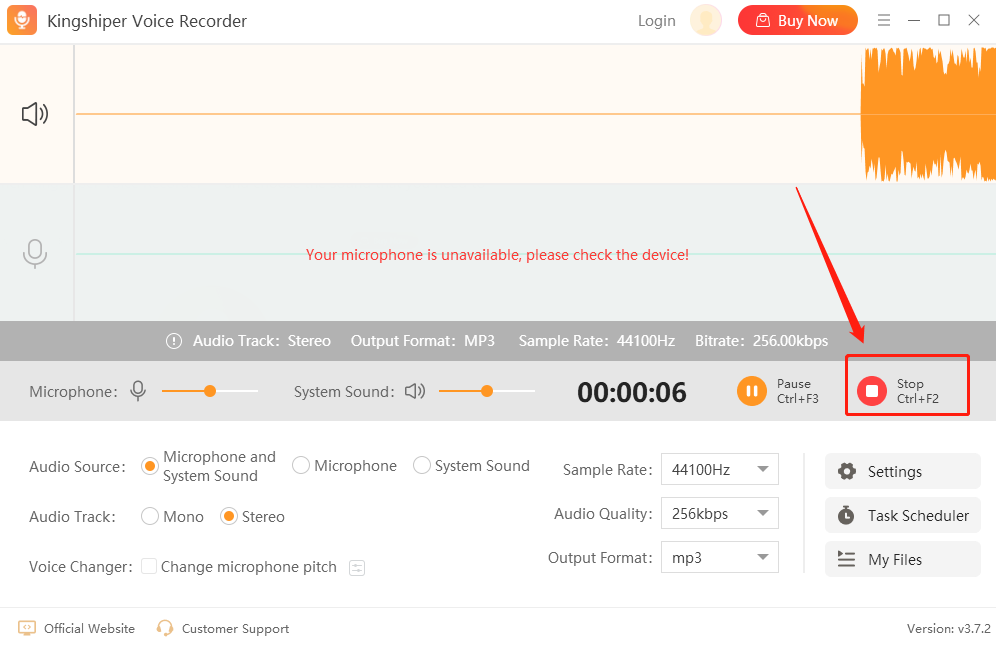
Step 3. If you’ve finished, click “Stop”.
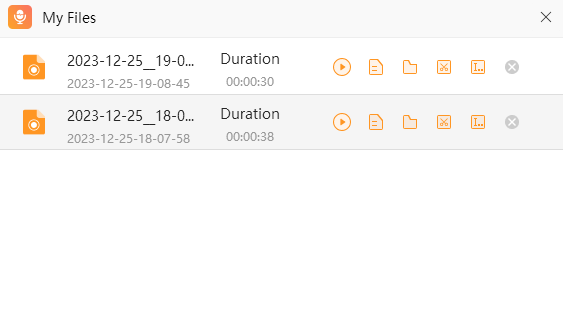
Step 4. Then, your recording will automatically saved on your computer. Here, you can rename, edit sound, and edit ID3 Tag according to your needs.
Part 2. Record Audio with Kingshiper Screen Recorder for Mac
If you are a Mac user and want to record audio along with your screen activity, Kingshiper Screen Recorder for Mac is an excellent solution. This software not only lets you capture your screen but also enables you to record system audio and external microphone input simultaneously. Whether you're creating tutorials, gaming videos, or presentations, Kingshiper Screen Recorder for Mac offers a seamless recording experience with high-quality audio.

Step 1. Launch Kingshiper Screen Recorder for Mac and choose screen recording.

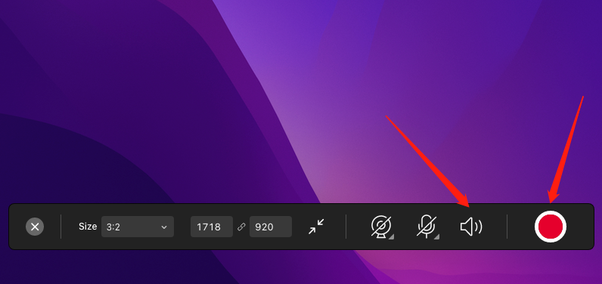
Step 2. Press ”Sound” to record the system audio, and then click “Start Recording”.
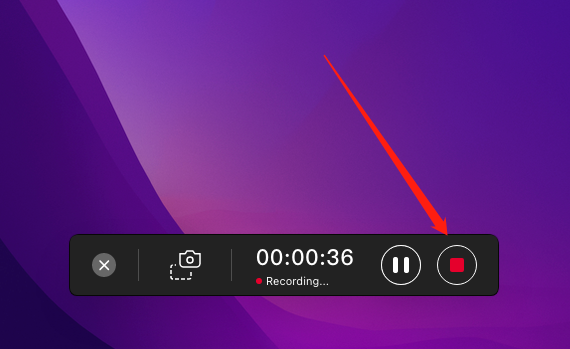
Step 3. When you’ve finished recording, click on “Stop Recording”.
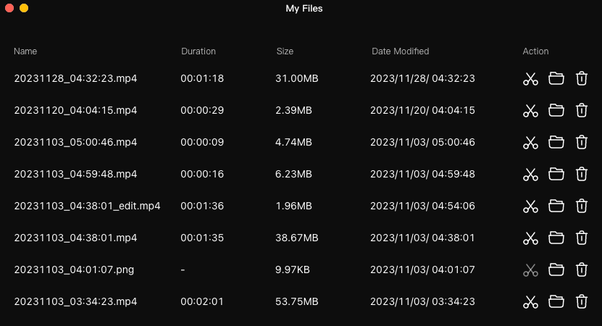
Step 4. Click “My Files” to check your recording. Here you also can make further edits on your recording by clicking “Edit” through Action.
Part 3. Record Audio with Audacity
Audacity is well-known as a free and open-source software. It offers an extensive range of features, flexibility, and simplicity, making it a favorite tool among both professionals and casual users. It allows you to capture high-quality audio directly from your microphone, line-in, or other external system sound. The real-time input level monitoring ensures optimal recording levels, and you can pause, resume, or stop the recording with ease.
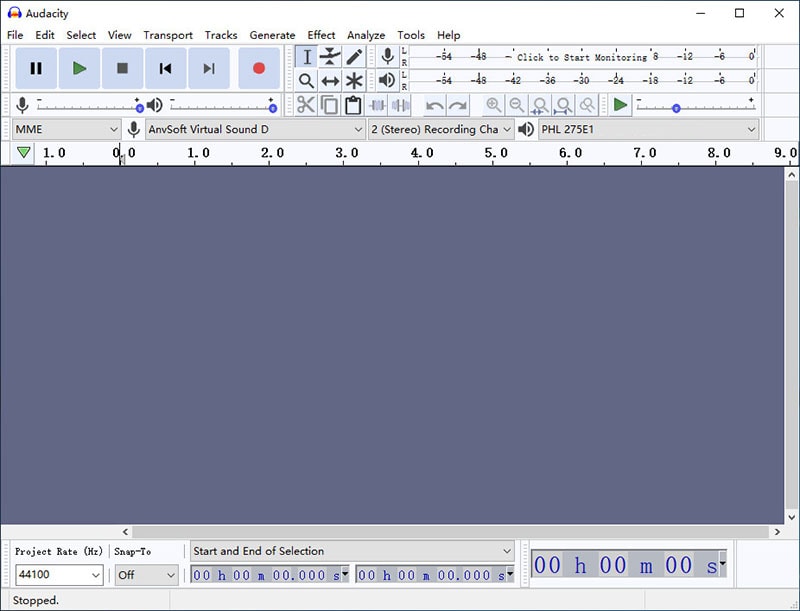
Step 1. Open Audacity and simply click the first dropdown menu and choose "Windows WASAPI".
Step 2. Then, click the dropdown menu next to the microphone icon and choose your computer's speakers.
Step 3. Click “Record” to start recording the audio from your system.
Step 4. Click "File" > "Export", and choose "Export as MP3” to save your recording.
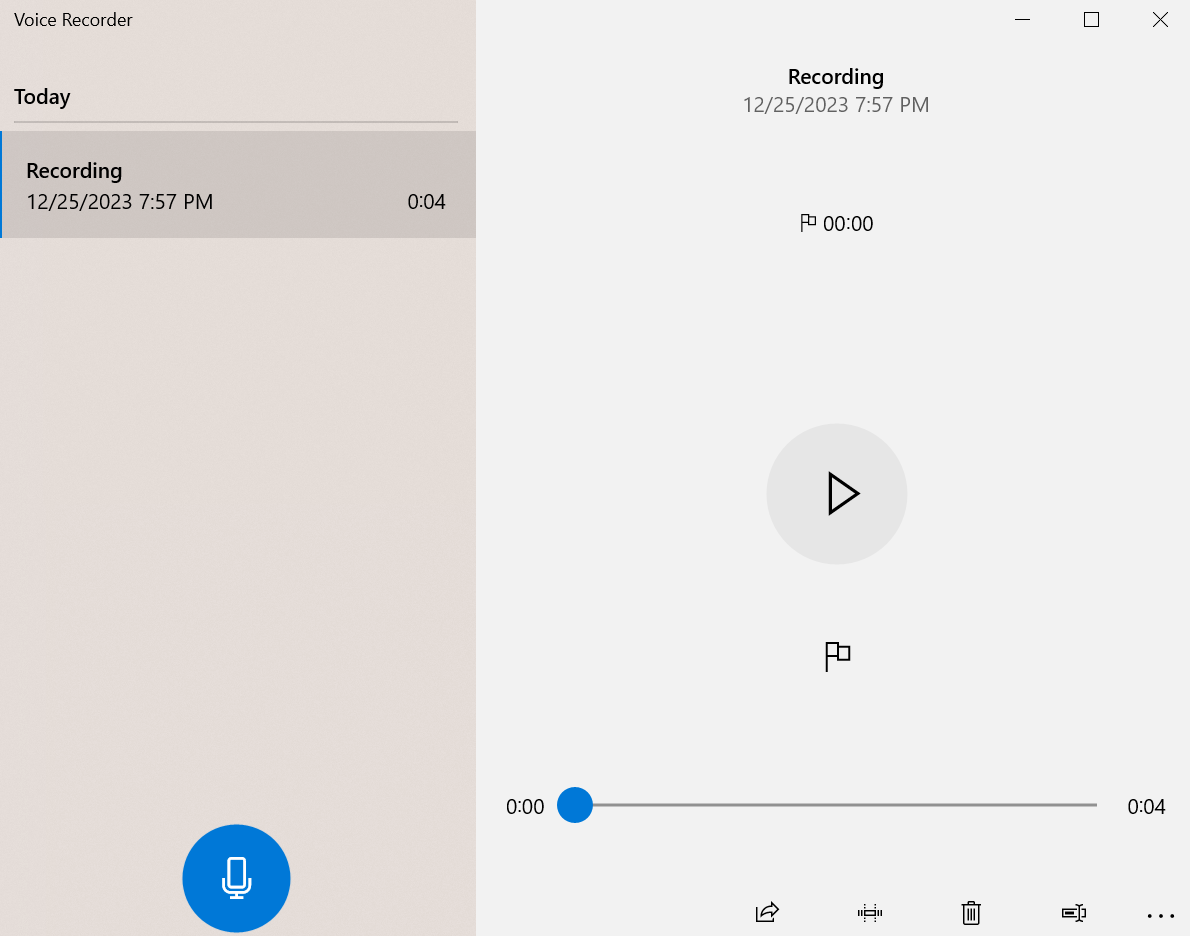
Part 4. Record Audio with Windows Built-in Tool
Voice Recorder is a handy built-in app on your Windows device that lets you capture audio recordings with simplicity and ease. It offers a straightforward user interface, making it accessible to users of all levels of experience. You'll find features such as one-click recording, pause and resume functionality, and easy playback options to review and listen to your recordings.
Step 1. Find the “Voice Recorder” app on your computer.
Step 2. Click “Record” to start your recording.
Step 3. If you’ve finished, click “Stop recording”. And your recording will automatically saved on your computer.
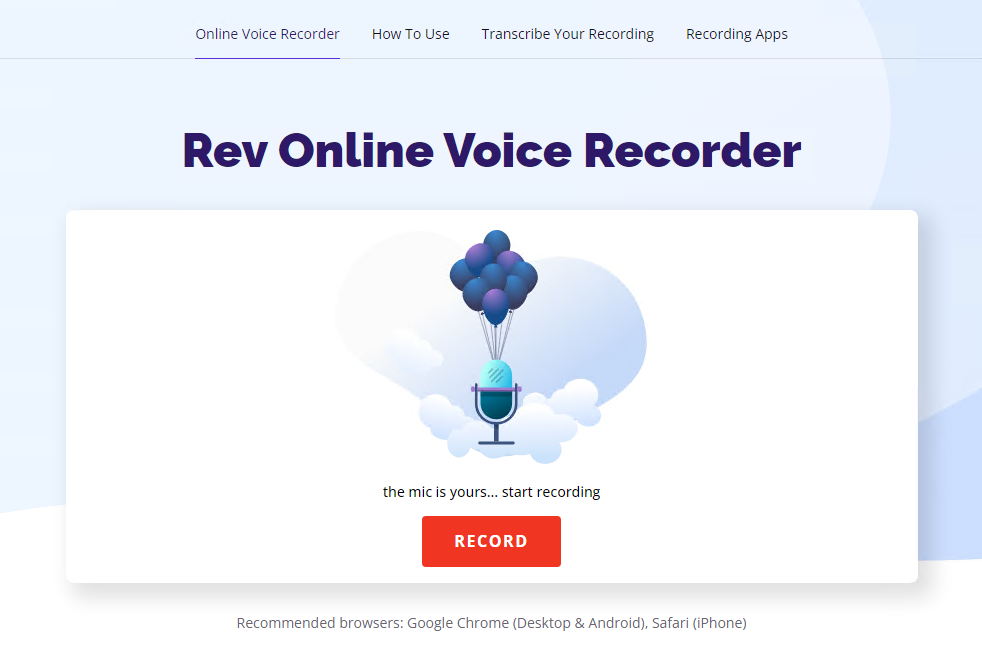
Part 5. Record Audio with an Online Tool
If you don't want to bother with installing any third-party software, you can try using online tools for a more convenient solution. An excellent online tool for audio recording is Rev Online Voice Recorder. With this tool, you can record audio directly from your computer's microphone without the need for any downloads or installations. Simply visit the website, grant microphone access, and start recording. Once finished, you can easily save or download the recorded audio file.
Step 1. Open your browser and visit the Rev Online Voice Recorder website.
Step 2. Click “RECORD” and it will start to record your microphone sound.
Step 3. If you’ve finished, click “PAUSE” to stop recording.
Step 4. Click “PREVIEW” and then click “download” to save the file on your computer.
The Bottom Line
Do you want to record audio on your Windows or Mac? This step-by-step guide has got you covered! You can now choose the method that suits you best to capture high-quality audio on your preferred device. While there are various programs like Kingshiper Screen Recorder, Audacity, Windows Voice Recorder, and online tools available, the top recommendation for user-friendliness and advanced features is Kingshiper Voice Recorder. Give it a try and record your voice now!
You May Also Like
1. Top 3 Methods to Screen Record on Mac with Audio


