


How to Screen Record YouTube Videos on Mac[5 Useful Ways]
- Support
- Dynamic News
- Kate
 639
639- 2024-02-01 19:52:33


Are you looking to capture and save your favorite YouTube videos on your Mac? Screen recording is an excellent solution, allowing you to create personalized copies of videos for various purposes. Whether you're a content creator aiming to enhance your editing skills, an educator seeking to create educational resources, or an avid fan wanting to save those precious moments, selecting the right screen recording software is crucial.
With the large quantities of options available, it's essential to find the perfect fit for your needs. Here we're glad to share the top 5 screen recording tools and show you step-by-step guides to screen record YouTube videos on your Mac. Now, let's explore them together!
Page Content:
1. Method 1. Use Kingshiper Screen Recorder to record YouTube Videos - Quick and Reliable
2. Method 2. Use QuickTime Player to record YouTube Videos
3. Method 3. Use EaseUS RecExperts to Record YouTube Videos
4. Method 4. Use OBS Studio to Record YouTube Videos
5. Method 5. Use Loom to Record YouTube Videos
Method 1. Use Kingshiper Screen Recorder to record YouTube Videos - Quick and Reliable
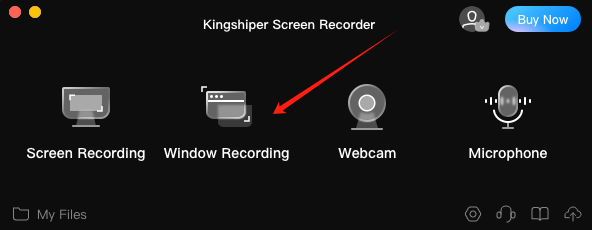
Kingshiper Screen Recorder is a powerful third-party software that offers 4 recording modes that you can record your YouTube videos in seconds, including Screen Recording, Windows Recording, Microphone, and Webcam. It boasts a user-friendly interface and a wide range of features that make the recording process simple. Moreover, it provides various customization options, enabling you to adjust the recording area, frame rates, and audio settings according to your preferences. These features will let you enhance and personalize your YouTube video recordings effectively.

To begin using Kingshiper Screen Recorder, follow these steps:
Step 1. Launch Kingshiper Screen Recorder on your Mac and click on the “Window Recording” button.
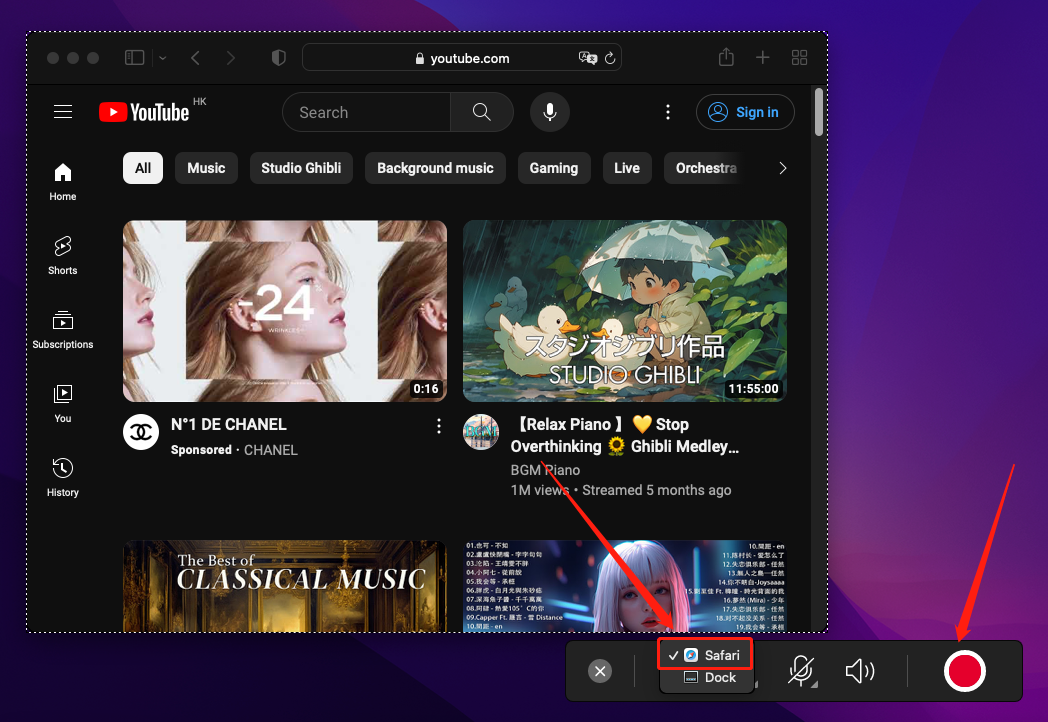
Step 2. If you open YouTube from a browser. You can select "Safari" or any other browser you use and it will automatically locate the window, then click "Start" to begin recording.
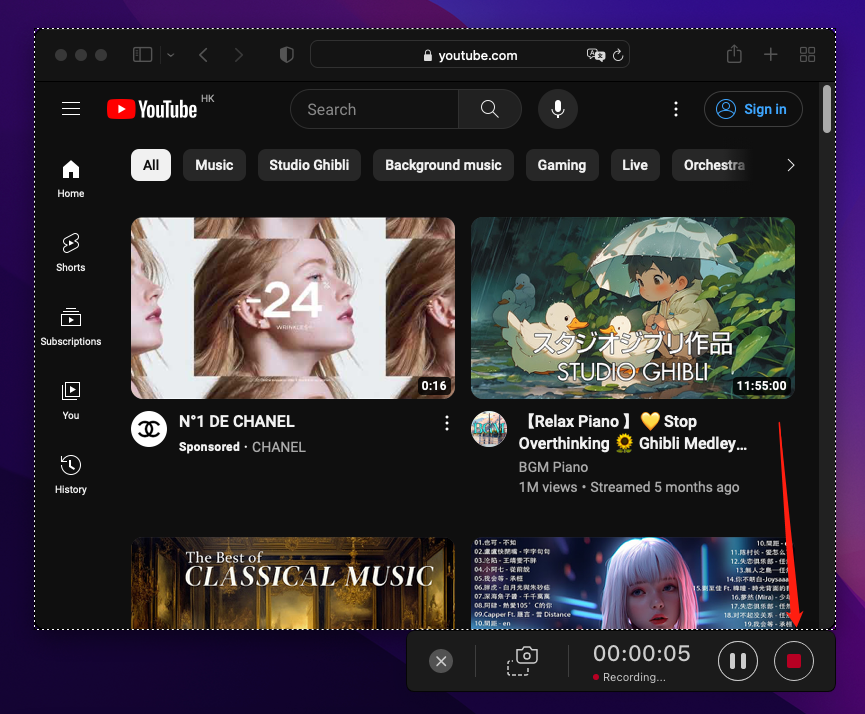
Step 3. When you've finished recording your YouTube video, click “Stop” to end your recording.
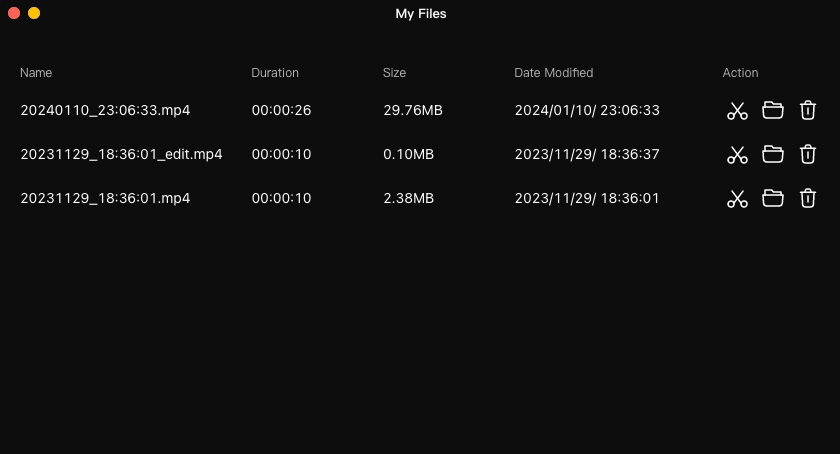
Step 4. Click “My Files” to check your recordings. Here, you can edit and trim your video.
Method 2. Use QuickTime Player to record YouTube Videos
QuickTime Player, a built-in application on your Mac, provides a straightforward method to screen-record YouTube videos. With the help of QuickTime Player, you can directly record YouTube videos with just a few basic steps. Its user-friendly interface ensures an accessible experience for users, enabling them to record their favorite YouTube videos without any unnecessary complications or technical barriers. Let's see how to get started:
Step 1. Launch QuickTime Player on your Mac.
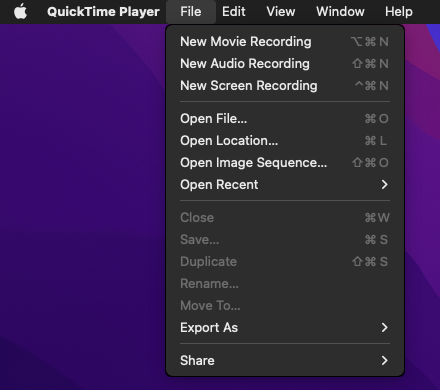
Step 2. Go to "File" and choose "New Screen Recording". Now, you can customize your recording area.
Step 3. After setup, click the "Record" button to start capturing.
Step 4. When you want to finish, click the "Stop" button or press the "Command-Control-Esc" keyboard combination to end your recording.
Method 3. Use EaseUS RecExperts to Record YouTube Videos
EaseUS RecExperts is another third-party software that is designed to simplify the process of screen recording, allowing users of all levels of experience to effortlessly capture their screens. Moreover, it provides a built-in video editor that allows you to make quick edits. You can trim, merge, crop, or add effects to your videos before sharing them with your friends. Its simplicity, versatility, and efficiency make it suitable for a wide range of users, from individual content creators to educators and businesses.
Step 1. Open EaseUS RecExperts and choose the "Full Screen" or "Region" recording modes as you need.
Step 2. Click on the “REC” button to start your recording.
Step 3. When you've finished, click "Stop" and it will pop up a window. You can check your file here.

Method 4. Use OBS Studio to Record YouTube Videos
For those seeking more advanced features and customization options, OBS Studio is a fantastic choice. This free and open-source software is widely used for live streaming and screen recording purposes. It also provides a comprehensive suite of audio and video customization options. You can adjust audio levels, remove background noise, add filters and effects, and even mix multiple audio sources. But if you’re a novice, might find the abundance of options and settings in OBS Studio a bit overwhelming at first. Don’t worry, let’s learn how to use it to record your computer below:
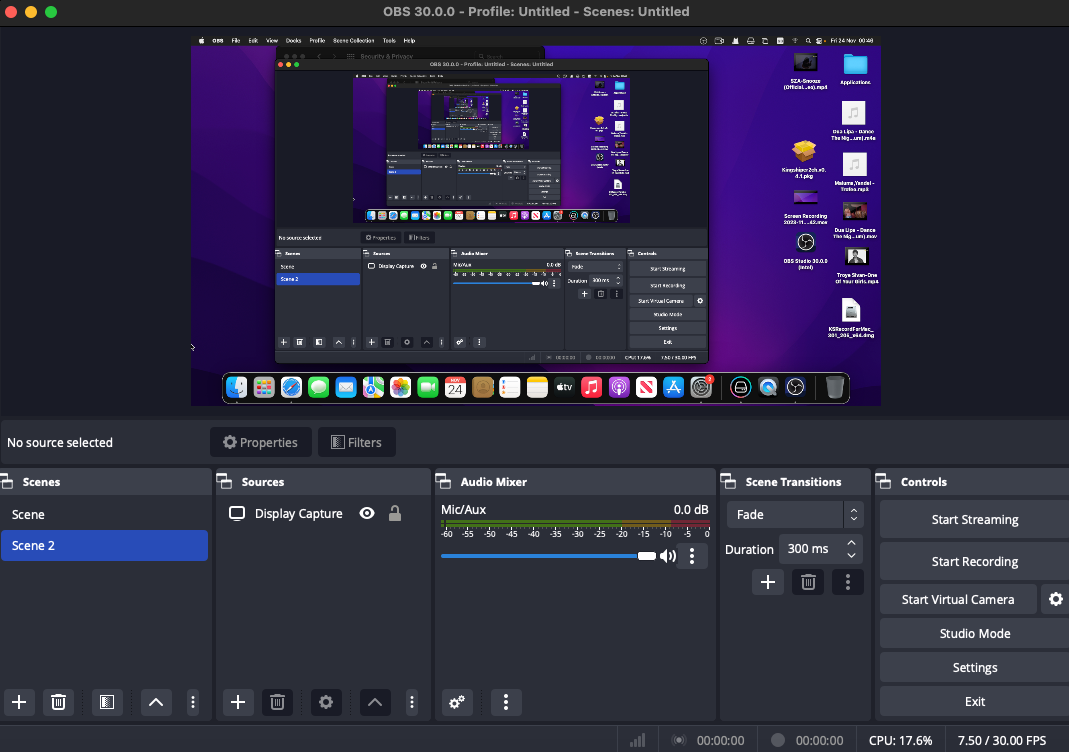
Step 1. Launch OBS Studio and click the "+" icon in the "Sources" box.
Step 2. Select "Display Capture" from the options list and click "OK".
Step 3. Go to "Settings" > "Output", and select "Recording Path" to determine the location where to place the file.
Step 4. Click “Start Recording” to begin. And then, if you’ve finished, click on the "Stop Recording" button to save your file.
Method 5. Use Loom to Record YouTube Videos
If you prefer to use an online tool to record YouTube videos, a great option to consider is Loom. It is a popular cloud-based screen and video recording tool that allows you to capture your screen, webcam, and microphone effortlessly. It offers a simple and user-friendly interface, making it an ideal solution for recording YouTube videos online. In addition, once you finish recording, you can choose to instantly generate a shareable link. Then, you can then share this link with your YouTube audience or collaborators to view and access your videos.
Here is how to use Loom to record YouTube videos:
Step 1. Go to Loom website and sign up for your account.
Step 2. Install its extension and click on it from your browser’s toolbar.
Step 3. Choose “Screen and Camera”, and click "Start Recording"
Step 4. When you've finished, click "Finish Recording". Then, it will process and save your recording.

The Bottom Line
This post provides the best 5 screen recorders to assist you in recording your YouTube videos on Mac. Now, you will find that a screen record application is an easy thing if you try an effective screen recording tool like Kingshiper Screen Recorder. Not only does it allow you to locate the YouTube window automatically, but also you can edit, trim, and share your recordings with your friends. With the simple interface, you can find the option easily. Now, download and install this video recording software! Choose the mode you need and start recording!
You May Also Like
1. Top 3 Methods to Screen Record on Mac with Audio


