How to Adjust Image Size for Best Compression Quality?
- Support
- Software Tutorials
- Alice
885
- 2024-09-05 09:38:03
Kingshiper JPG to PDF Converter provides flexible options when compressing images, particularly to deal with image file size. If you have specific file size requirements, the "Compress by ratio" and "Fixed pixel" feature are what to meet your needs.
This article, we will guide you how to use these two features for better compression experience.
How to use Compress by ratio?
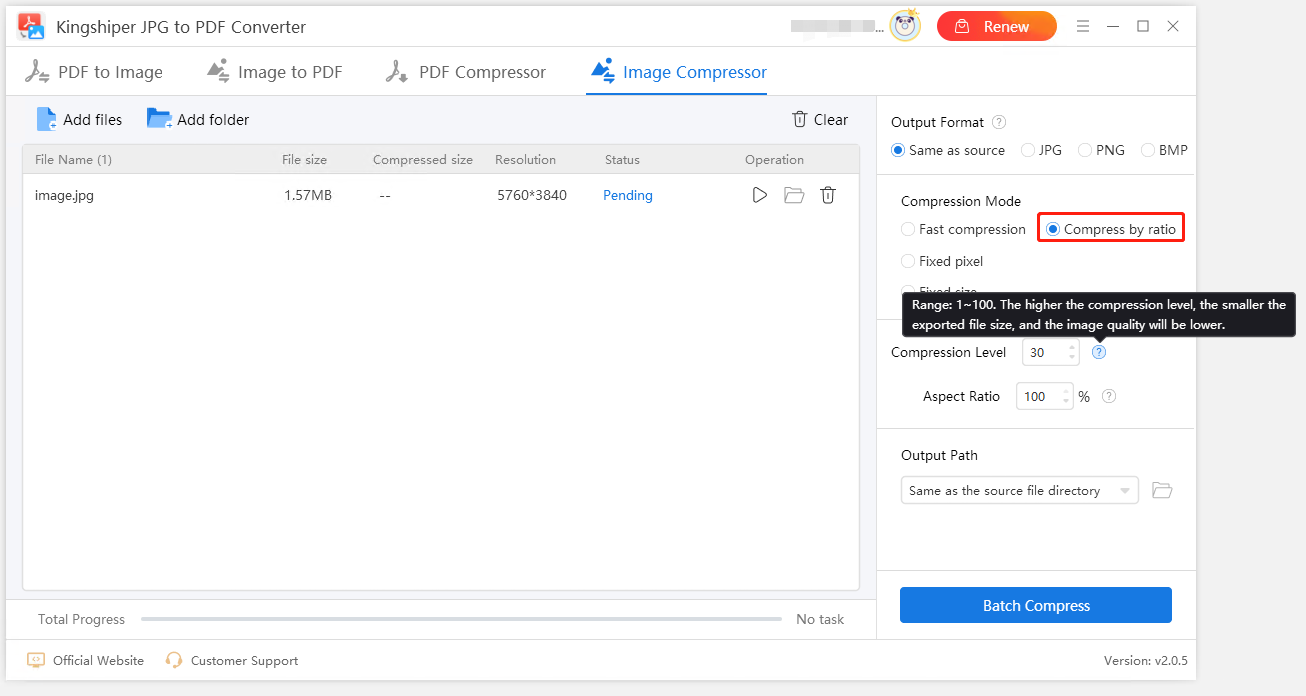
After adding an image, select "Compress by radio" in Compress Mode. Next, set values for "Compression Level" and "Aspect Ratio."
Explanation:
Compression Level - The strength of compression; The bigger number means the stronger compression, the smaller file size, and the lower picture quality.
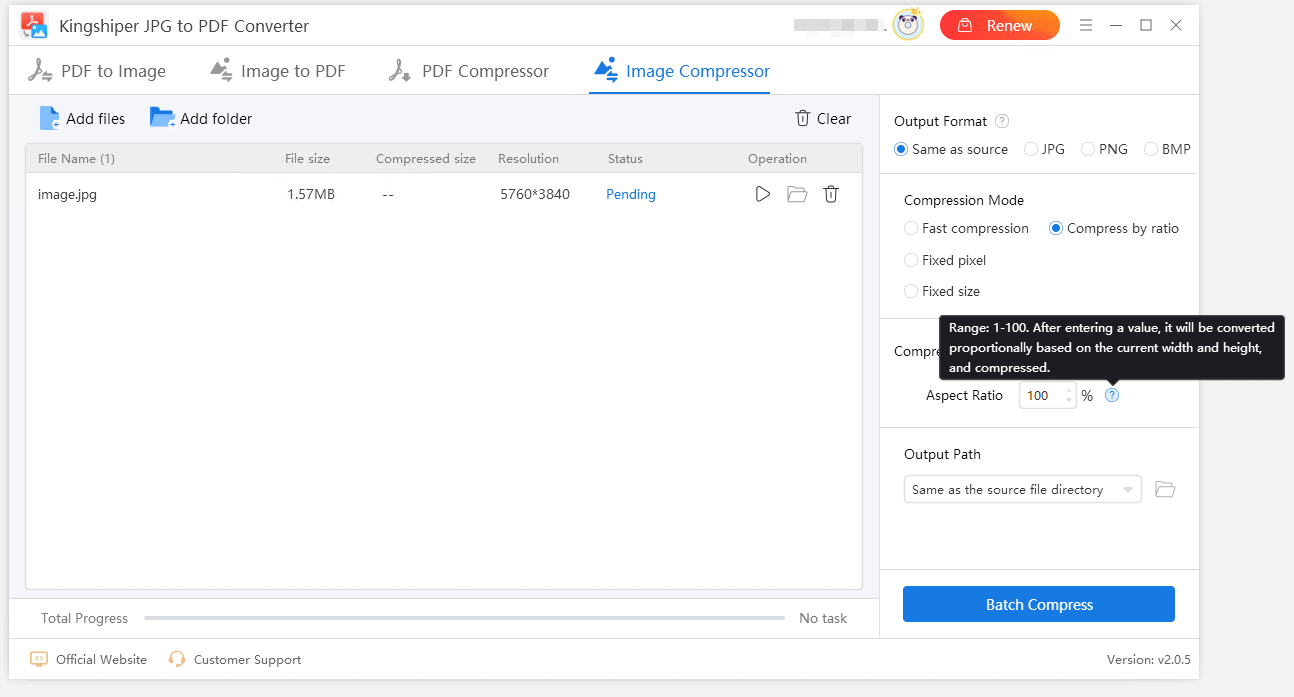
Aspect Ratio - Adjust the resolution ratio by percentage; The entered number will be use to adjust image width and height. e.g. If you enter 50%, the original image which is 200 W x 200 H will be compressed as 100 W x 100 H.
Step 1. Set an appropriate compression strength ranging from 1 to 100.
We will use a test image (1000w x 500h, 107.7kb) to show the effect. When you set 50 as the compression level, the file size will be 33.5kb after compressed. It’s reduced by 69% approximately.
Step 2. Set a proportion between 1 to 100.
Use the same test image in this part. When you set 50 as the aspect ratio, the image will be adjusted as 500w x 250h after output. And the file size will be reduced as well.

Tips:
Please noted that the size of the file and the width and height, is closely related to its definition. If you want to have a high-quality compressed picture, then you should not set a high Compress Level and small Aspect Ratio. Otherwise, you will get a small file.
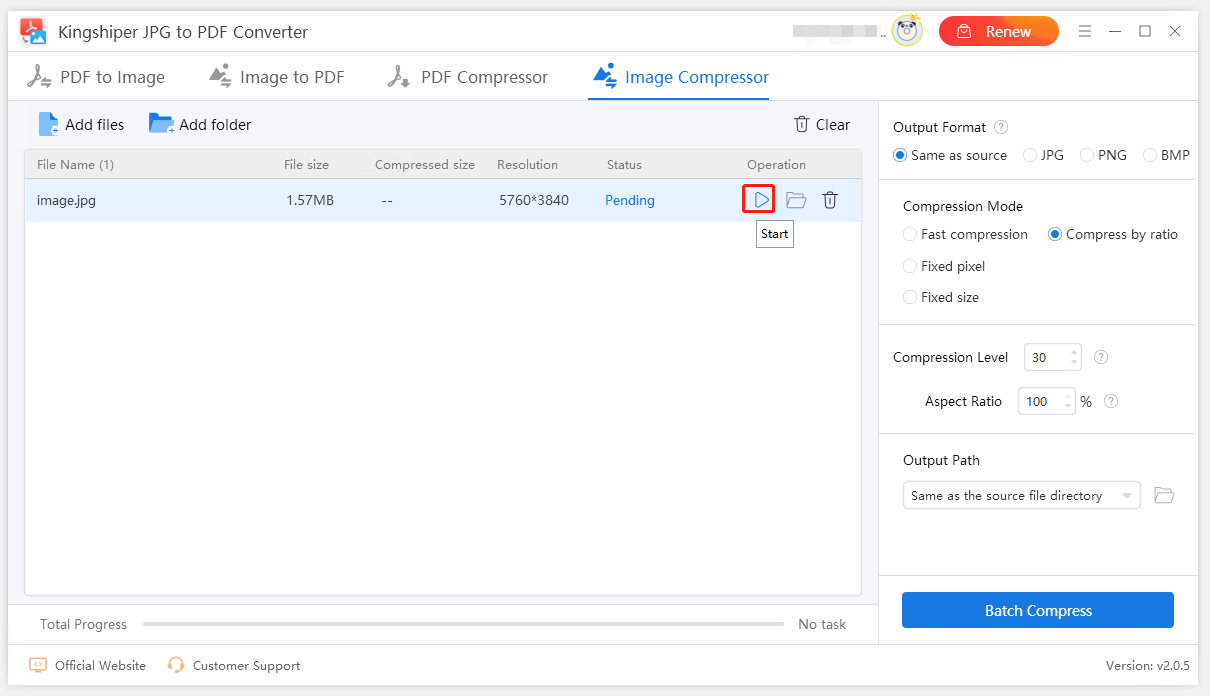
Step 3. Click "Start" to compress.

How to use Fixed Pixel?
The pixel ("picture element") is the unit of a digital image to illustrate dimensions (usually refers to width and height). More pixels mean larger dimensions, a larger file size, and a clearer image.
When it comes to the compression, you need to set the width and height pixels smaller than the original image so to reduce file size.
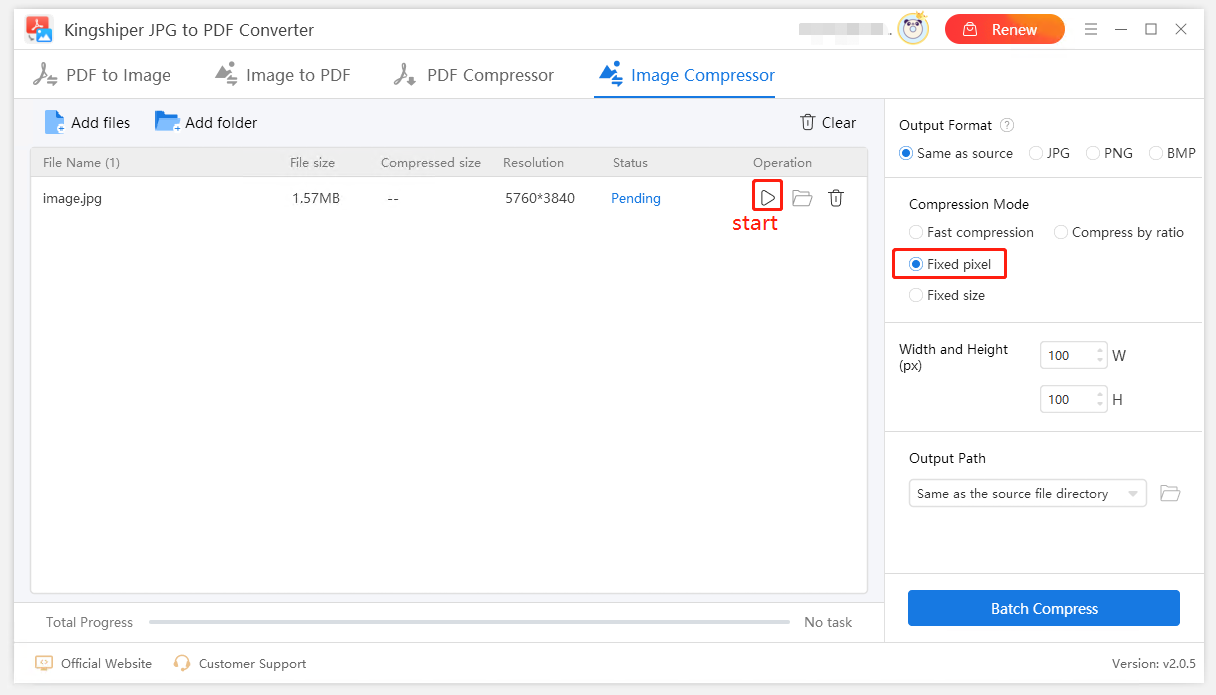
In the interface, you're allowed to set up a sepific number for the image width and height.
Step 1. Check the resolution of the original image after added.
Step 2. Type numbers in "W" (width) and "H" (height).
For example, the original image is 1000px width. To reduce it, you can set it as 100. Same in height.
Step 3. Compress the image.

If you have any questions, please feel free to tell us at [email protected]


