


How to Compress Image to a Specific Size without Losing Quality
- Support
- Software Tutorials
- Kate
 1786
1786- 2024-09-28 11:28:36


Managing image file sizes while keeping quality is important, especially true for professionals in design, photography, and online content creation. Kingshiper File Manager provides an easy way to compress images. It helps users reduce file sizes without losing quality. Here's how you can compress images to a specific size using this helpful tool.
How to Compress Image Files with No Quality Loss?
Kingshiper File Manager provides 4 compression modes to compress your image files in seconds, including Fast compression, Compress by ratio, Fixed pixel, and Fixed size. Below are detailed steps for each method, allowing you to choose the one that best fits your needs.
Method 1. Use "Compress by ratio" to Reduce Image Size
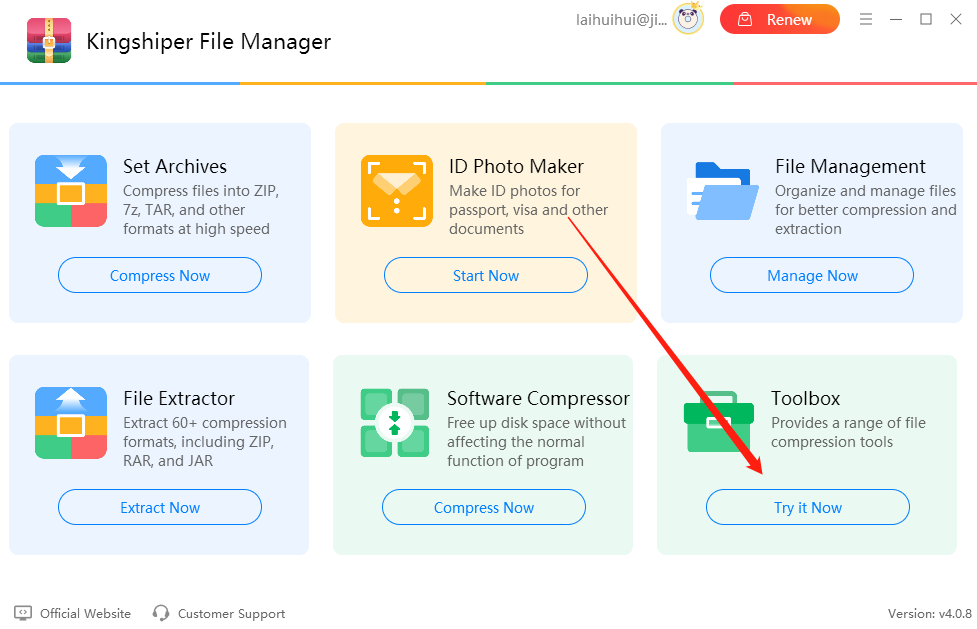
Step 1. Launch Kingshiper File Manager on your computer. Choose "Toolbox" and click on the "Try it Now" button.
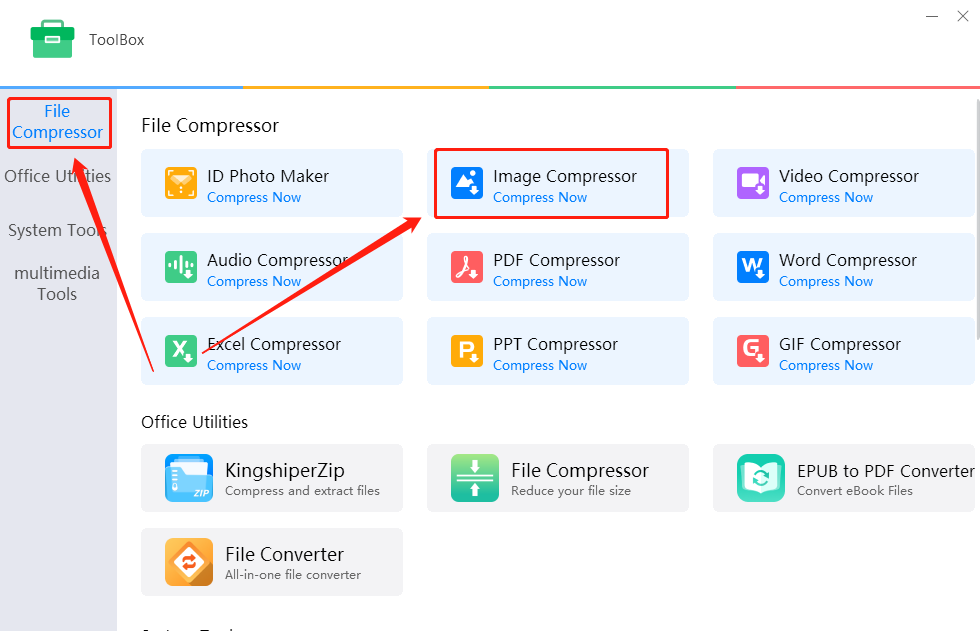
Step 2. Select "File Compressor" on the left sidebar, and click "Image Compressor".
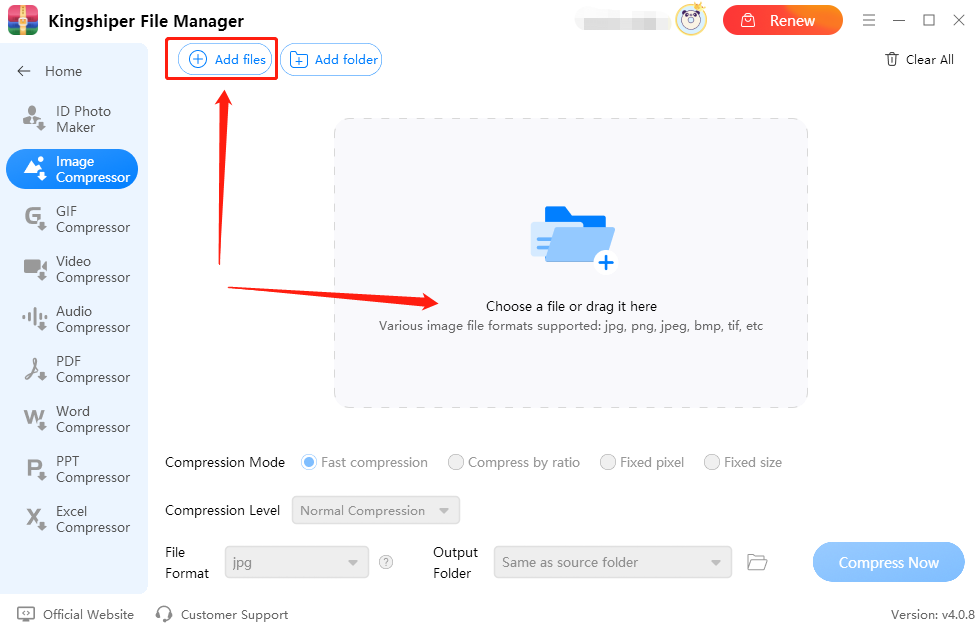
Step 3. Click "Add files" to import the image you want to reduce size or drag the file into the software interface from your computer.
Step 4. Choose "Compress by ratio" in the Compression Mode. Then, you can set the Compression Level to "100." Adjust the Aspect Ratio to be below "100."
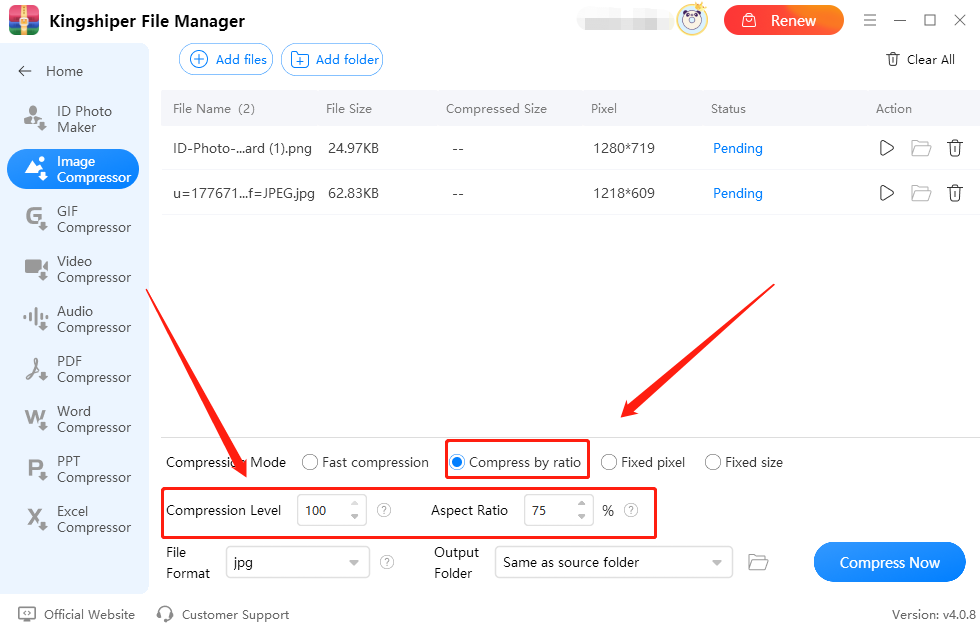
Step 5. Click "Compress Now" to start the process. Once compression is complete, you will see that the image size has significantly decreased.

Method 2. Use “Fixed pixel” to Reduce Image Size
Step 1. Launch Kingshiper File Manager on your computer. Choose "Toolbox" and click on the "Try it Now" button.
Step 2. Select "File Compressor" on the left sidebar, and click "Image Compressor".
Step 3. Click "Add files" to import the image you want to reduce size or drag the file into the software interface from your computer.
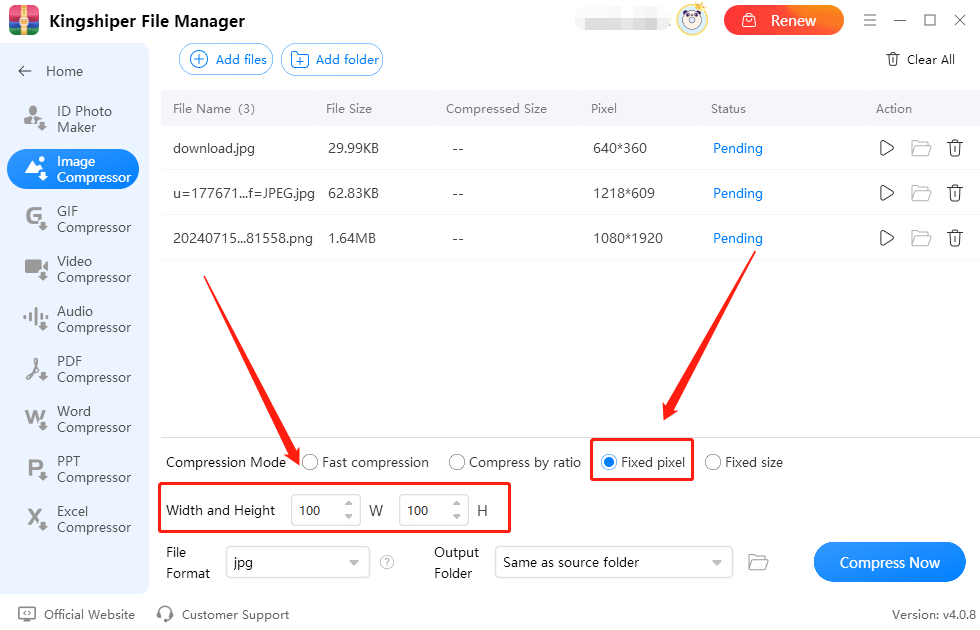
Step 4. Choose "Fixed pixel" in the Compression Mode. And then set the image width and height to be smaller than the original dimensions.
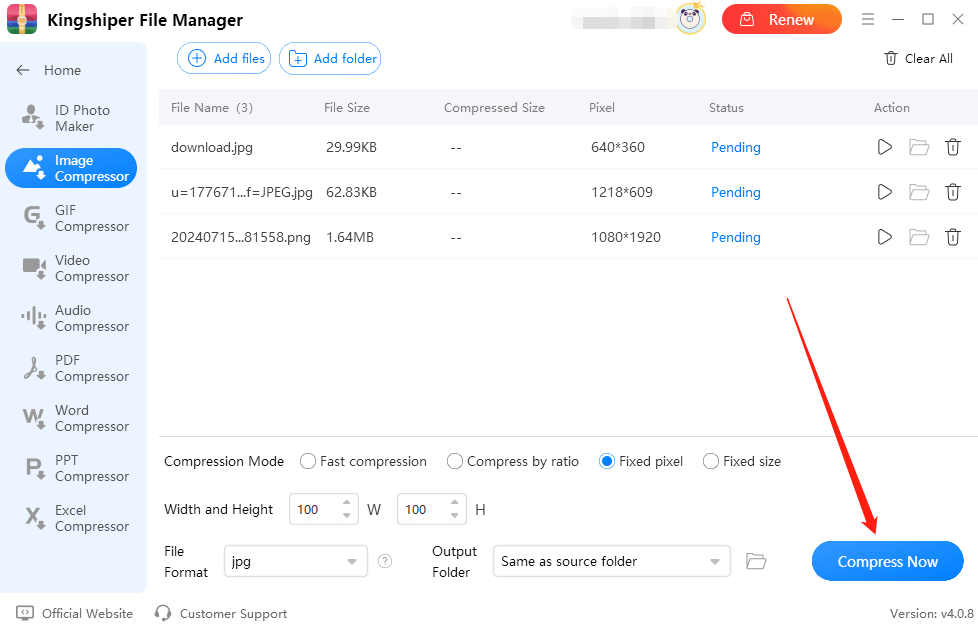
Step 5. If you've finished, click on the "Compress Now" to start the compression process.
Method 3. Use “Fixed size” to Reduce Image Size
Step 1. Launch Kingshiper File Manager on your computer. Choose "Toolbox" and click the "Try it Now" button.
Step 2. Select "File Compressor" from the left sidebar and then click on "Image Compressor."
Step 3. Click "Add files" to upload the image you want to compress or drag the file into the software interface.
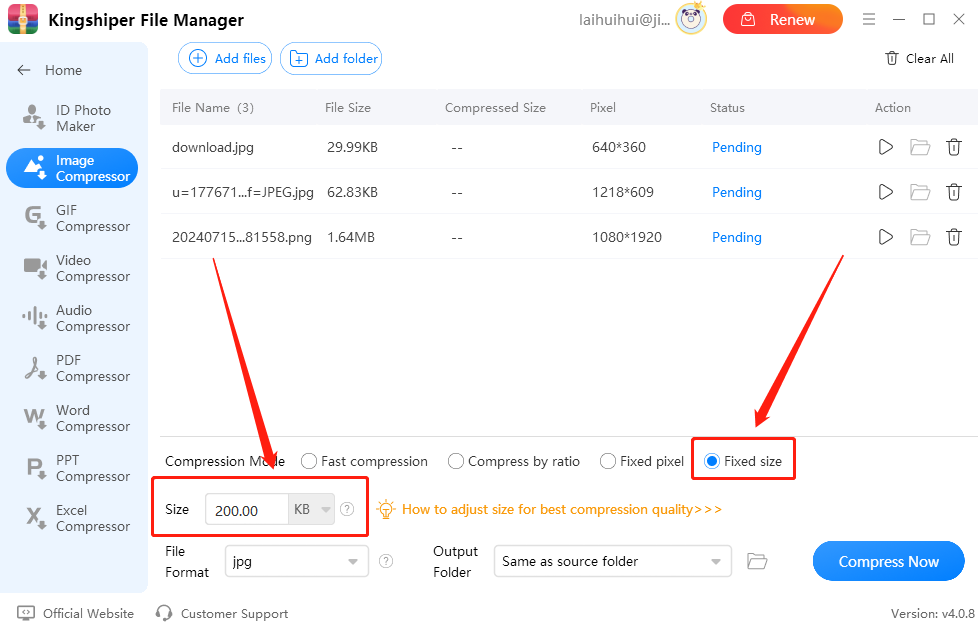
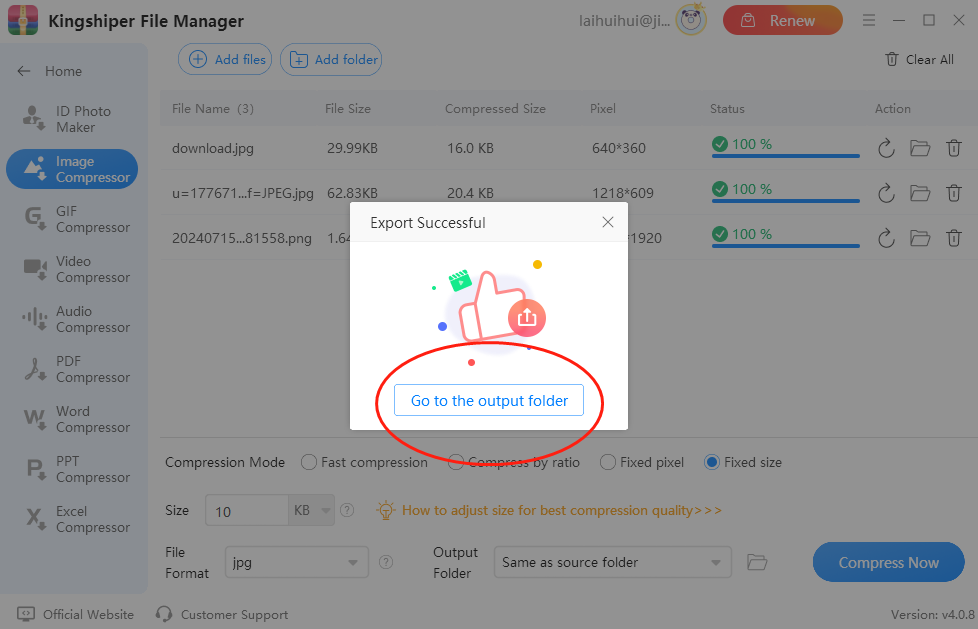
Step 4. Click on the "Fixed size" option under Compression Mode. Enter your desired size for the compressed image in the Size input box.
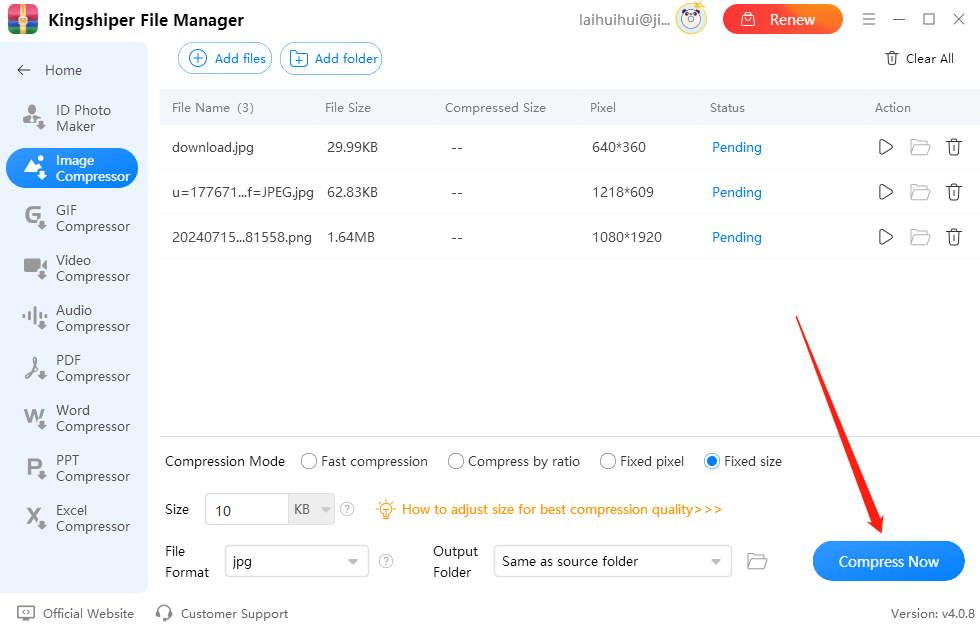
Step 5. Once you've finished the above settings, click on "Compress Now".
Step 6. Once the images are successfully compressed, click "Go to the output folder" to view them.
In conclusion, compressing images to a specific size without losing quality is important. Kingshiper File Manager makes this easy. It offers different ways to compress images quickly. You can reduce file sizes by ratio, adjust pixel dimensions, or set a fixed size. Just follow the steps mentioned above. With Kingshiper File Manager, you can keep your images looking great while saving space. For more image compression tips, please pay attention to Kingshiper Software.
You May Also Like
1. How to Adjust Image Size without Losing Quality


