


How to Use Screen Recording Tasks (Including Three Parts)
- Support
- Software Tutorials
- Kate
 1441
1441- 2025-02-25 09:51:43


Kingshiper Screen Recorder is a powerful tool for capturing high-quality screen recordings. By configuring the right parameters, you can optimize your recording process and achieve better results. In this guide, you’ll learn the key features of Kingshiper Screen Recorder, including Split Screen Recording, Auto Recording, and Scheduled Recording. Let’s get started.
Page Content:
Part 1. Split Screen Recording
Part 1. Split Screen Recording
By adopting the split screen recording, you can save recordings in segments once they reach a specified duration or file size. This feature is particularly useful when you need to upload a video to a platform that has video length restrictions.
Step 1. Launch Kingshiper Screen Recorder and click on the "Task" option in the bottom-left corner.
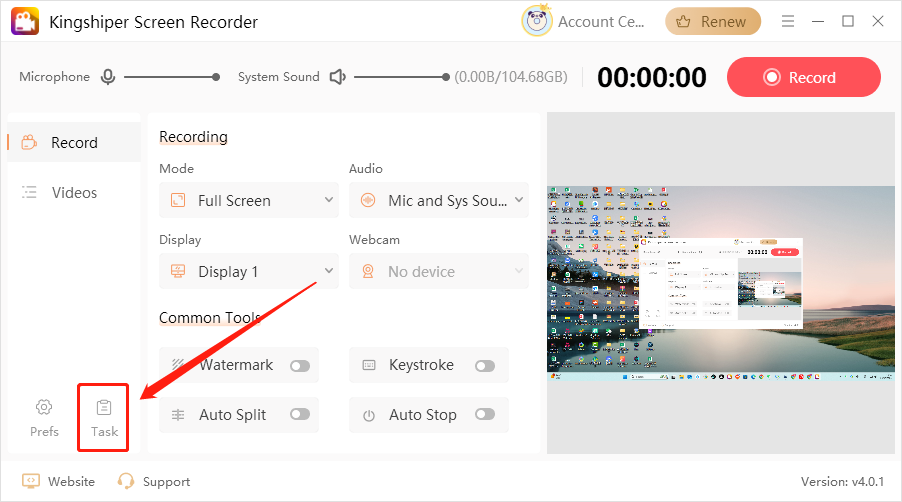
Step 2. Select "Auto Split" in the Recording Task. Check the box to enable the split recording, and select the effective option.
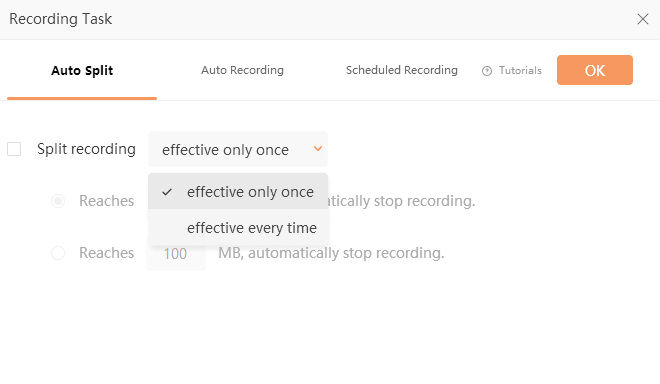
Step 3. Choose your preferred split method:
By Duration: Set a specific time interval (e.g., 5 minutes per segment).
By File Size: Define a maximum file size for each segment (e.g., 100MB).
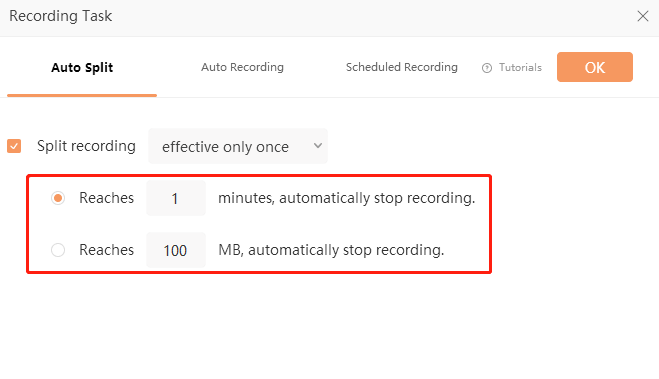
Step 4. When you’ve finished, click "OK" to confirm.
Note: File size and duration are not directly proportional. For example, a 100MB video in RMVB format may last around 30 minutes, while the same size in AVI format may only last 15 minutes. The actual duration varies based on the video format and specific encoding settings.

Part 2. Auto Recording
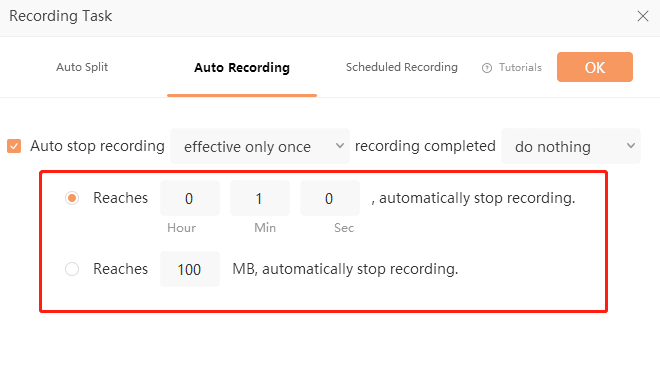
With Auto Recording, you can set a specific duration or file size for your recordings. Once the limit is reached, the software will automatically stop recording.
Steps to use auto recording in Kingshiper Screen Recorder:
Step 1. Launch Kingshiper Screen Recorder and click on the "Task" option in the bottom-left corner.
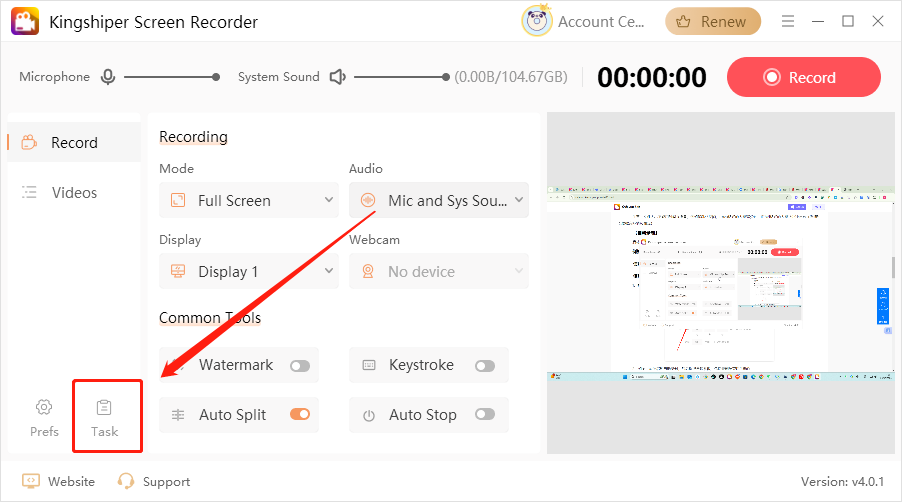
Step 2. Select the “Auto Recording” option and check the box to enable it. Please note that the Auto Split and Auto Recording cannot be used at one time.
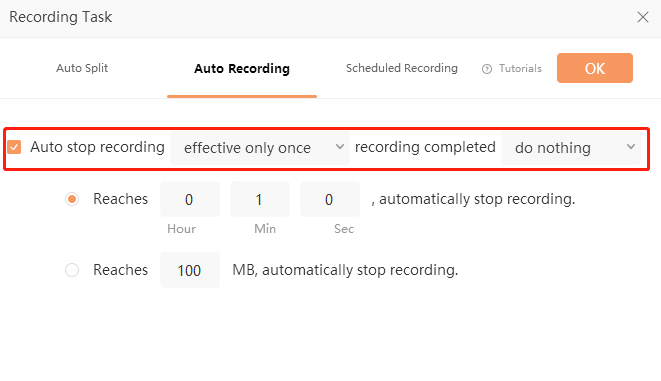
Step 3. Configure the parameters, including:
Recording Duration: Set a time limit (e.g., 30 minutes).
File Size: Define a maximum file size (e.g., 500MB).
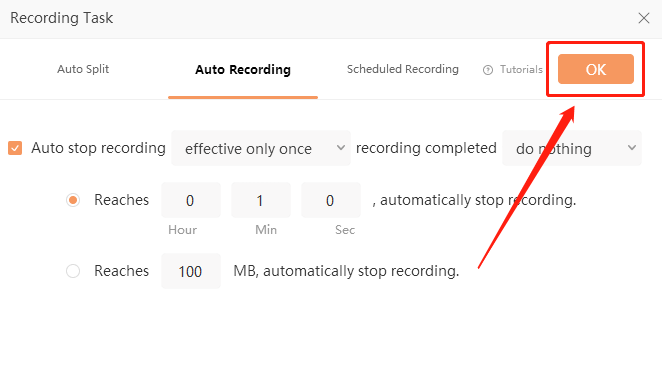
Step 4. When you’ve finished the settings, click "OK" to confirm.
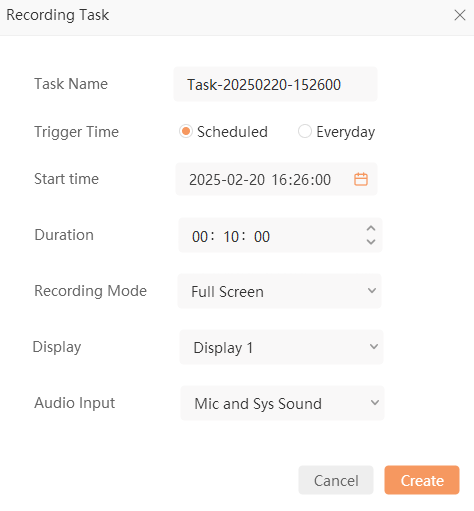
Part 3. Scheduled Recording
Scheduled Recording lets you predefine recording conditions, such as start time, end time, and duration. The software will automatically start and stop recording based on your settings.
Step 1. Launch Kingshiper Screen Recorder and click on the "Task" option in the bottom-left corner.
Step 2. Select "Scheduled Recording" and then click "Add Task".

Step 3. Set the Task Name, Trigger Time, Start time, Duration, Recording Mode, Display, and Audio Input. After that, click “Create”. However, please note that if you want to enable the scheduled task, you must ensure that Kingshiper Screen Recorder is always running in the background. This way, it will automatically start recording at the scheduled time.
Conclusion
Kingshiper Screen Recorder has useful features that make screen recording easier. It offers options like Split Screen Recording for platform rules, Auto Recording for better efficiency, and Scheduled Recording for hands-free use. With these tools, you can improve your recording process and get great results. If you want to learn more about screen recording, please pay attention to Kingshiper Software.
You May Also Be Interested In
1. How to Record Video on Mac [3 Methods]
2. Top 5 Ways to Screen Record on Mac [2024 Updated]
3. How to Screen Record YouTube Videos on Mac[5 Useful Ways]


